25 Creative Halloween Home Decoration Ideas for 2026 (Easy, Spooky & Budget-Friendly)
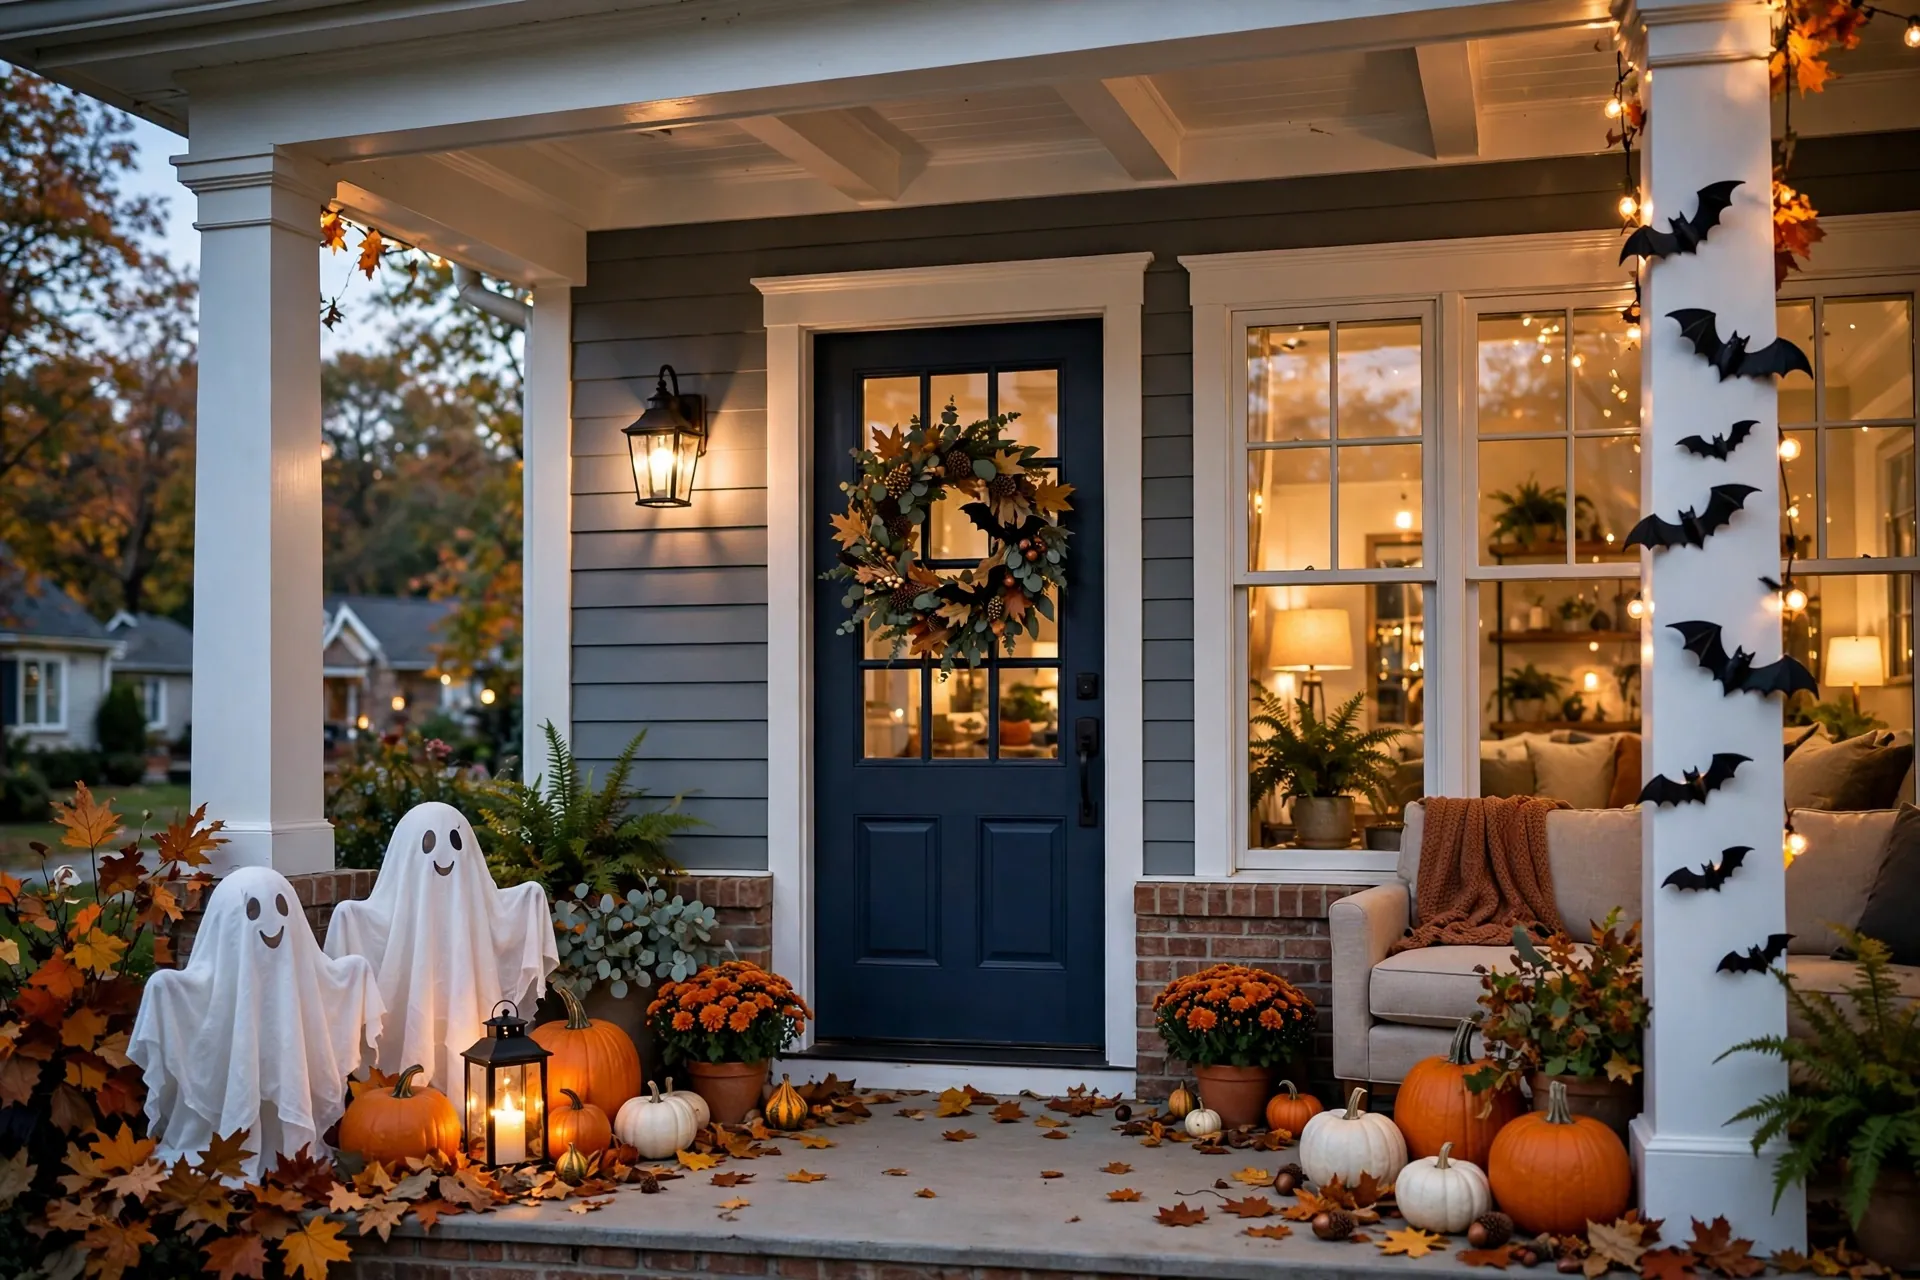
You don't need a big budget or a design degree to make your home look fantastic this Halloween. What you need is a handful of good ideas, a free weekend afternoon, and the willingness to try something a little playful. This guide collects 25 Halloween home decoration ideas that real people can actually pull off — from floating ghosts and glowing pumpkin lanterns to elegant black-and-gold mantels and renter-friendly porch displays. Every idea includes what you'll need, how long it takes, and roughly what it costs, so there are no surprises. Whether you live in a house, an apartment, or somewhere in between, you'll find indoor Halloween decorations, outdoor Halloween decorations, and plenty of Halloween decorating ideas on a budget.
Short on time? Start here
Some of the easiest Halloween home decoration ideas include floating fabric ghosts hung with transparent thread, paper bat wall arrangements, glowing pumpkin lanterns with LED lights, black-paper window silhouettes, and a simple front-door wreath. Most take under an hour, cost less than $15, and need no special tools.
Easy DIY Halloween Decorations for Every Home
1. Floating Ghosts Made From White Fabric
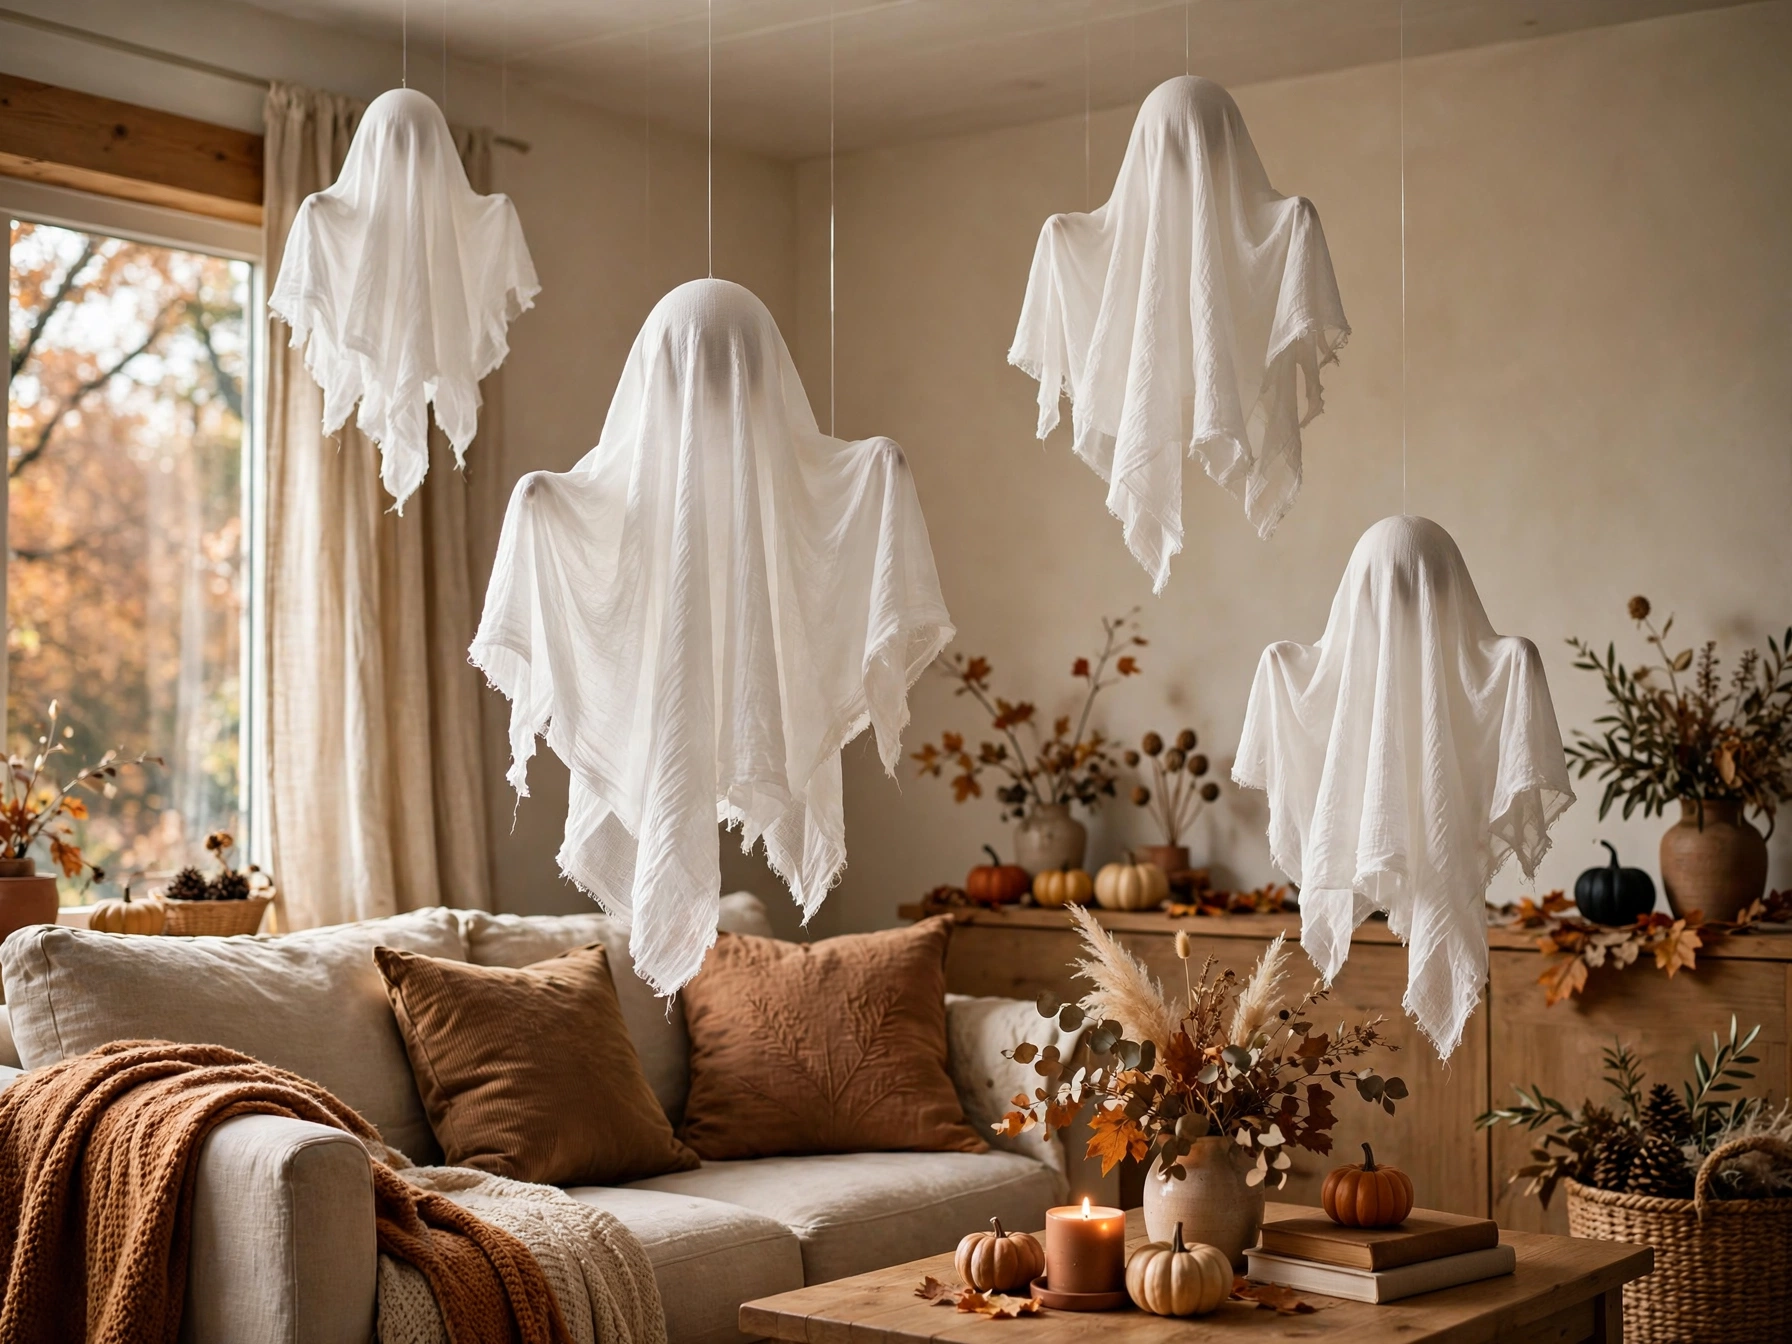
Few decorations deliver as much atmosphere for so little effort. Draped white fabric over a lightweight form — a balloon, a foam ball, even a bunched-up plastic bag — creates a ghost with natural, flowing folds that catches light beautifully. Hung at staggered heights with transparent thread, they look like they're drifting through the room.
Why it works visually: White fabric glows softly against darker walls and reads clearly from across the room. The irregular drape of real cloth beats anything printed or plastic.
Materials: White cotton fabric or old white sheets, transparent nylon thread, small foam balls or balloons, black felt for eyes (optional).
Instructions:
- Cut fabric into roughly 24-inch squares.
- Drape each square over a foam ball or inflated balloon and let it fall naturally.
- Tie transparent thread around the "neck" to hold the shape.
- Cut simple oval eyes from black felt and glue on, or leave them blank for a classic look.
- Hang from the ceiling at varying heights with transparent thread and small removable hooks.
DIY time: About 30 minutes for five ghosts.
Estimated cost: $5–$10 (fabric from a thrift store works perfectly).
Best placement: Living room ceiling corners, above a dining table, or in a hallway.
Styling tip: Hang them near a lamp so they cast soft moving shadows — the shadows do half the decorating for you.
2. Glowing Pumpkin Lanterns
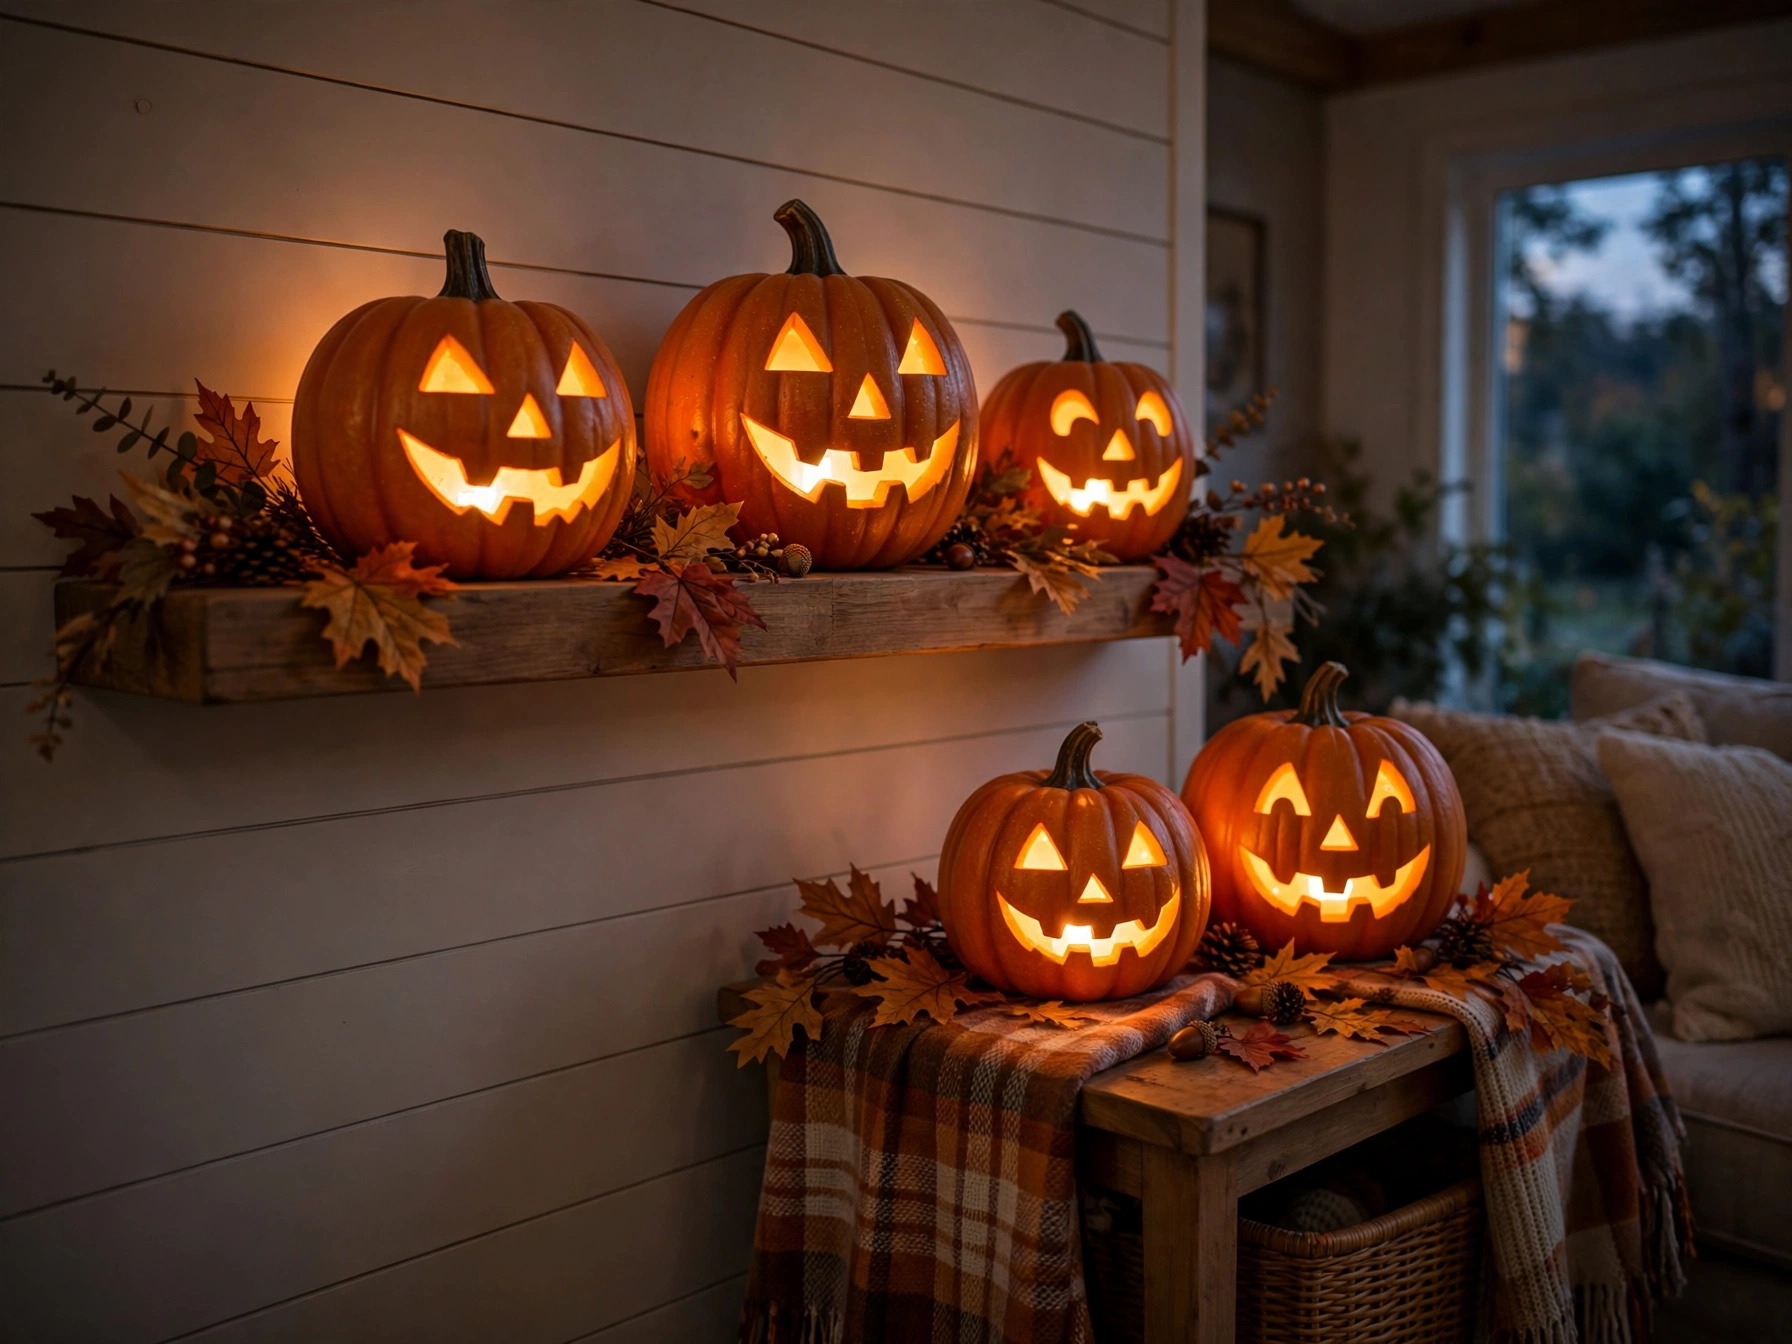
Real candles and dry autumn decor are a bad combination, which is why battery-powered LED lights have completely taken over pumpkin decorating. Hollow artificial pumpkins with LED tea lights or fairy lights inside give you that warm jack-o'-lantern glow with zero fire risk, and they last the entire season. Rather decorate without cutting at all? Our 12 no-carve pumpkin ideas cover paint, stickers, and decoupage — no knives needed.
Why it works visually: Warm light spilling from pumpkin faces is the single most recognizable Halloween image there is. Grouped at different heights, the glow layers beautifully.
Materials: Artificial carveable pumpkins (foam or plastic), battery-powered LED tea lights or a short string of warm-white fairy lights.
Instructions:
- Choose pumpkins in varied sizes — three looks better than one.
- If using carveable foam pumpkins, cut simple faces; if pre-carved, skip this step.
- Place one LED tea light or a small bundle of fairy lights inside each pumpkin.
- Arrange on a mantel, windowsill, or porch steps, tallest in back.
- Switch on at dusk; most LED lights run 100+ hours per battery set.
DIY time: 20–40 minutes depending on carving.
Estimated cost: $10–$20 for pumpkins and lights.
Best placement: Front porch steps, fireplace mantel, or flanking the front door.
Styling tip: Mix orange and white pumpkins — the contrast photographs beautifully and looks more designed than all-orange.
3. Paper Bat Wall Decorations
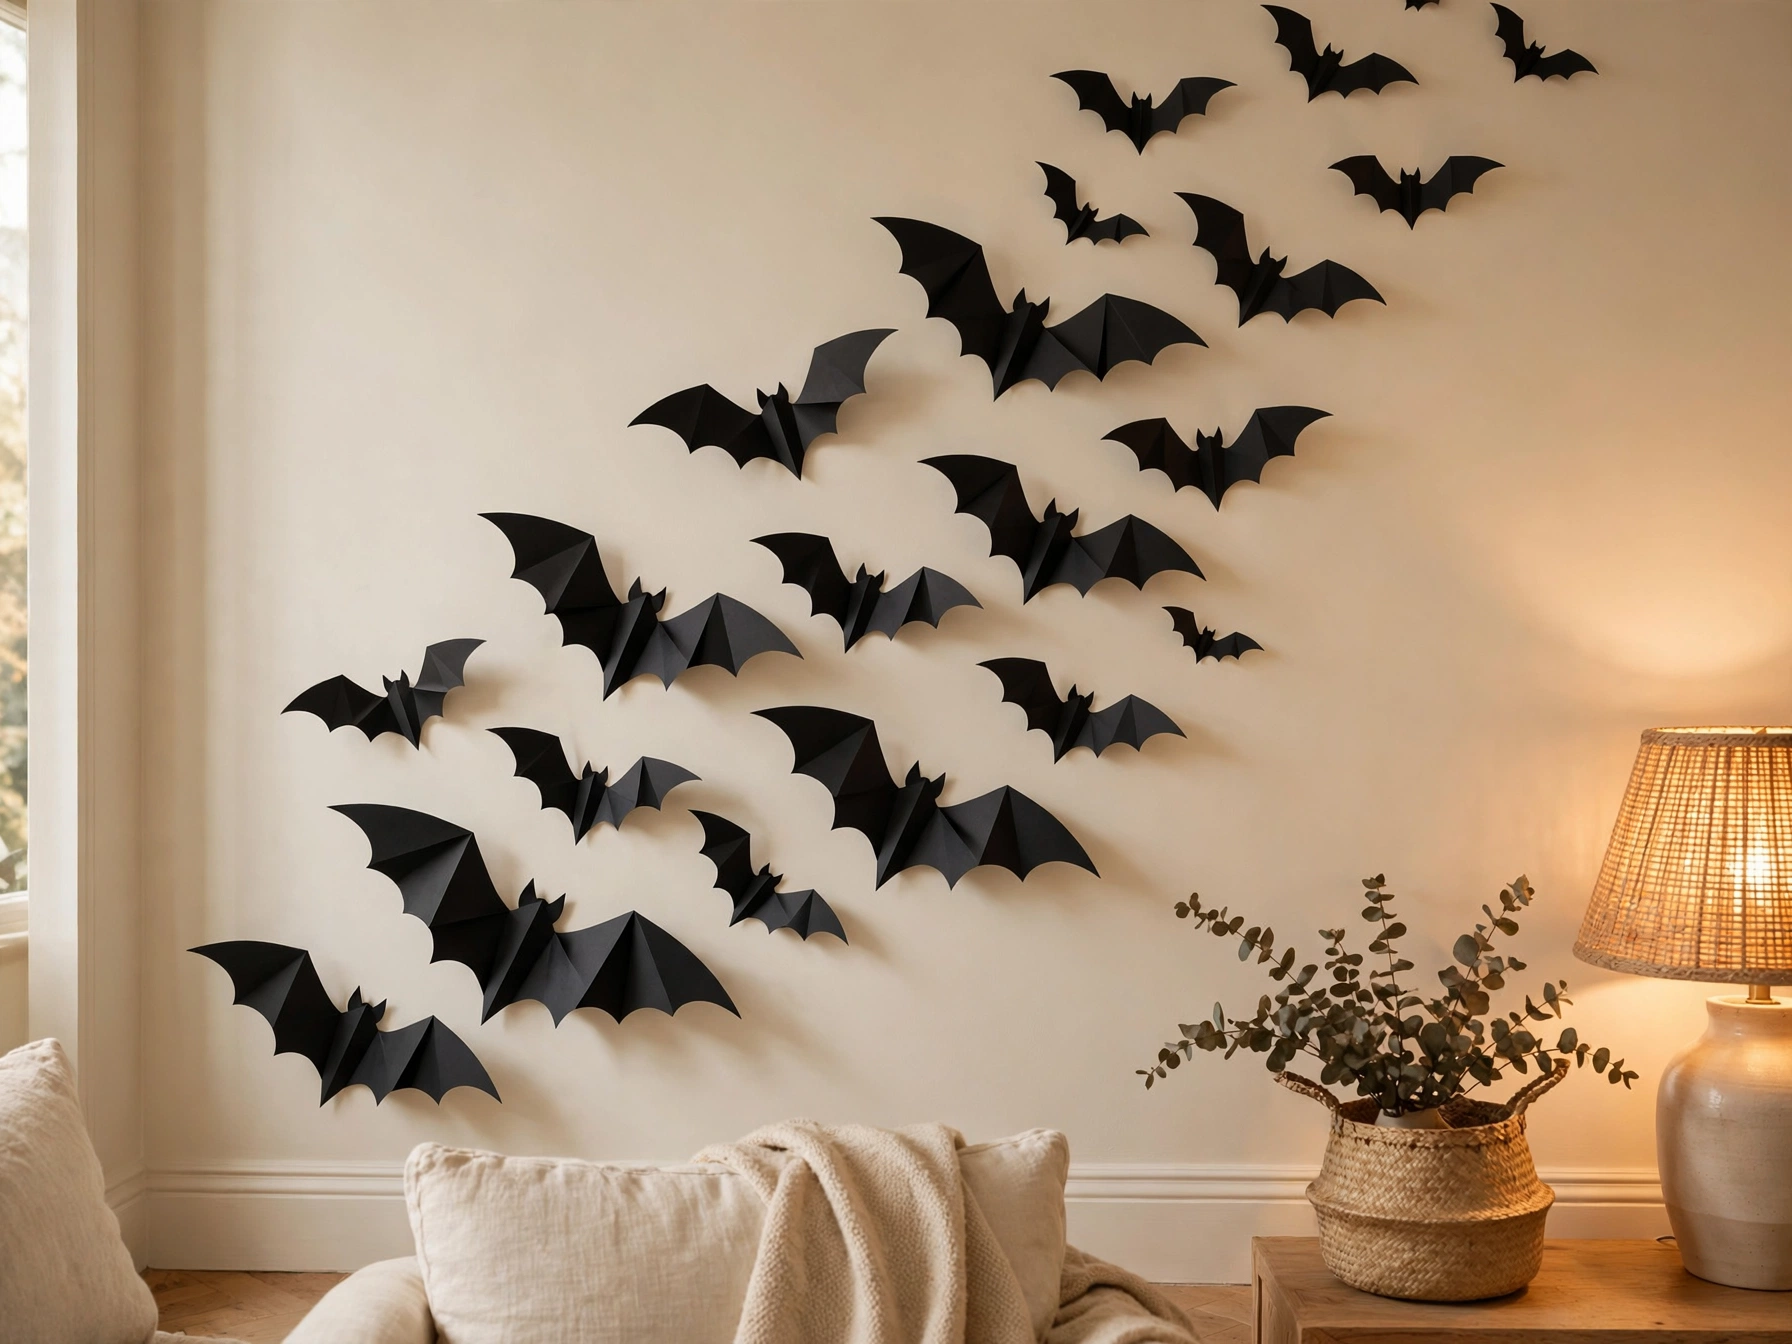
A swarm of black paper bats climbing a wall is one of the highest-impact, lowest-cost Halloween decorations ever invented. From a distance, the flat black shapes read as real movement, especially when you vary the sizes and angles.
Why it works visually: Repetition with variation — dozens of the same shape at different sizes and rotations — creates energy and draws the eye upward, making rooms feel taller.
Materials: Black cardstock, bat template (printable free online), scissors, removable adhesive putty or painter's tape.
Instructions:
- Print a bat template in three sizes (small, medium, large).
- Trace and cut 20–40 bats — enlist kids for this part.
- Fold each bat slightly down the middle so the wings angle outward for dimension.
- Plan your swarm on the floor first, starting dense at one point and scattering outward.
- Attach with small balls of removable adhesive putty, pressing firmly.
DIY time: About 45 minutes including cutting.
Estimated cost: $3–$6 for cardstock and putty.
Best placement: A large blank wall, climbing a staircase wall, or above a doorway.
Styling tip: Start the swarm from behind a piece of furniture so the bats appear to be flying out from hiding — much spookier than a centered arrangement.
4. Mini Ghost Mason Jar Decorations
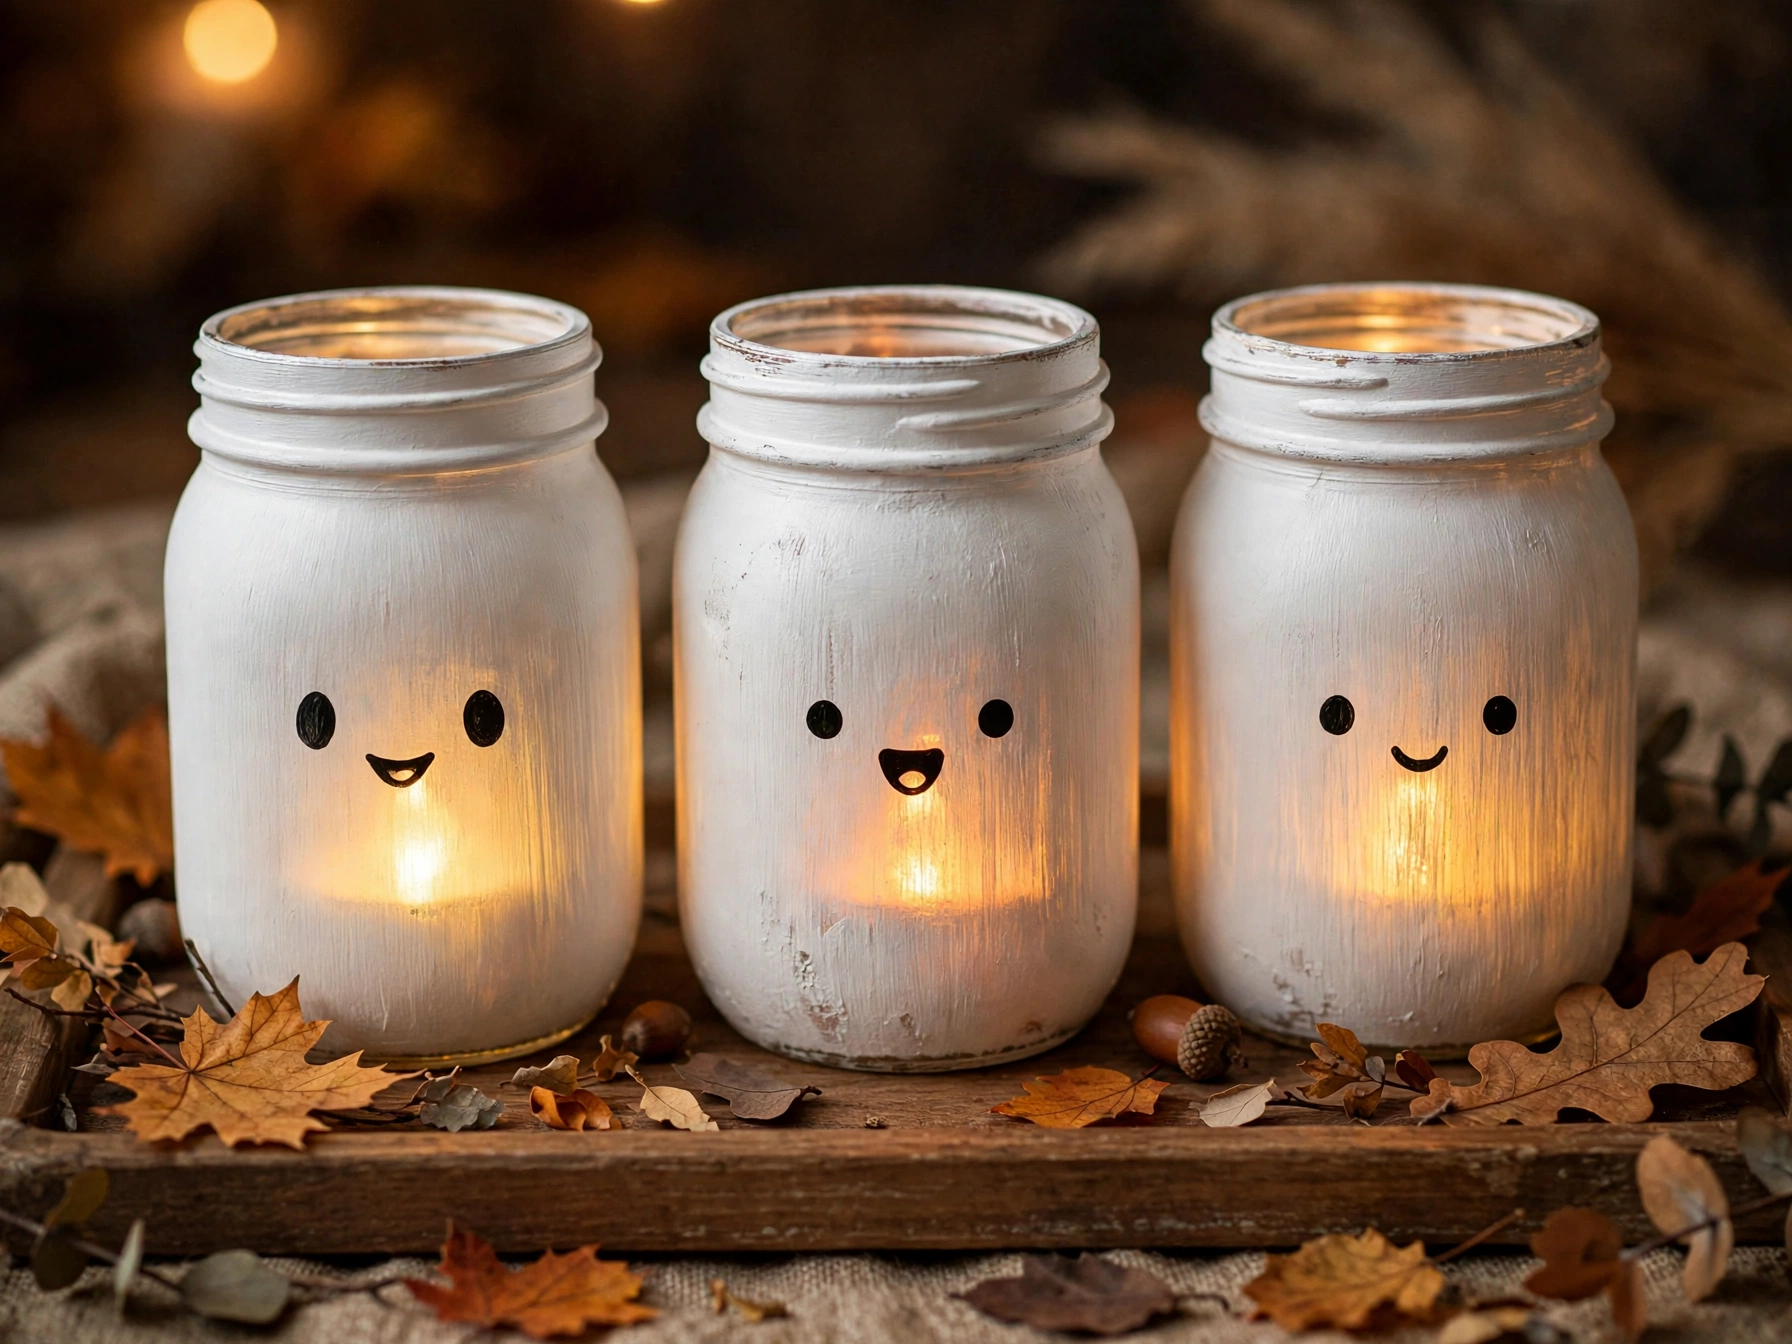
Mason jars are the Swiss Army knife of seasonal decorating. Painted white with simple ghost faces and lit from within by an LED tea light, they become cute little spirits that work on a shelf, a mantel, or as a table centerpiece.
Why it works visually: The frosted glow through painted glass is soft and friendly — cute-spooky rather than scary, which suits bedrooms and kitchens.
Materials: Mason jars (any size), white acrylic or chalk paint, black paint pen for faces, LED tea lights.
Instructions:
- Clean and dry the jars thoroughly.
- Apply two thin coats of white paint to the outside, letting each dry.
- Draw simple ghost faces with a black paint pen — two oval eyes and a small oval mouth.
- Drop an LED tea light inside each jar.
- Group in odd numbers on a tray with some faux autumn leaves scattered around.
DIY time: About 1 hour including paint drying.
Estimated cost: $8–$12 (jars are often already in the kitchen).
Best placement: Kitchen windowsill, bathroom shelf, or a bedroom nightstand.
Styling tip: Vary the jar heights and face expressions — one surprised, one sleepy, one happy — for charm.
5. DIY Spiderweb Picture Frames
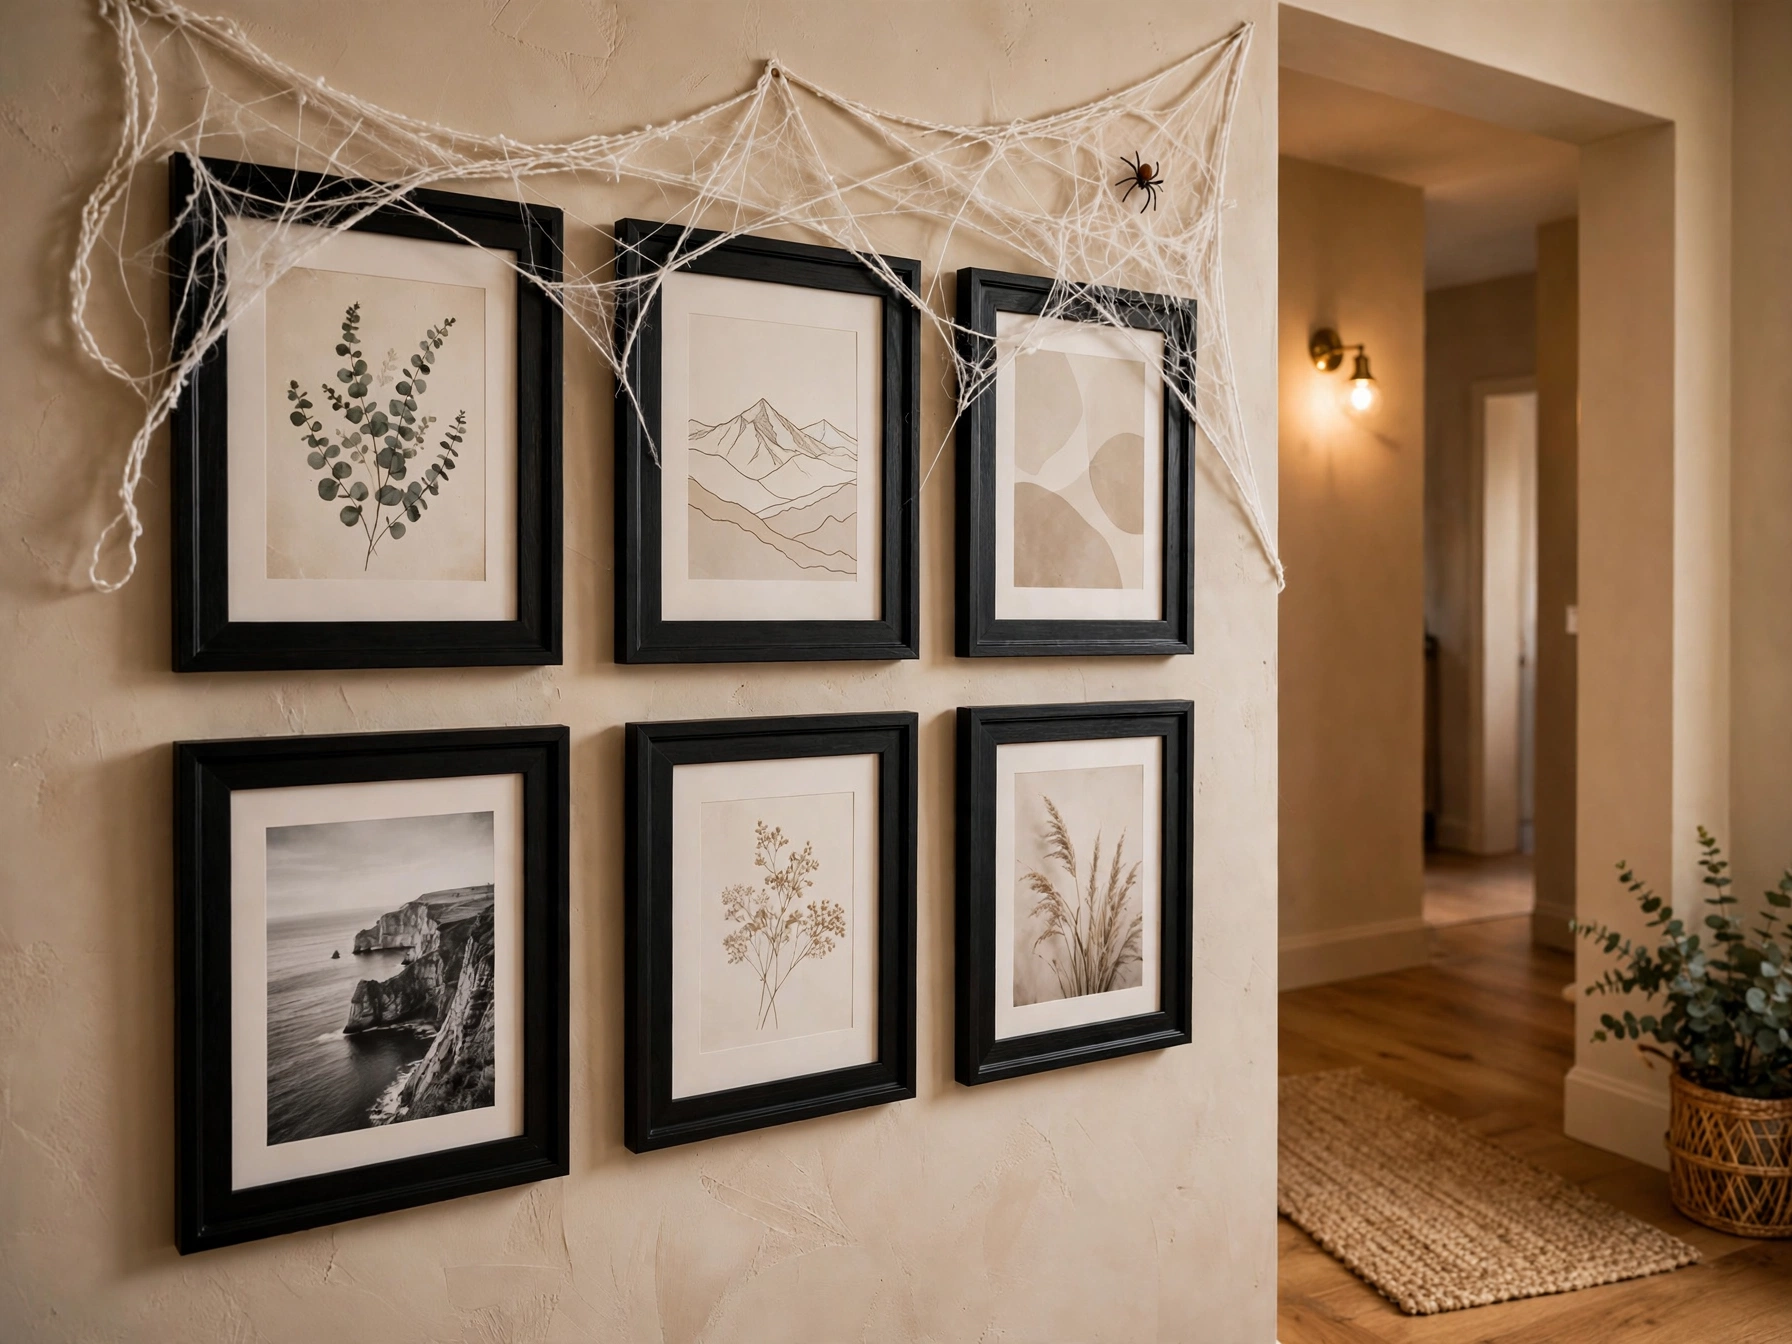
Your existing wall art can join the Halloween party. Stretching white yarn or cotton webbing across the corners of picture frames creates a subtle haunted-house effect without touching the artwork itself.
Why it works visually: The unexpected detail rewards a second look. Guests notice the webs a moment after the pictures, which makes the whole room feel thoughtfully decorated.
Materials: White yarn or thin white cotton cord, small removable adhesive dots, existing picture frames.
Instructions:
- Choose 3–5 frames on one wall.
- Cut yarn into varied lengths.
- Stretch strands diagonally across the top corners of each frame, securing behind the frame with adhesive dots.
- Add a small plastic spider on one or two webs for those who look closely.
- Remove after Halloween by peeling the dots — no wall damage.
DIY time: 20 minutes.
Estimated cost: $2–$4.
Best placement: Gallery walls, hallway frames, or above a desk.
Styling tip: Keep it to corners only — full-frame webs look messy, corner webs look intentional.
Halloween Living Room Decoration Ideas
6. Cozy Halloween Sofa Styling
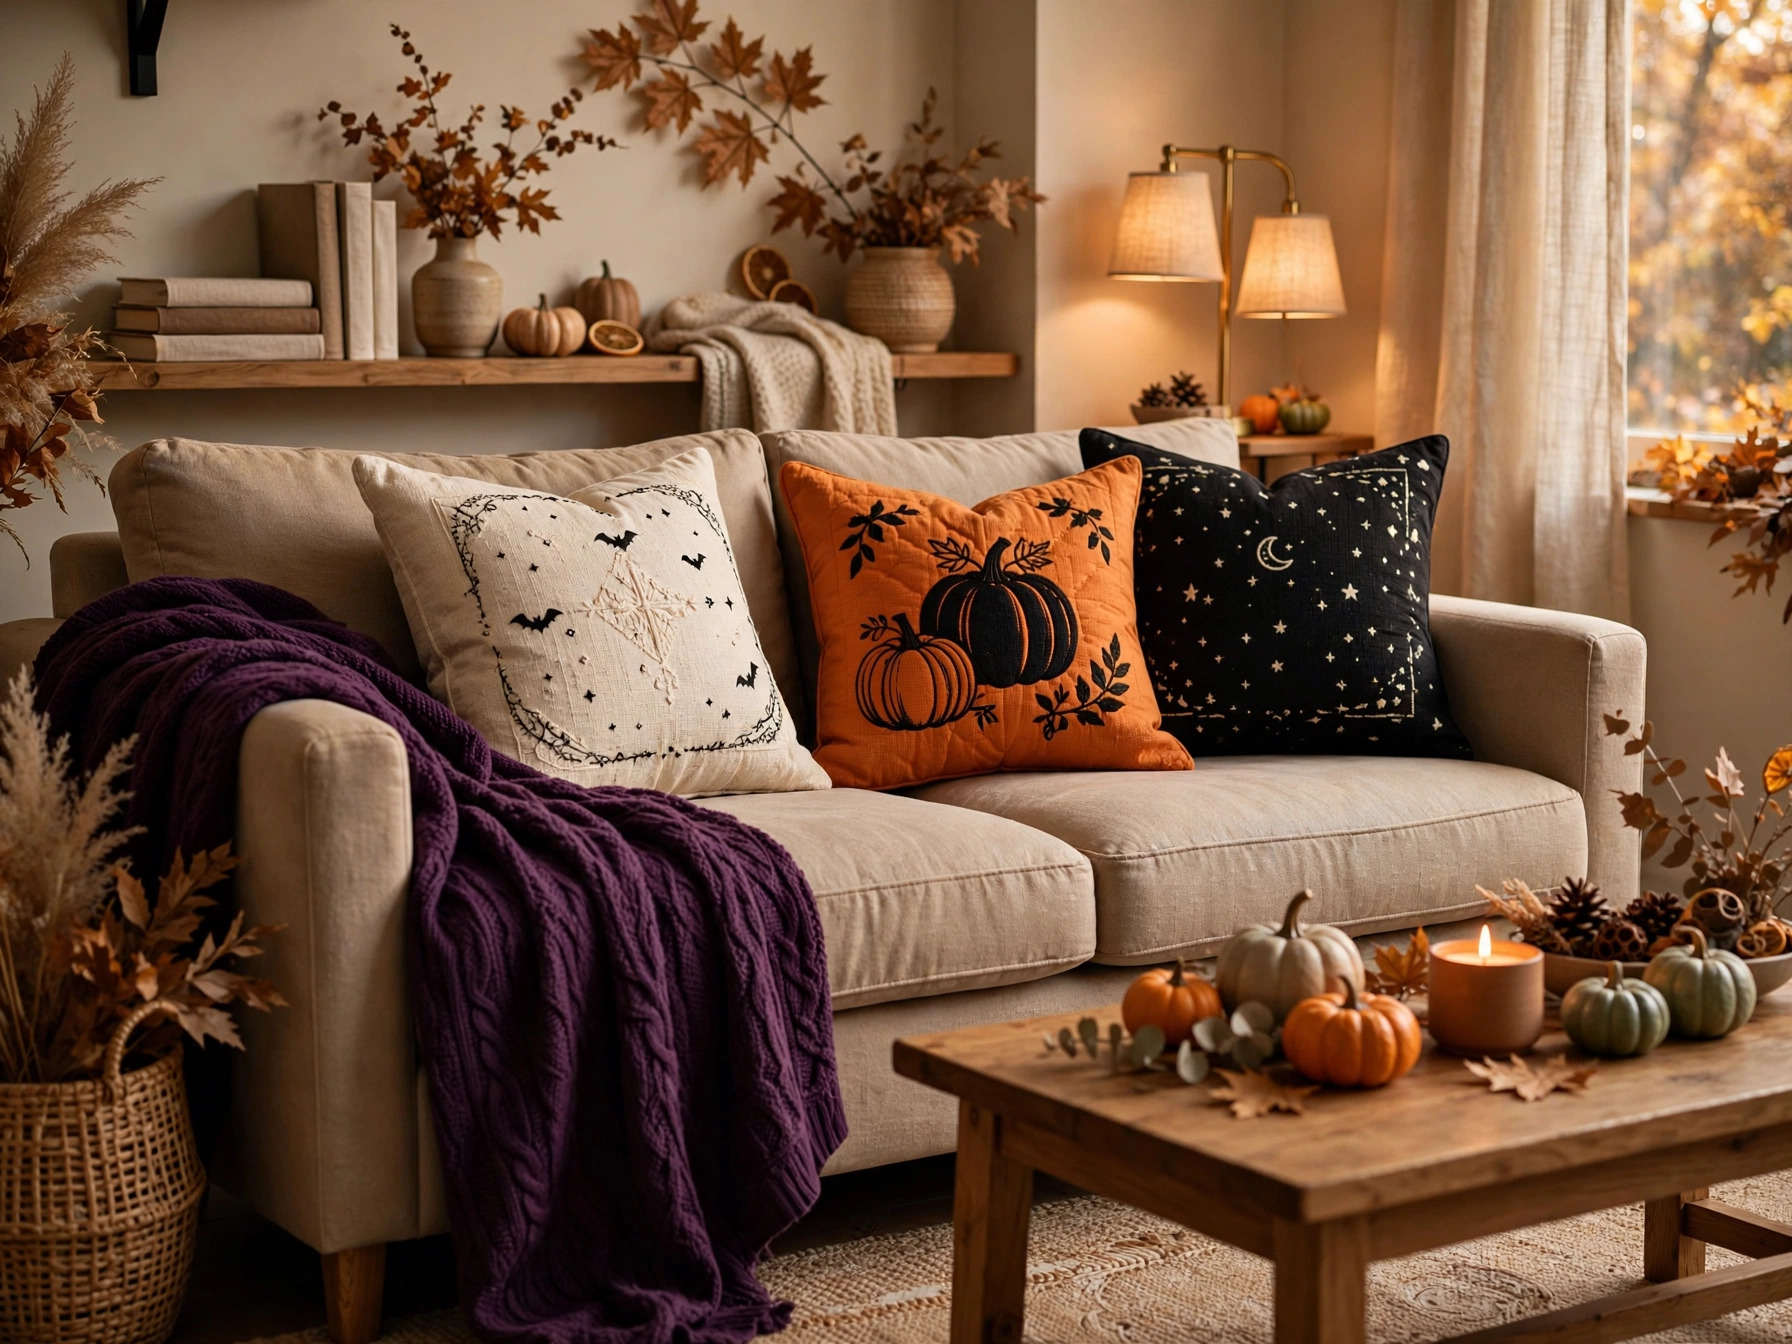
The sofa is the largest surface in most living rooms, so dressing it for Halloween transforms the whole space in minutes. The trick is restraint: two or three seasonal textiles in a tight color palette, not a costume shop explosion.
Why it works visually: A limited palette — orange, black, cream, deep purple — reads as "designed" while a rainbow of Halloween prints reads as clutter.
Materials: 2–3 cushion covers in Halloween colors, one throw blanket, optional small lumbar pillow with a subtle motif.
Instructions:
- Remove your everyday cushions (store them, don't discard the look entirely).
- Arrange the Halloween cushions in odd numbers, largest at the ends.
- Drape the throw over one arm or across the back, slightly off-center.
- Step back and remove one item — if it still looks good, that was the right call.
DIY time: 10 minutes.
Estimated cost: $15–$30 for covers and a throw (reusable yearly).
Best placement: The main family sofa.
Styling tip: Keep one neutral cream cushion in the mix — it stops the dark colors from making the sofa look heavy.
7. Elegant Black-and-Gold Halloween Mantel
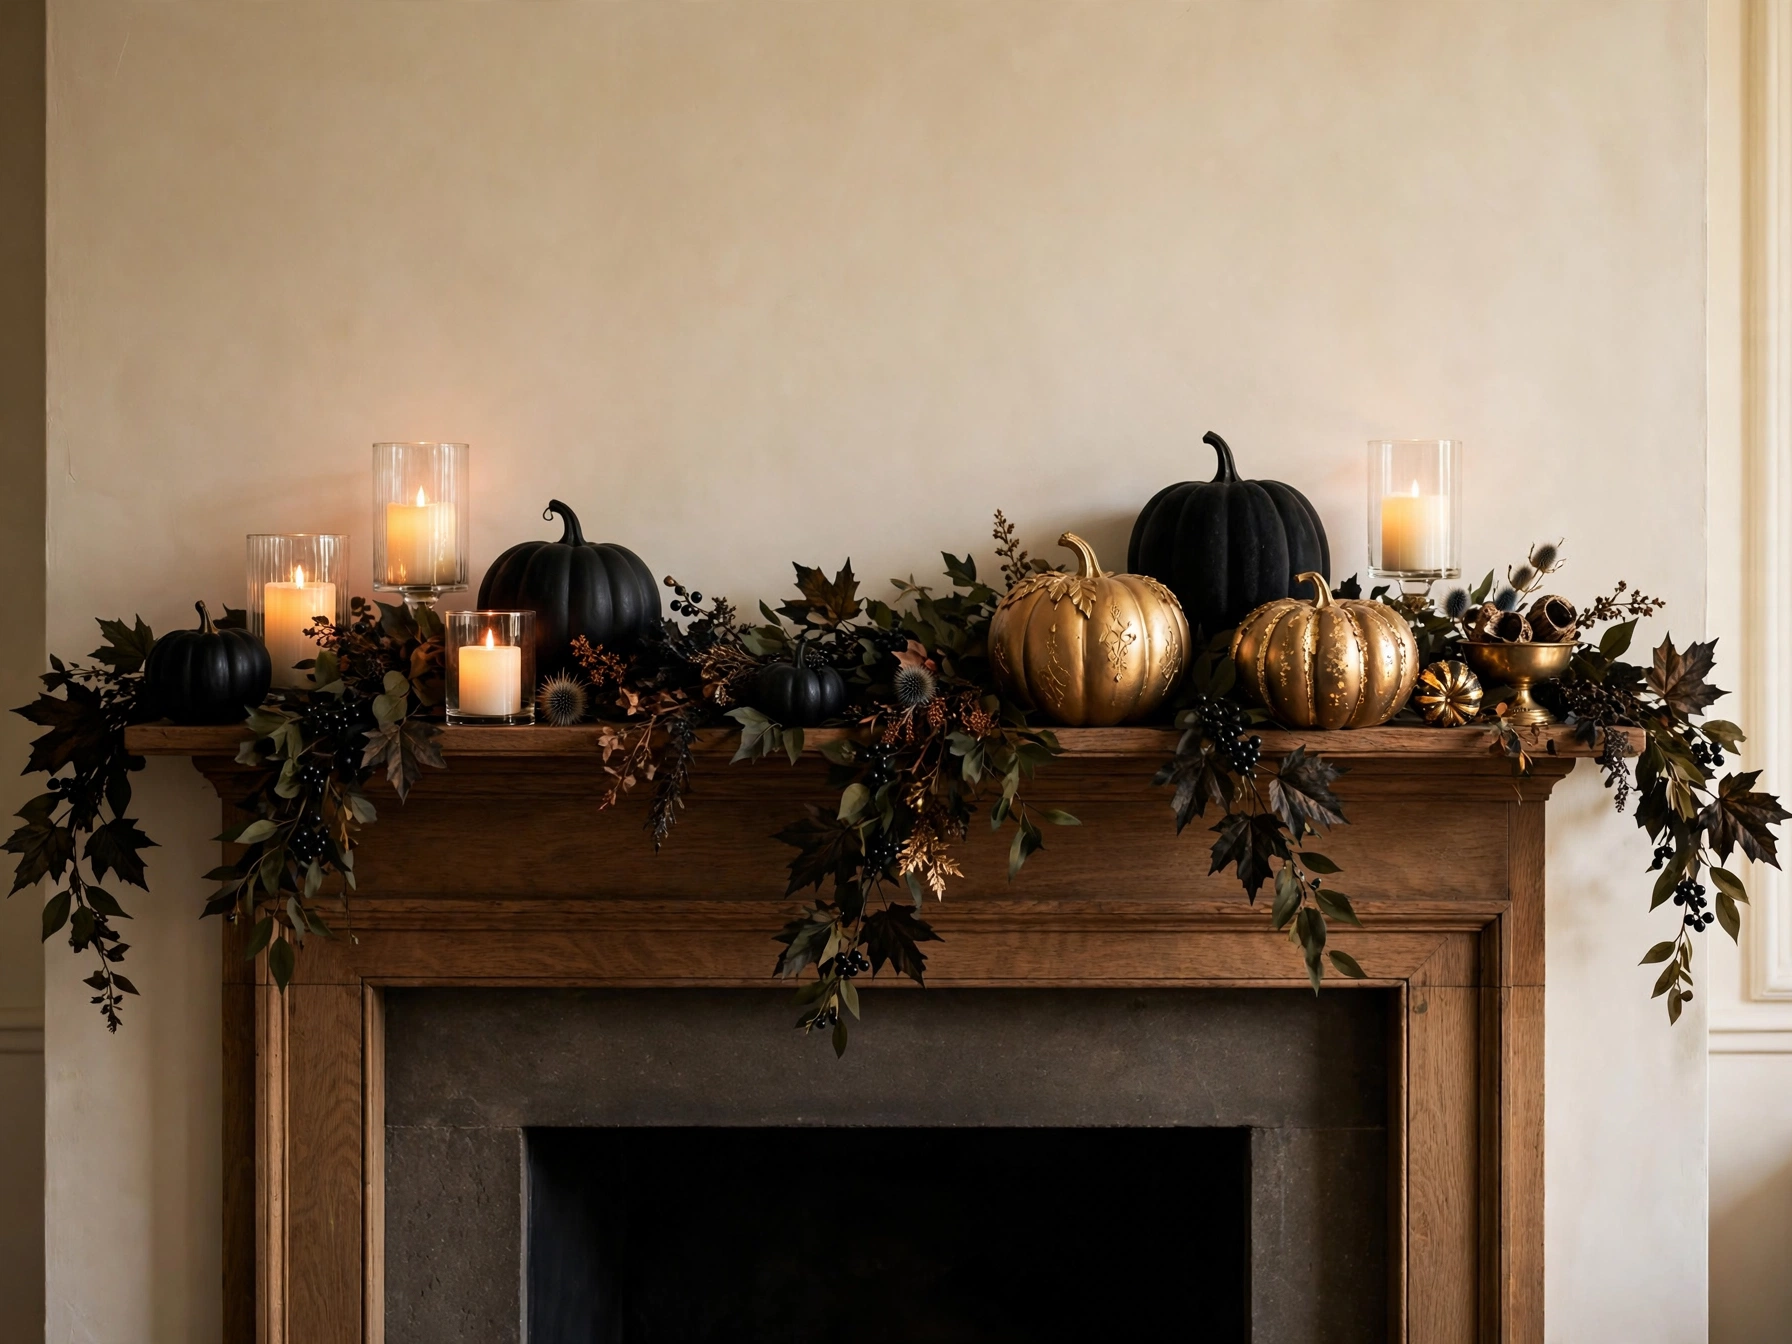
Halloween doesn't have to be orange and silly. A black-and-gold mantel borrows from formal holiday decorating — think New Year's Eve meets October — and suits living rooms that lean traditional or modern.
Why it works visually: Black and antique gold is inherently dramatic. Against a light wall, the dark shapes pop; against a dark wall, the gold catches every bit of light.
Materials: Matte black pumpkins (3–5, varied sizes), 2–3 gold-accented pumpkins, flameless LED candles in glass holders, dark faux foliage garland.
Instructions:
- Lay the foliage garland along the mantel as your base, letting ends drape slightly.
- Place the largest black pumpkin off-center as your anchor.
- Cluster smaller pumpkins in groups of three around it, mixing black and gold.
- Tuck LED candles between the pumpkins at varied heights.
- Switch the candles on at dusk and adjust until the gold pieces catch the light.
DIY time: 30 minutes.
Estimated cost: $25–$40 (all reusable).
Best placement: Fireplace mantel, or a console table if you have no fireplace.
Styling tip: Odd numbers and asymmetry are what separate "decorated" from "lined up" — resist the urge to center everything.
8. Spooky Halloween Coffee Table Centerpiece
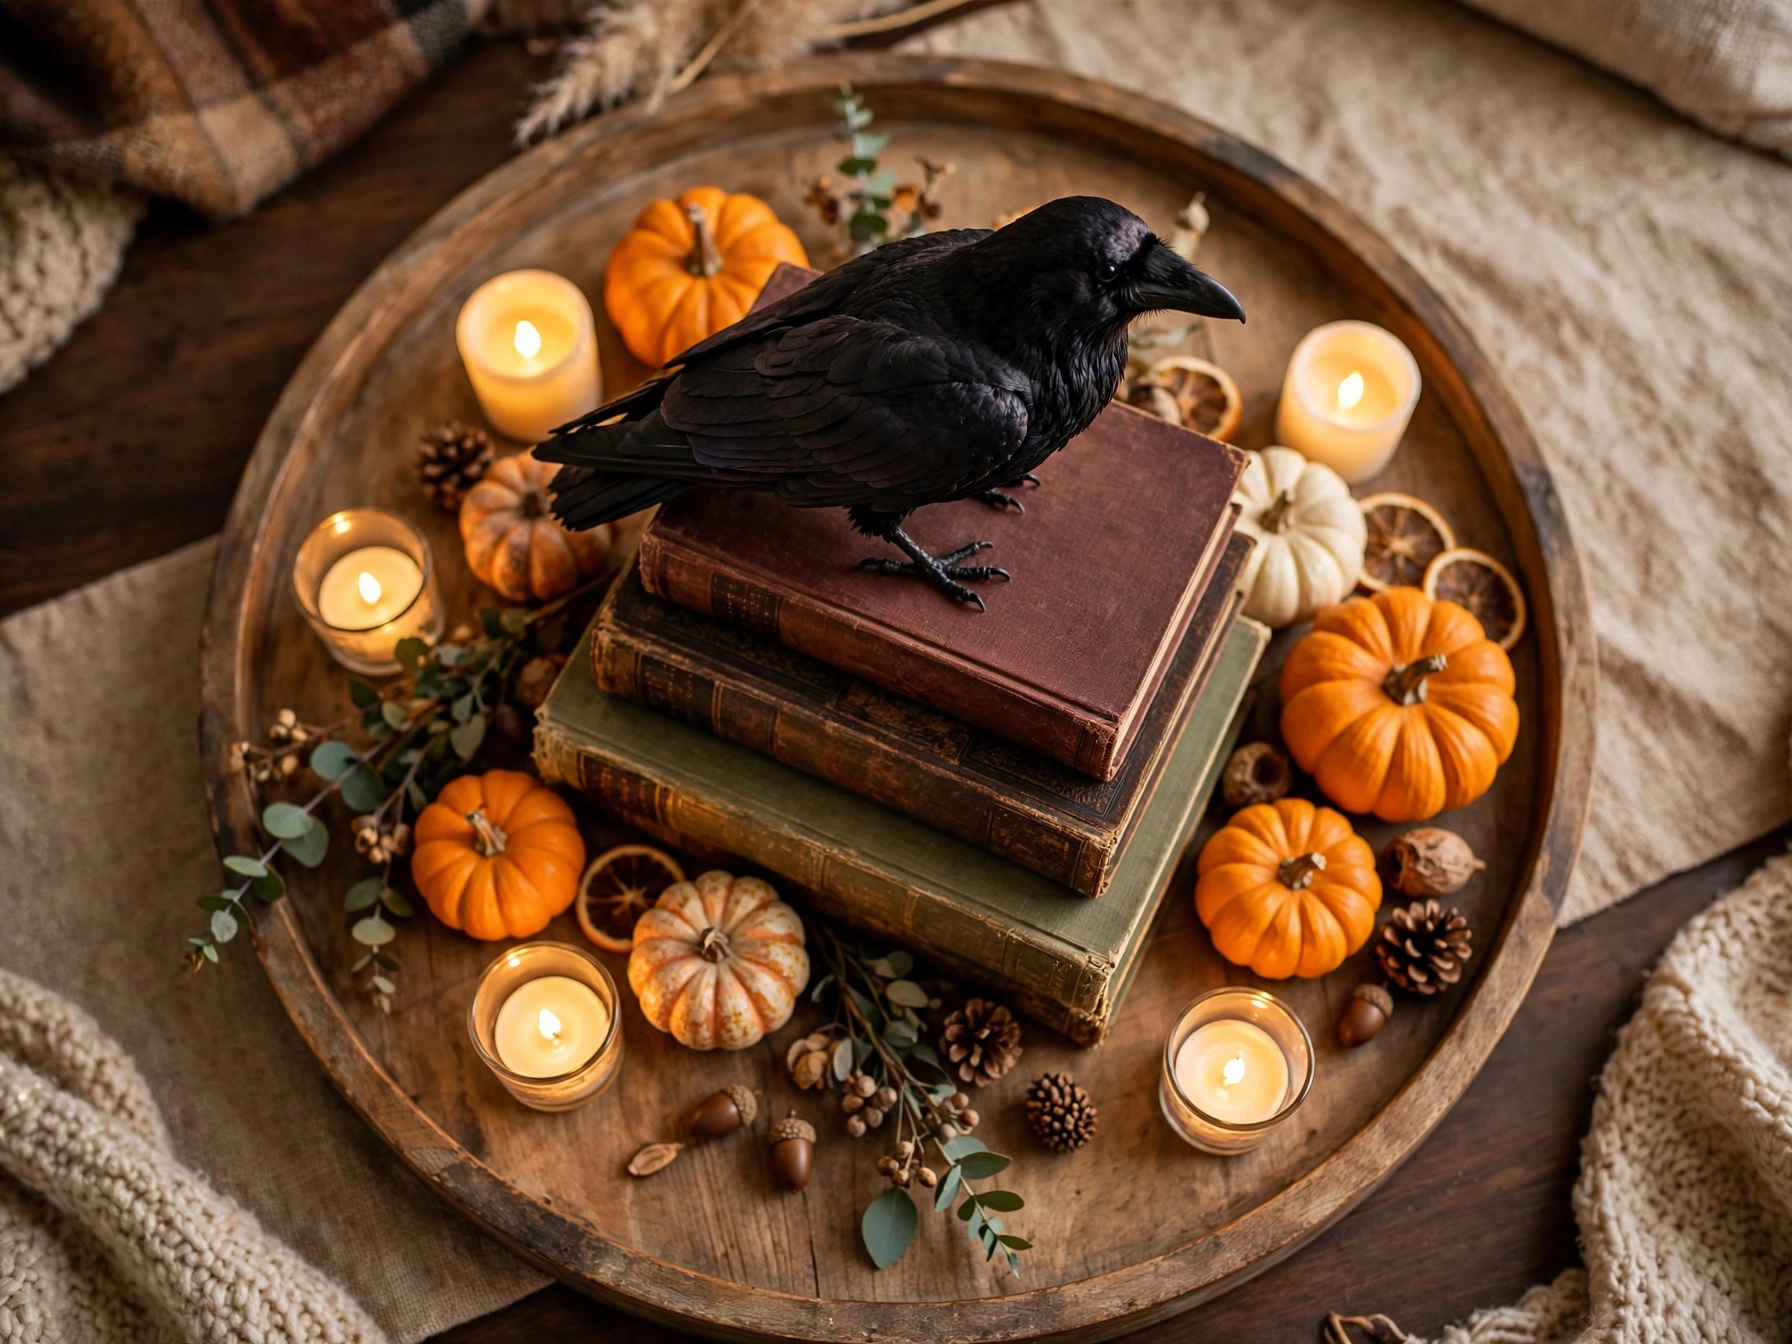
The coffee table sits at the center of the room's sightlines, so a compact Halloween arrangement there punches above its weight. The formula: something natural, something vintage, something dark, something glowing.
Why it works visually: Four contrasting textures — smooth pumpkin, worn book covers, feathered raven, flickering light — keep the eye moving across a small area.
Materials: 2–3 small pumpkins or gourds, a stack of old hardcover books, one faux raven or crow, 2 LED tea lights, a small tray to contain it all.
Instructions:
- Place the tray in the center of the coffee table.
- Stack the books slightly askew on one side of the tray.
- Perch the raven on top of the books.
- Arrange pumpkins on the other side, with tea lights tucked between.
- Make sure everything still leaves room for actual coffee cups.
DIY time: 15 minutes.
Estimated cost: $10–$20.
Best placement: Living room coffee table.
Styling tip: The tray is the secret — it makes a random collection look like a deliberate arrangement and makes post-Halloween cleanup a one-lift job.
9. Floating Witch Hat Display
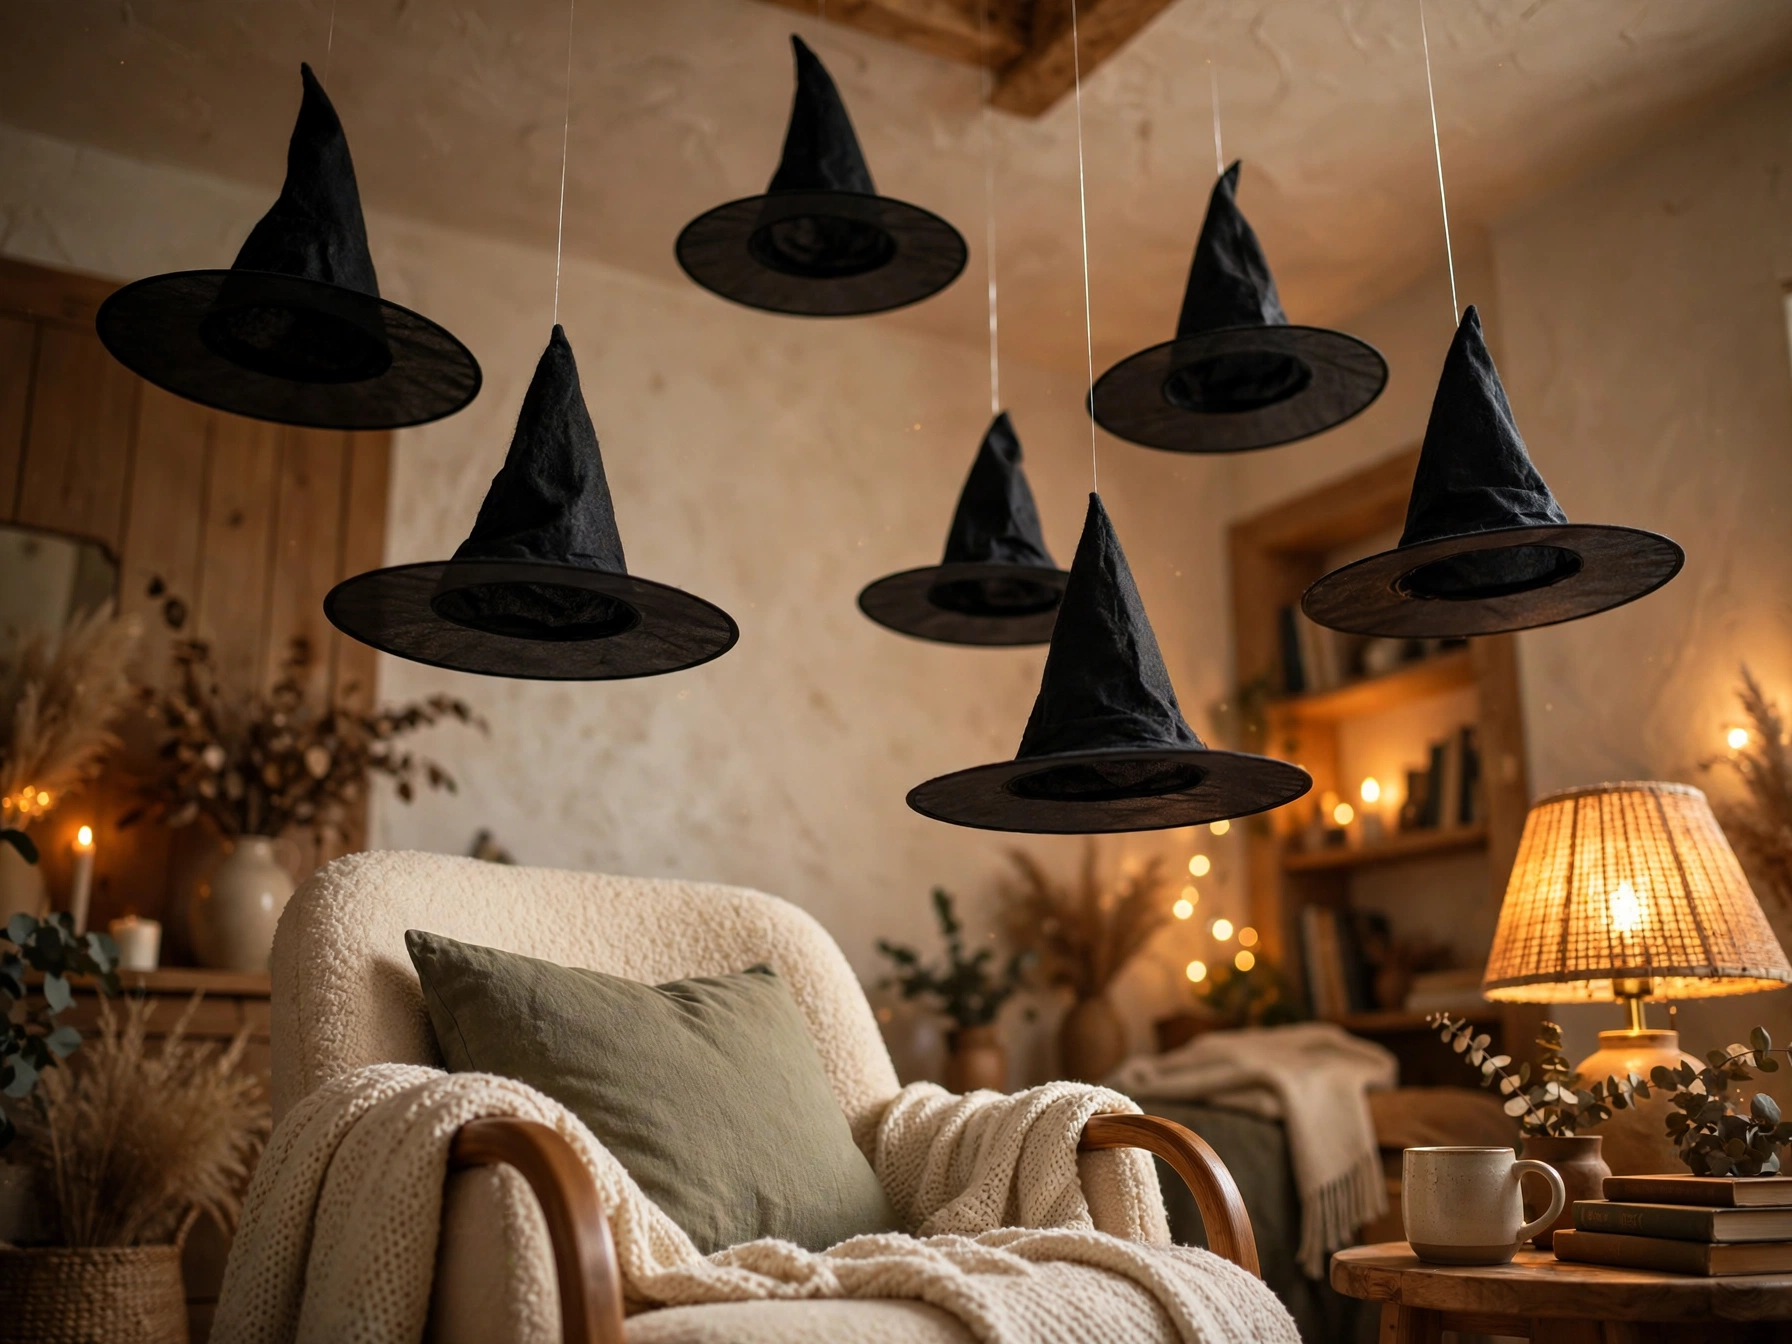
Lightweight witch hats suspended above a seating area create a magical, slightly mischievous ceiling that kids love and adults photograph. Done with fishing line and proper clearance, they're secure and out of the way.
Why it works visually: Objects floating overhead trigger genuine delight — it's unexpected, and the hats' conical shapes are readable even in dim light.
Materials: 5–8 lightweight decorative witch hats (foam or fabric), transparent fishing line, small ceiling hooks or removable adhesive ceiling clips.
Instructions:
- Cut fishing line in varied lengths (18–36 inches).
- Tie one end securely through each hat's tip.
- Attach to the ceiling in a loose cluster over the seating area, keeping the lowest hat at least 7 feet off the floor.
- Give each hat a slight tilt for a "just landed" look.
- Double-check clearance — nobody should be able to touch them standing normally.
DIY time: 30 minutes.
Estimated cost: $10–$18 for hats and line.
Best placement: Above a reading chair, over the dining table, or in a party corner.
Styling tip: Add one tiny LED fairy light strand woven through the cluster for evening magic — the hats will glow from within.
10. Minimalist White Pumpkin Display
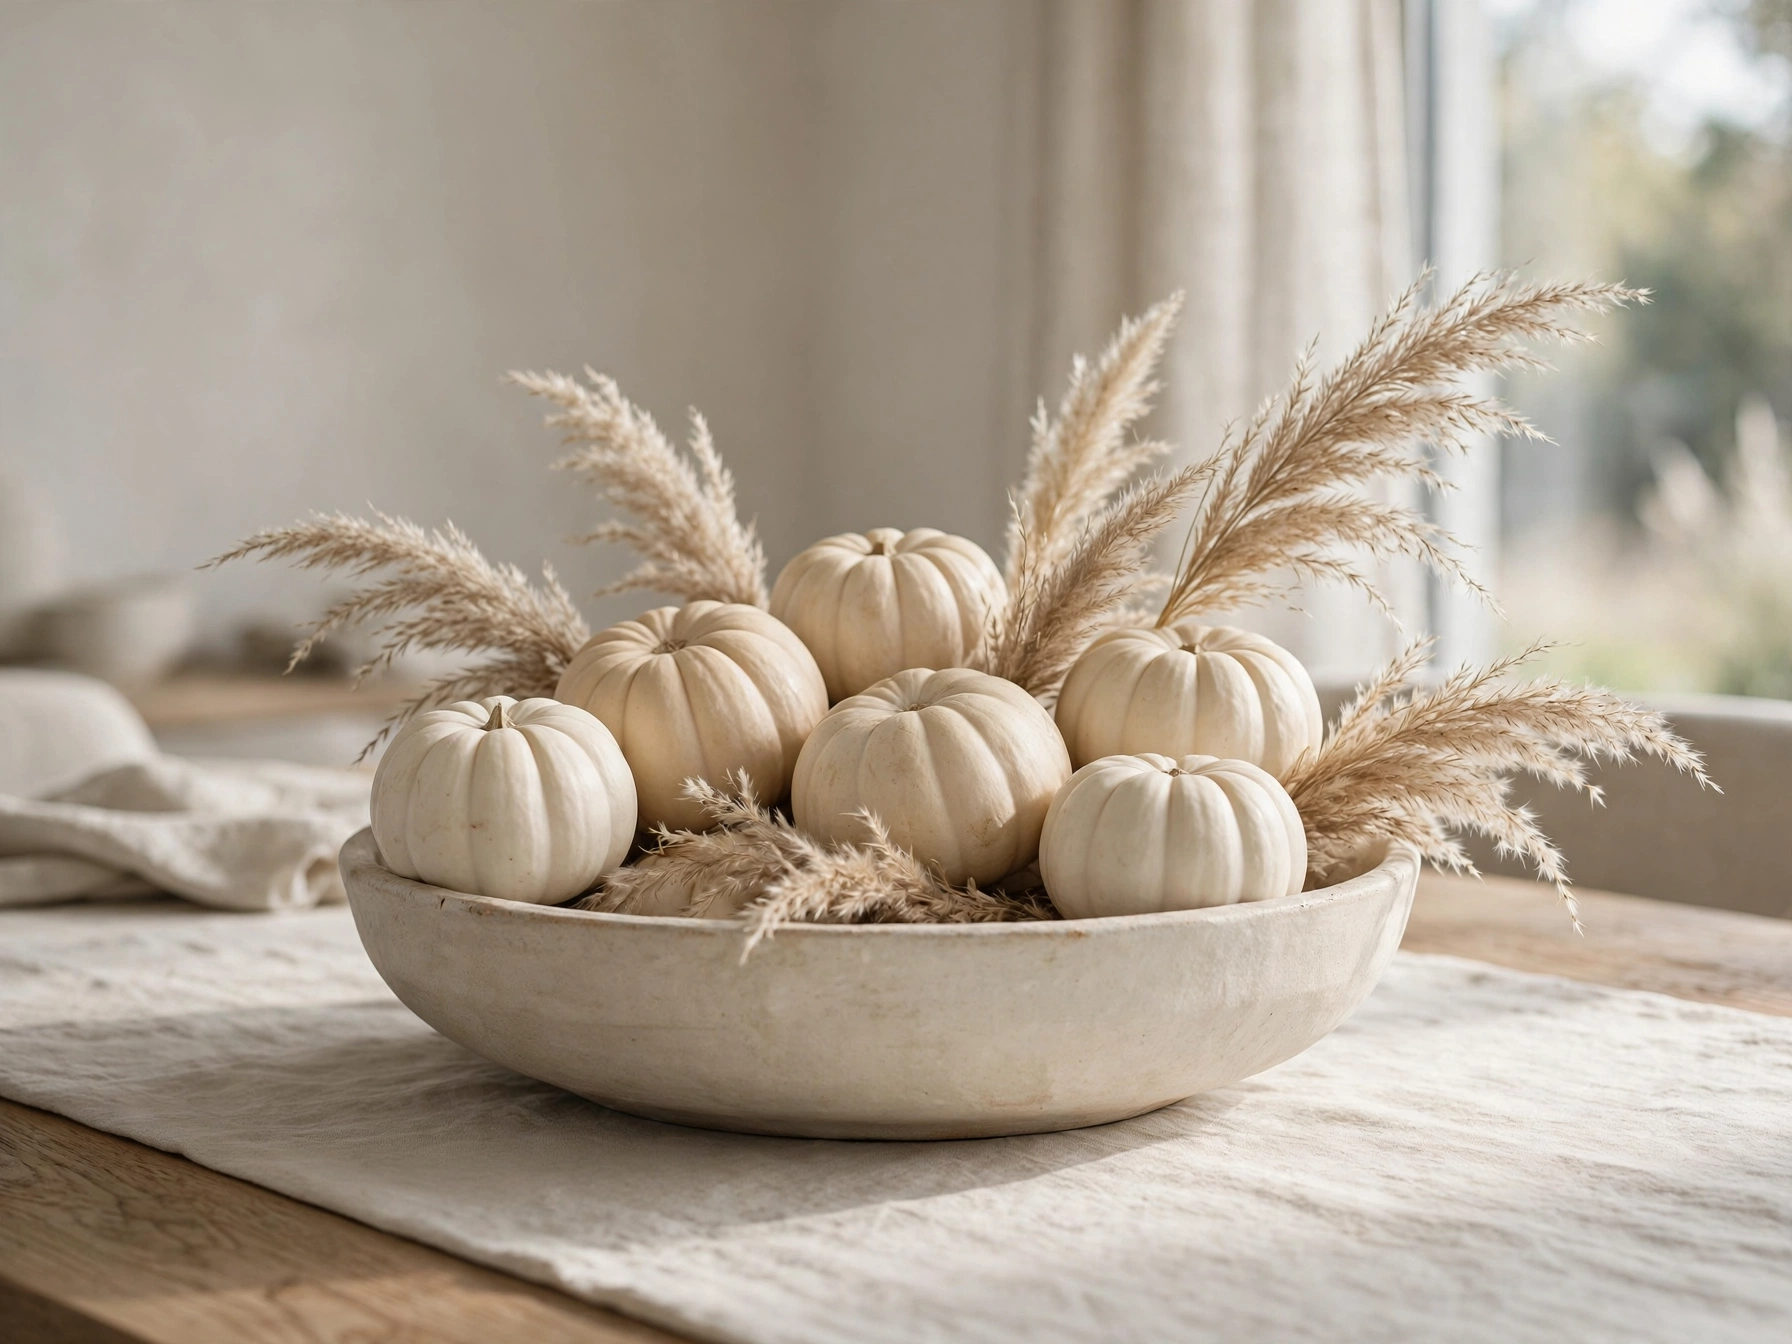
For the "I like autumn, not horror" crowd: an all-white pumpkin arrangement with dried flowers and soft lighting. It's Halloween-adjacent, Thanksgiving-ready, and the most reusable look on this list.
Why it works visually: A monochrome palette is calming and lets texture do the talking — bumpy gourds, feathery dried grasses, smooth ceramic.
Materials: White and cream pumpkins (real or faux, 5–7), dried pampas grass or wheat stems, a low wide bowl or tray, 2–3 LED tea lights.
Instructions:
- Fill the tray with the pumpkins, largest in the middle.
- Tuck dried stems between pumpkins at angles for height.
- Nestle tea lights where they'll glow through gaps.
- Place where it'll catch natural daylight — white-on-white needs light to shine.
DIY time: 20 minutes.
Estimated cost: $15–$25.
Best placement: Dining table, entryway console, or a bedroom dresser.
Styling tip: This arrangement works straight through Thanksgiving — just remove anything overtly spooky nearby and it transitions seasons on its own.
Outdoor Halloween Decoration Ideas
11. Haunted Front Porch With Pumpkins
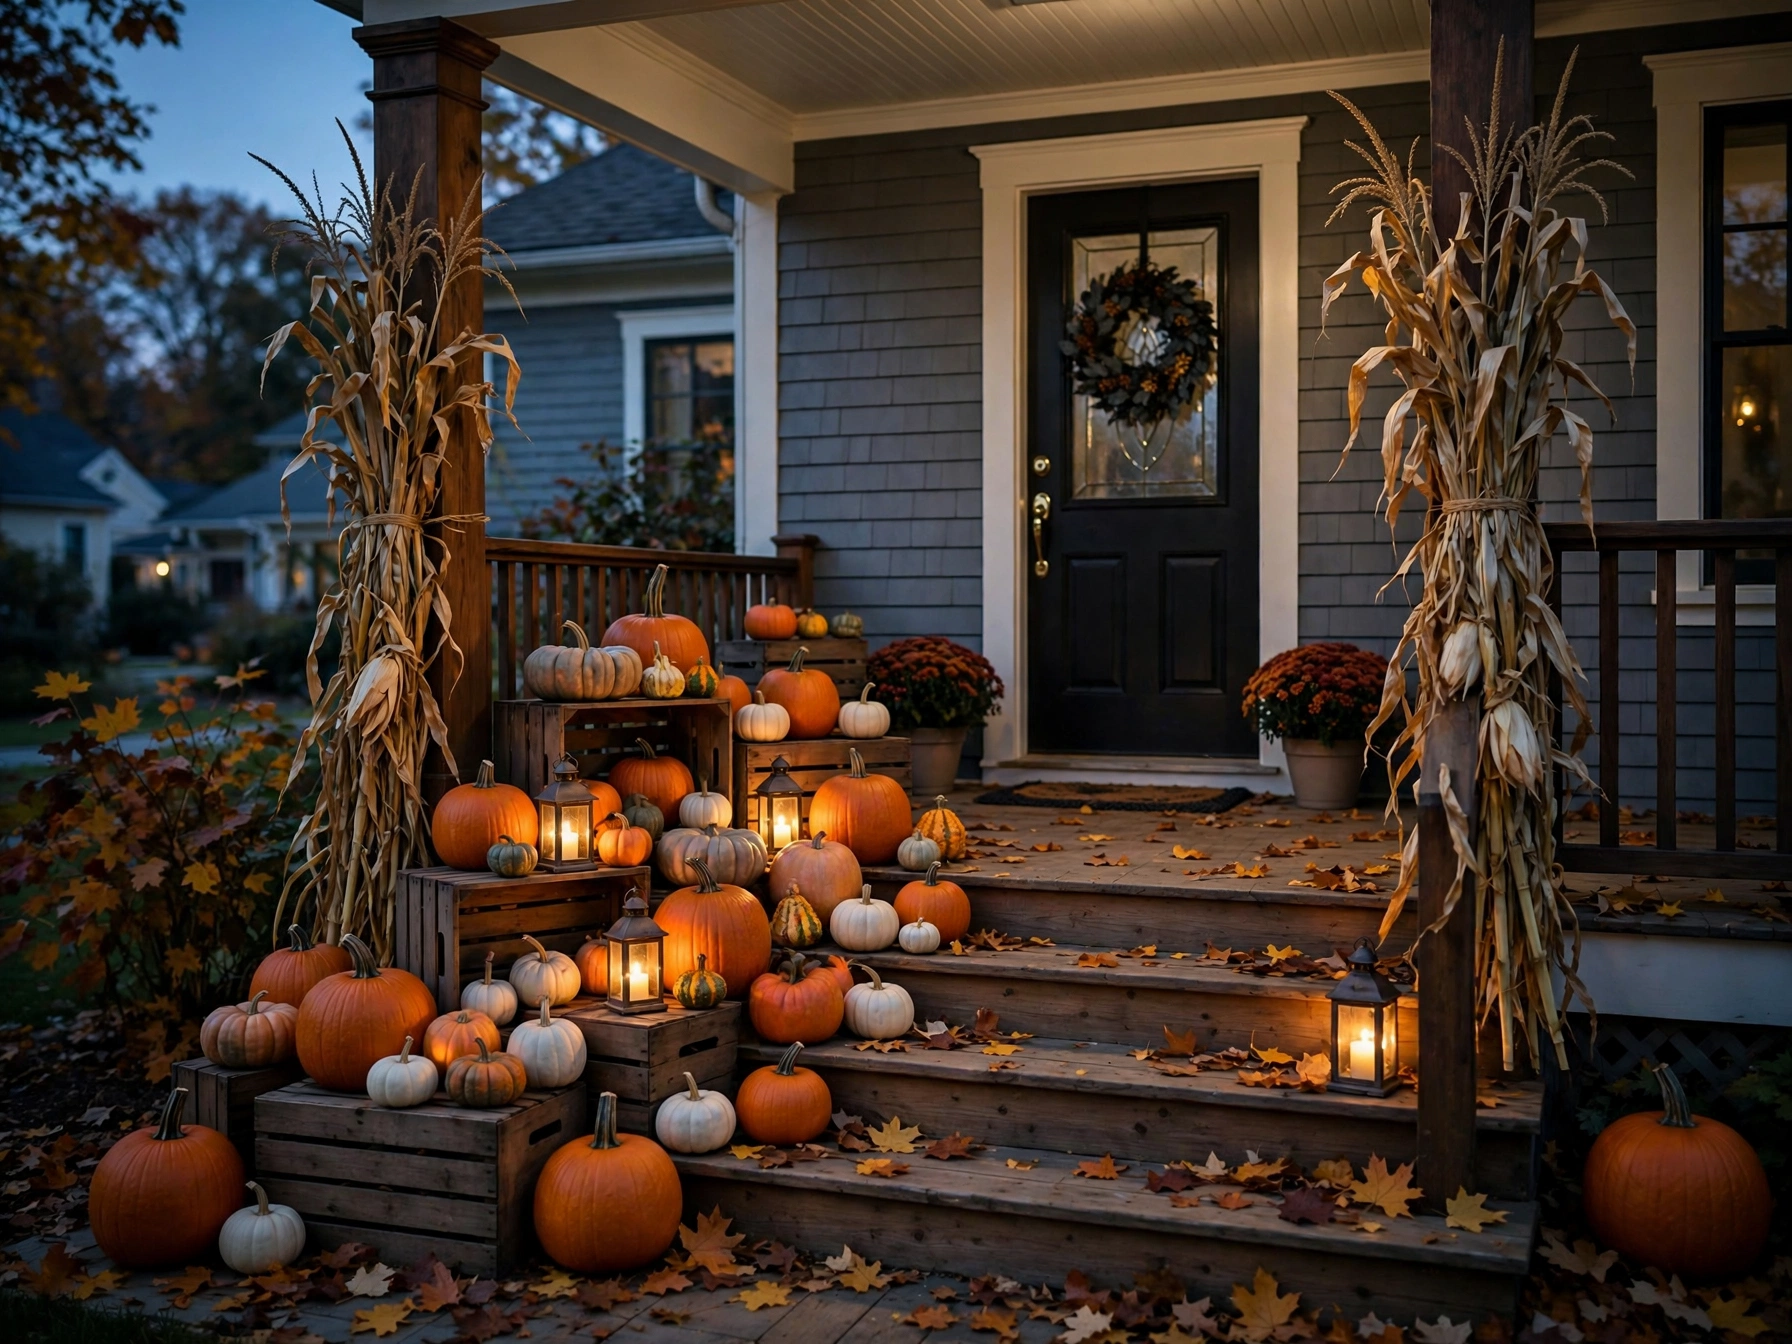
The front porch is your Halloween handshake with the neighborhood. A layered pumpkin display — different sizes, heights, and colors — with warm lantern light says "welcome" far better than a single sad pumpkin by the door.
Why it works visually: Layering at multiple heights (steps, crates, the floor) creates depth that reads beautifully from the street, especially at dusk.
Materials: Pumpkins in 3+ sizes, 2–3 outdoor-rated LED lanterns, a couple of hay bales or wooden crates for height, autumn foliage or corn stalks.
Instructions:
- Place crates or hay bales on the porch to create two or three height levels.
- Arrange the largest pumpkins on the ground level, medium on crates.
- Tuck lanterns between pumpkins so light spills across them.
- Add corn stalks tied to porch posts and scatter autumn leaves at the base.
- Set lanterns on a timer for dusk-to-10pm.
DIY time: 45 minutes to 1 hour.
Estimated cost: $20–$40.
Best placement: Front porch steps and landing.
Styling tip: Light is everything outdoors — a $5 timer on your lanterns means the display looks intentional every single evening without you thinking about it.
12. Friendly Ghost Garden Decorations
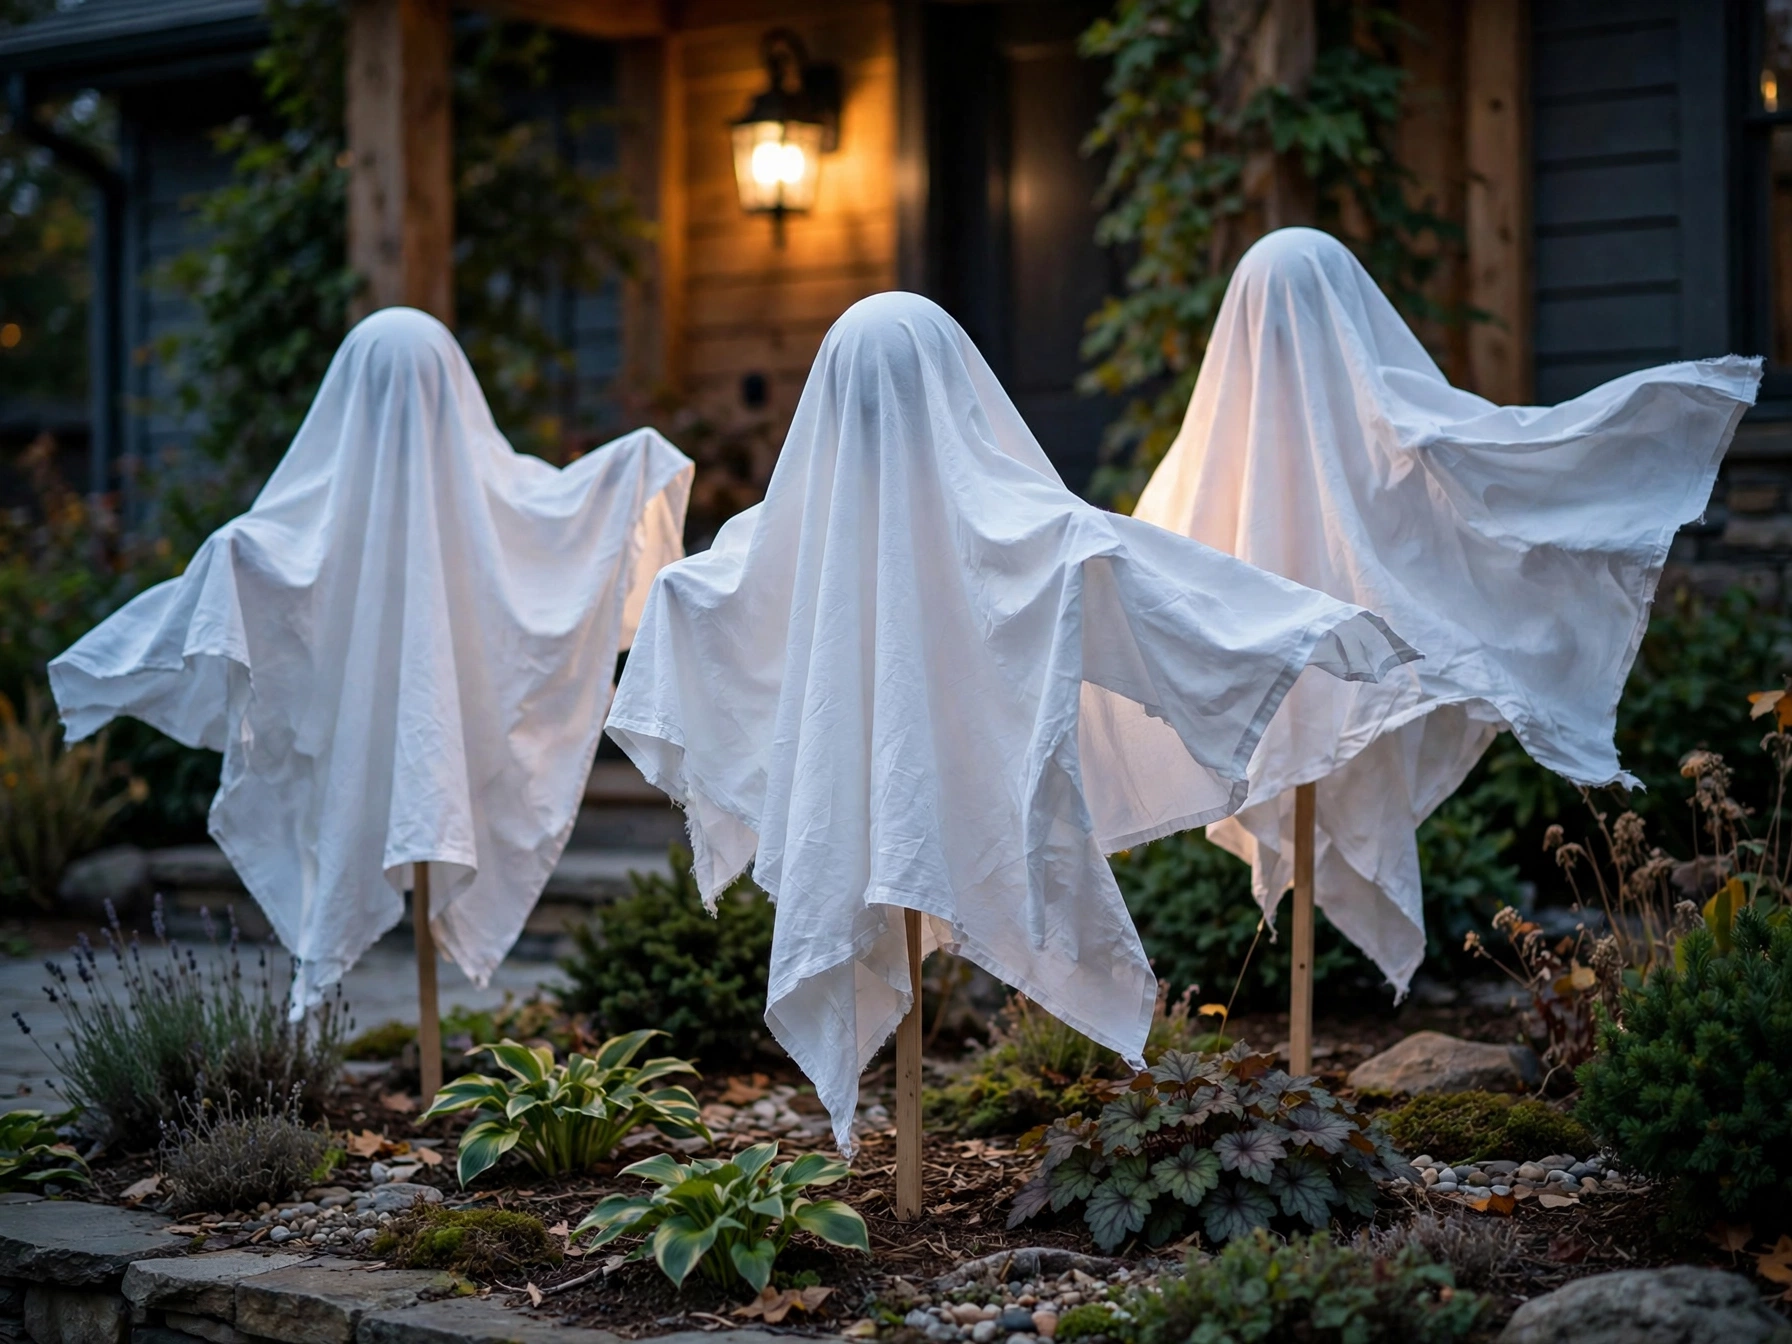
Not every outdoor display needs to frighten. White fabric ghosts staked in the garden — the outdoor cousins of the indoor floating ghosts — read as playful from the sidewalk and charm trick-or-treaters rather than terrifying them.
Why it works visually: White shapes against dark evening landscaping have huge contrast. Slight movement in the breeze makes them feel alive.
Materials: White fabric squares, tomato stakes or dowels, foam balls, outdoor-safe zip ties.
Instructions:
- Push a stake firmly into the ground where each ghost will stand.
- Top with a foam ball and drape fabric over it.
- Secure the fabric under the ball with a zip tie.
- Space ghosts 3–4 feet apart along a garden bed or walkway edge.
- Bring fabric indoors during heavy rain to extend its life.
DIY time: 30 minutes for a half-dozen.
Estimated cost: $8–$15.
Best placement: Front garden beds, along the walkway, or clustered near a tree.
Styling tip: Face a couple of ghosts toward the street and one or two toward the house — it looks like they're milling around rather than posed.
13. Spooky Halloween Front Door Wreath
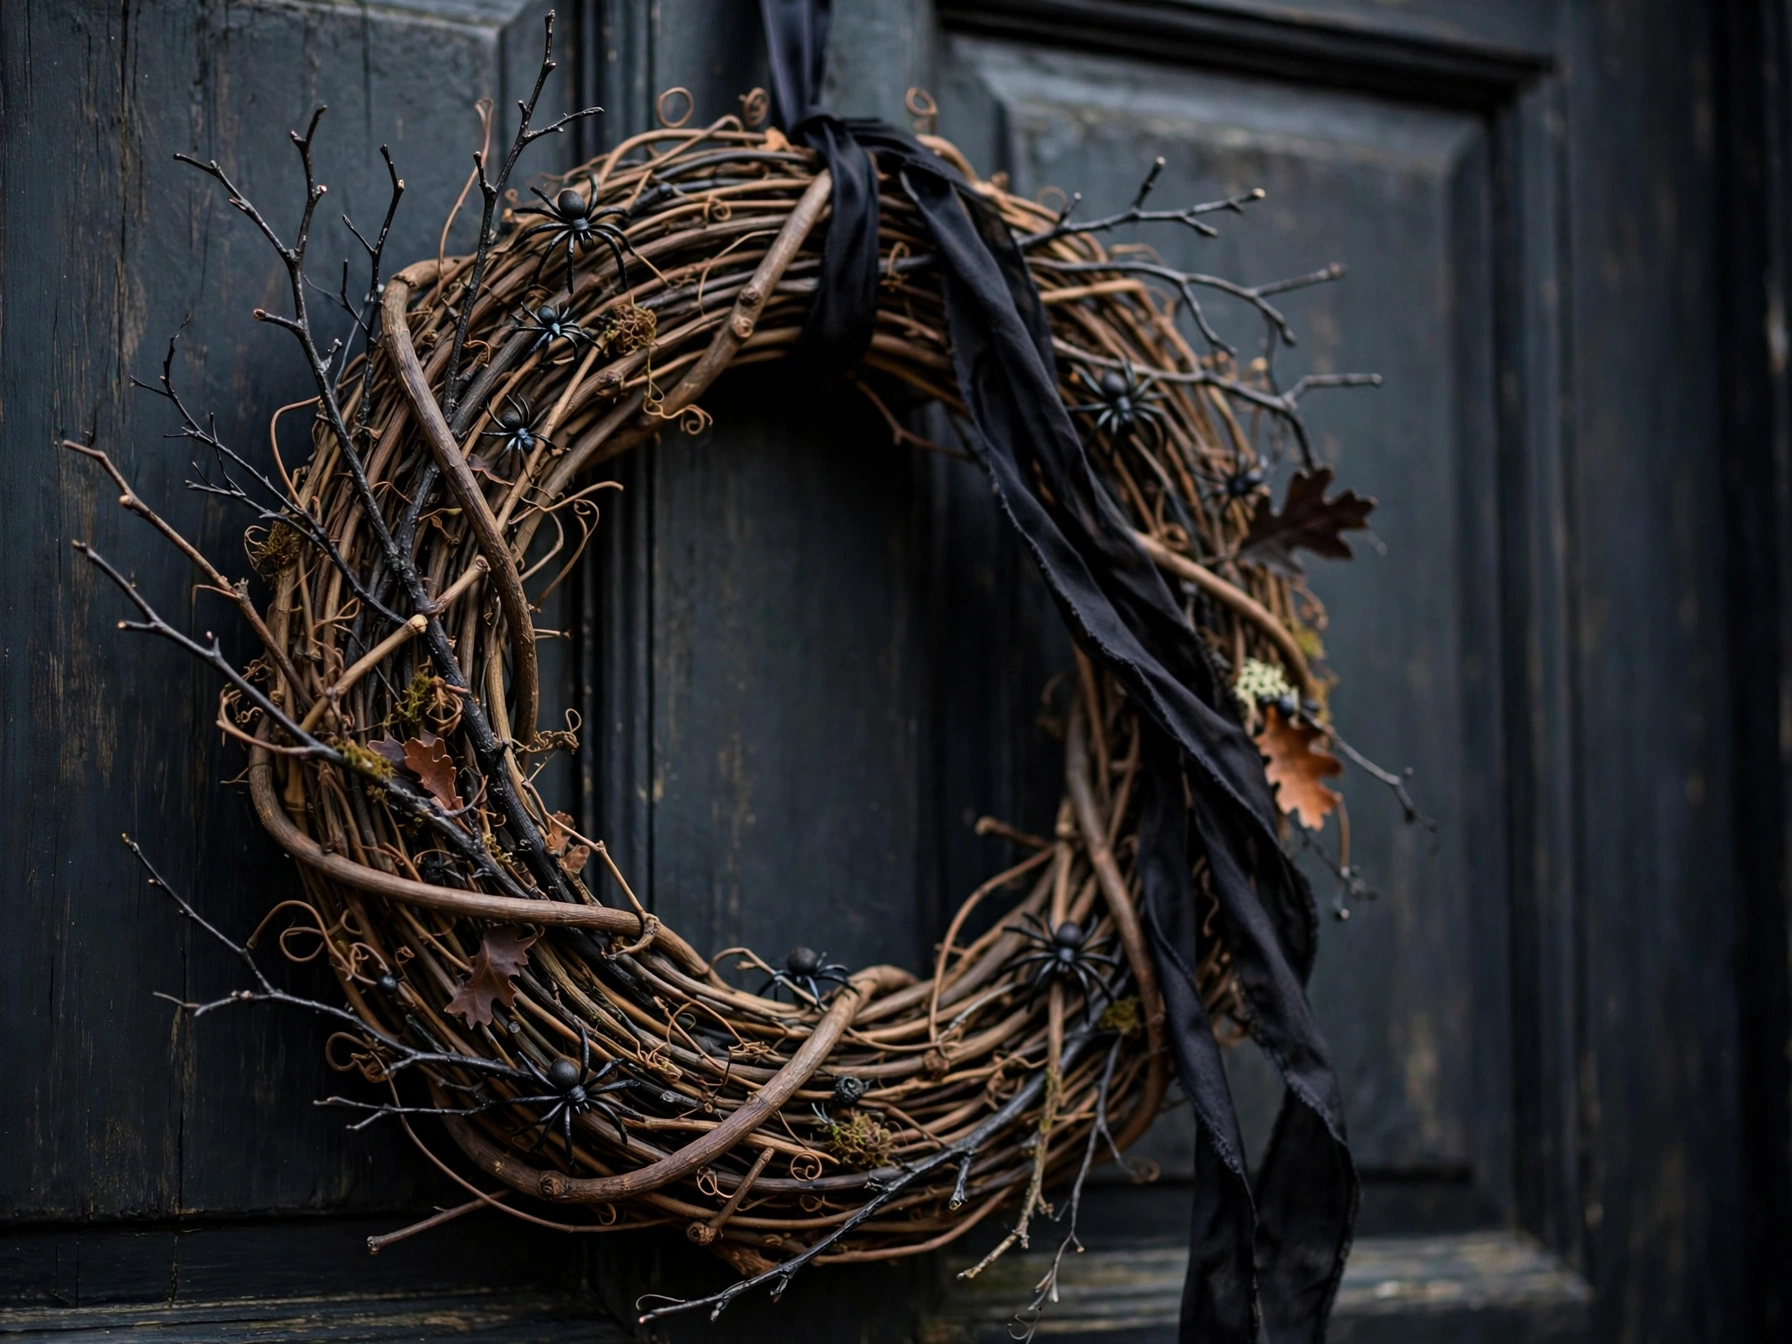
A wreath is the fastest way to Halloween-ify an entrance. Start with a grapevine or foam base and build outward: dark branches, a ribbon, and small spooky accents. Everything assembles flat on a table.
Why it works visually: A wreath frames the door the way a picture frame holds art — it tells visitors "this house is decorated" in one glance.
Materials: Grapevine wreath base, black or deep-purple ribbon, artificial branches or twigs, small plastic spiders, hot glue gun.
Instructions:
- Wrap the ribbon around the wreath base, leaving a loop at top for hanging.
- Hot-glue branches radiating outward for a wild, organic shape.
- Glue 3–5 small spiders at asymmetric points — not evenly spaced.
- Hang with an over-the-door hook (no nails needed).
- Fluff and adjust from ten feet back — wreaths always look different at distance.
DIY time: 30–45 minutes.
Estimated cost: $10–$18.
Best placement: Front door, obviously — centered at eye level.
Styling tip: Asymmetry is your friend. A wreath that's slightly wild on one side looks artful; a perfectly even one looks store-bought.
14. Skeleton Welcome Committee
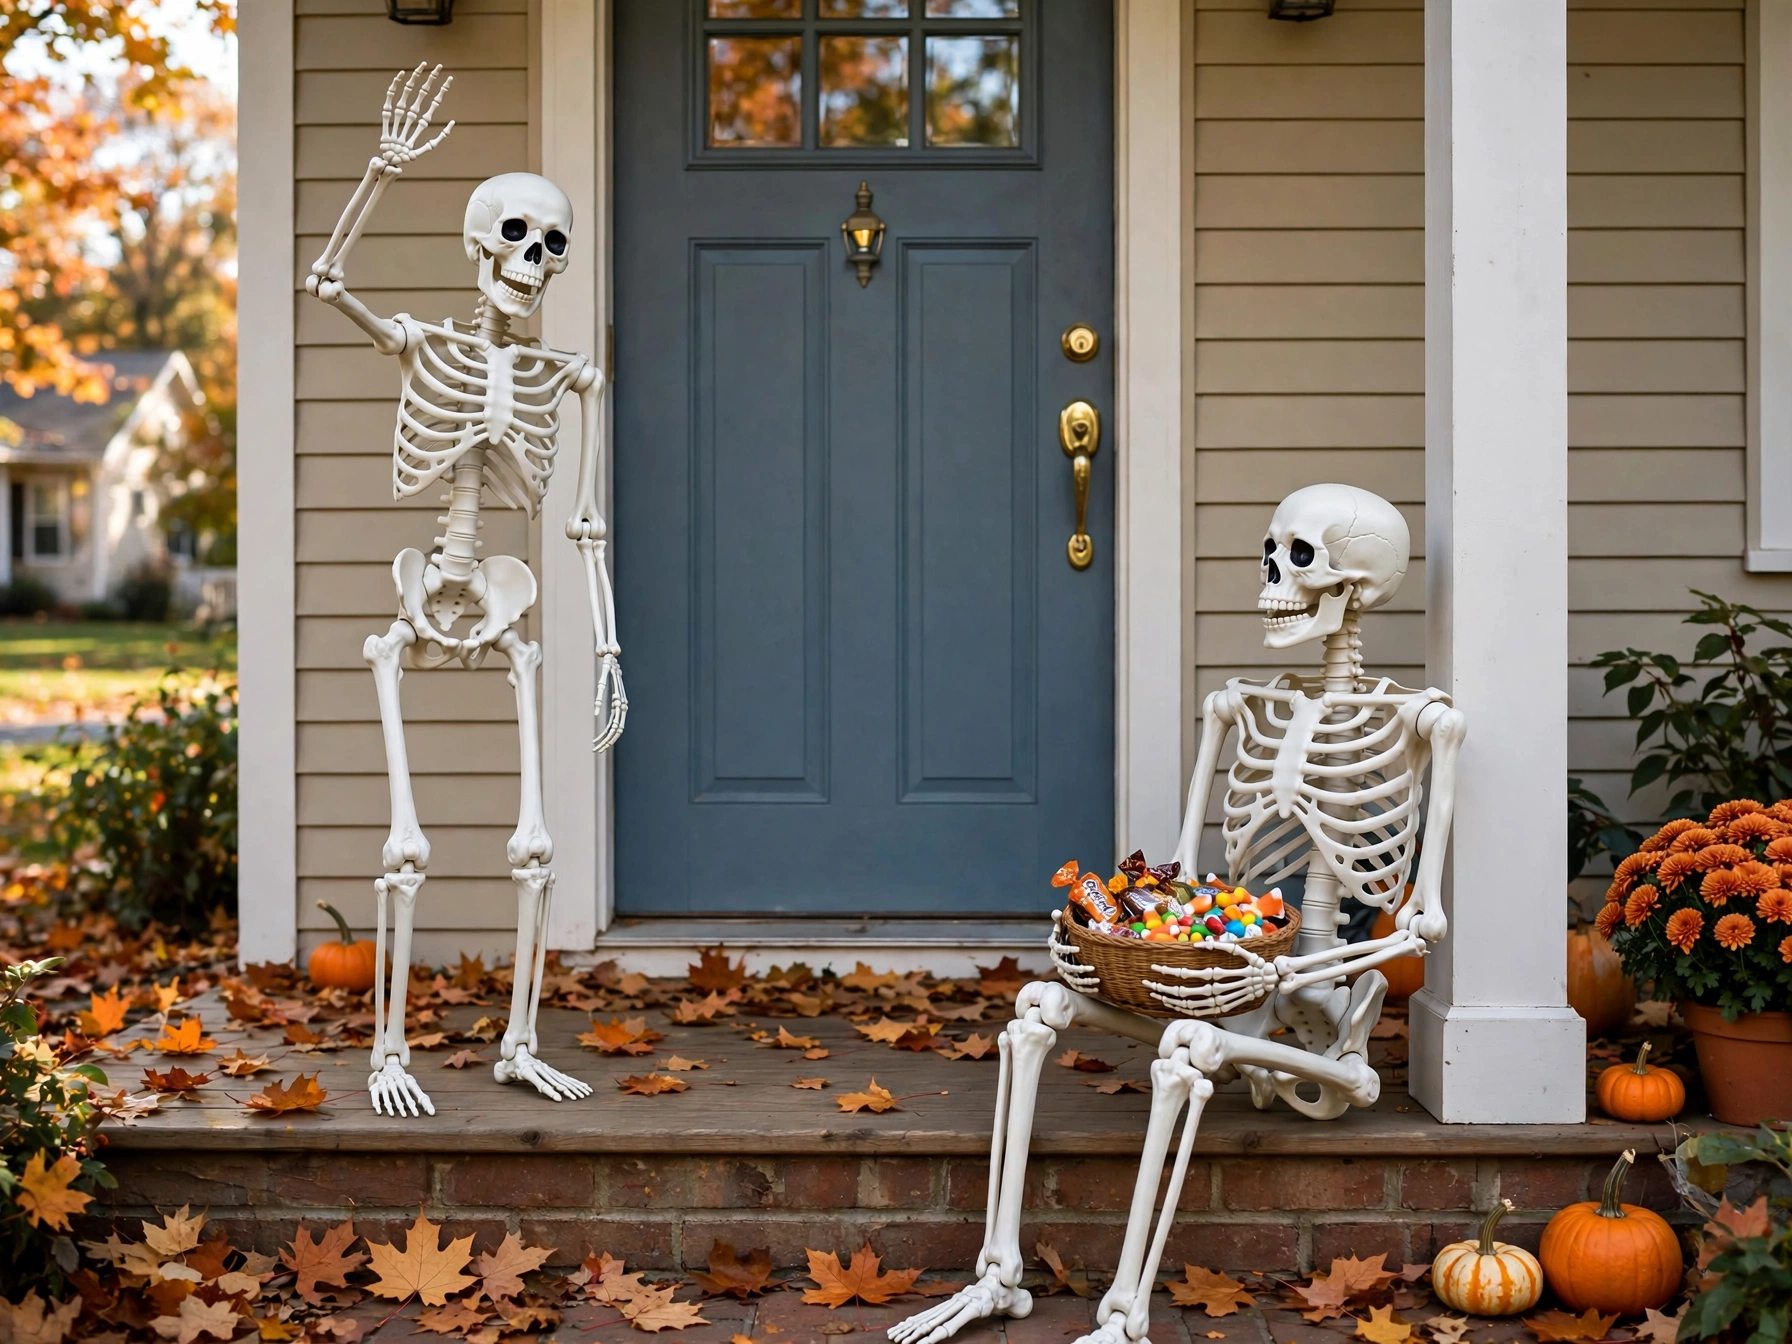
A pair of posable skeletons flanking the front door — one waving, one "holding" a candy bowl — is the friendliest possible Halloween greeting. Kids love them, and they're endlessly reposable through the season.
Why it works visually: Human-shaped figures at human scale are instantly engaging. Posing them in welcoming gestures flips skeletons from scary to funny.
Materials: 2 posable plastic skeletons (3-foot or 5-foot), optional small candy bowl, zip ties for posing.
Instructions:
- Pose one skeleton with an arm raised in a wave; wire the joints or zip-tie them in place.
- Pose the second seated or leaning, "offering" the candy bowl.
- Place one on each side of the door, slightly angled toward approaching visitors.
- Secure against wind — lean them against the wall or stake them lightly.
- Repose weekly to keep neighbors amused.
DIY time: 20 minutes.
Estimated cost: $15–$30 for the pair.
Best placement: Flanking the front door or at the top of porch steps.
Styling tip: Give them props that change — a tiny hat one week, holding a pumpkin the next. Returning visitors will look forward to the updates.
15. Halloween Pathway Lanterns
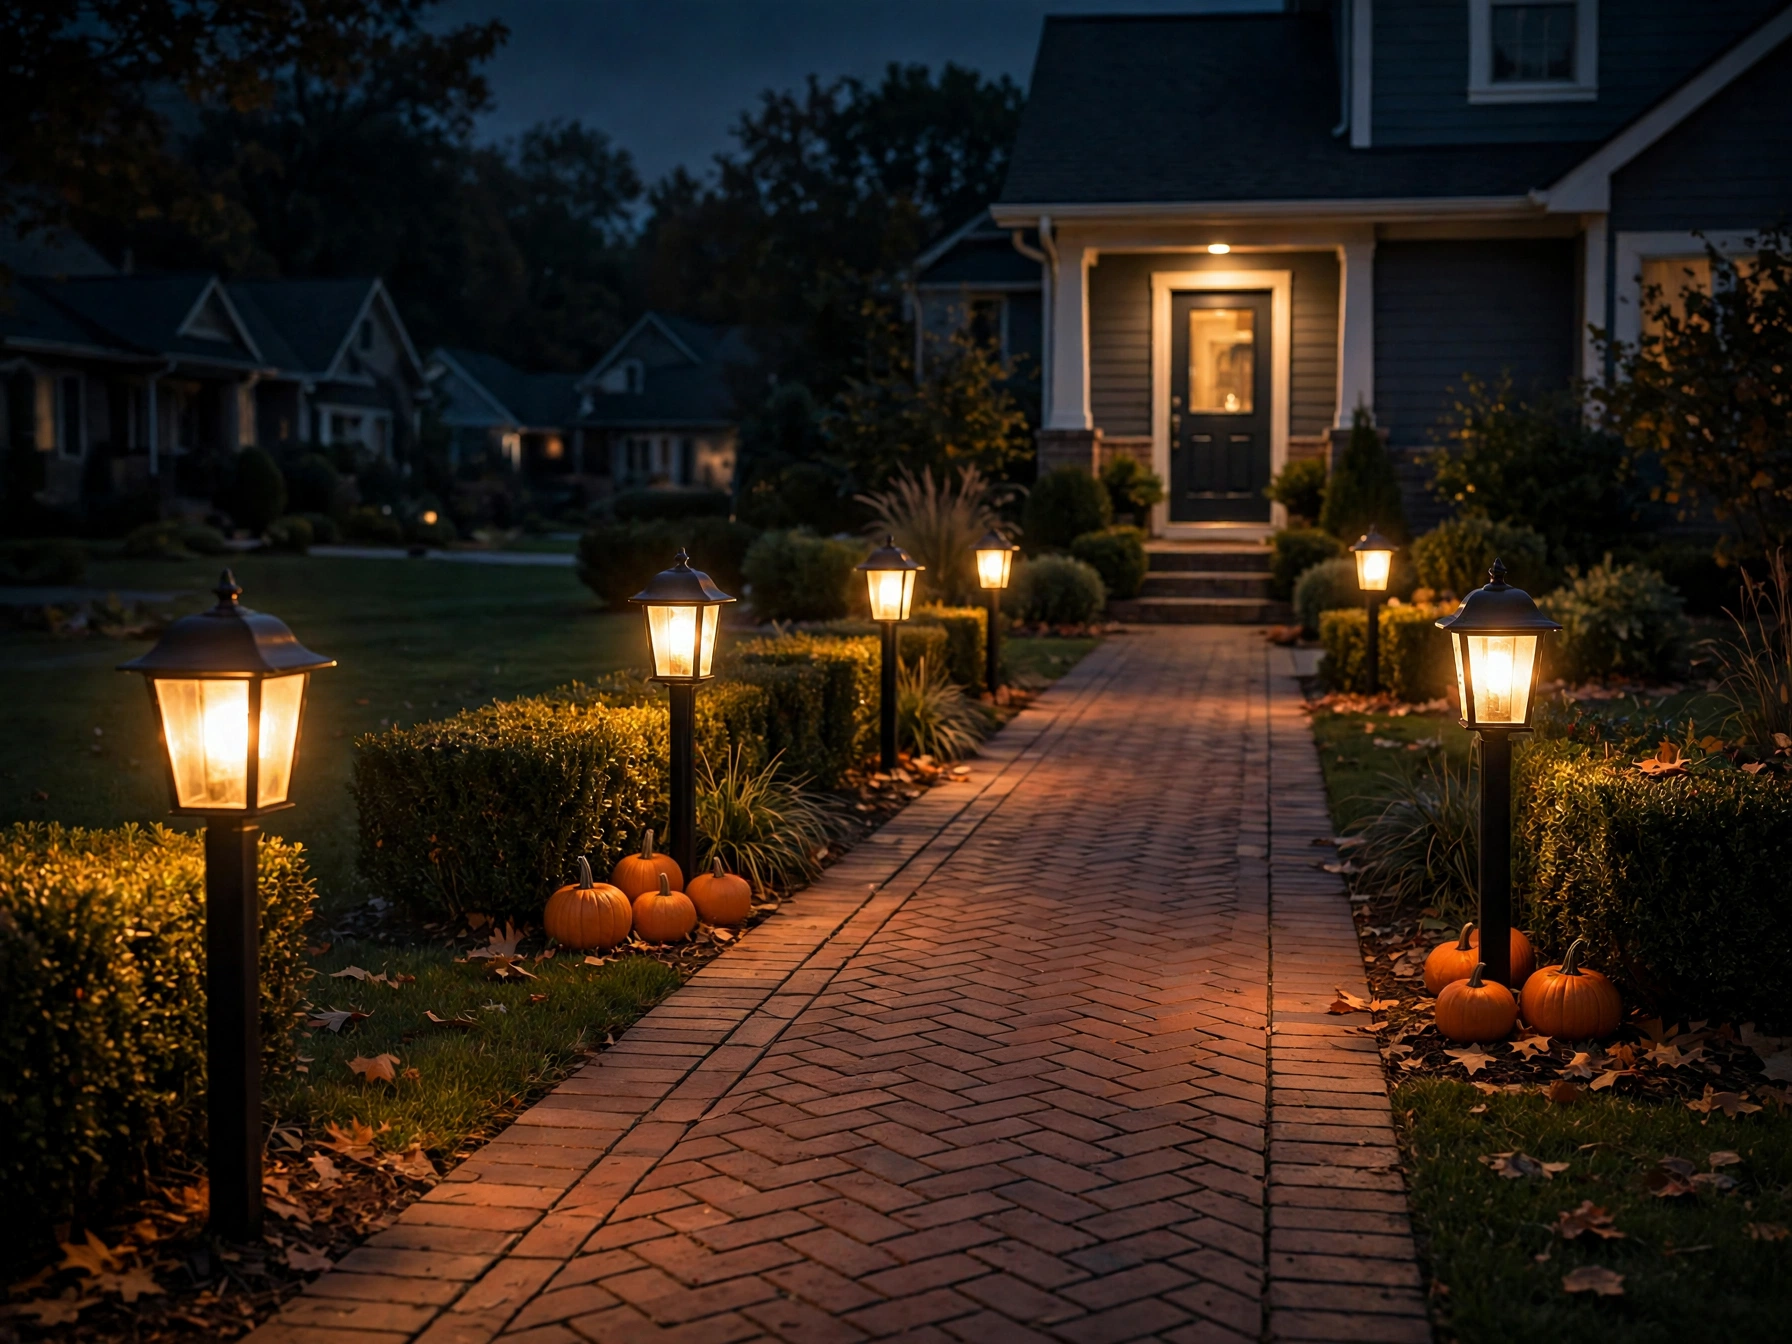
A lit pathway is both decoration and hospitality: it guides trick-or-treaters safely to your door while looking magical. Outdoor-rated battery lanterns or LED stake lights do the job with no wiring.
Why it works visually: A line of warm lights receding into the dark is one of the most inviting sights in home decorating — it literally draws people forward.
Materials: 6–10 outdoor-rated battery lanterns or LED stake lights, warm white color temperature.
Instructions:
- Count your pathway length and space lights every 3–4 feet.
- Alternate sides for a natural, non-runway look.
- Push stake lights firmly into soil, or set lanterns on flat stones.
- Use the built-in timers for dusk activation.
- Check the path yourself at night — you want glow, not glare in visitors' eyes.
DIY time: 20 minutes.
Estimated cost: $15–$30.
Best placement: Front walkway, driveway edge, or garden path.
Styling tip: Tuck a small pumpkin beside every third light — the pairing of light and pumpkin is classic for a reason.
Cute Halloween Decorations for Bedrooms and Small Spaces
16. Halloween Fairy-Light Headboard
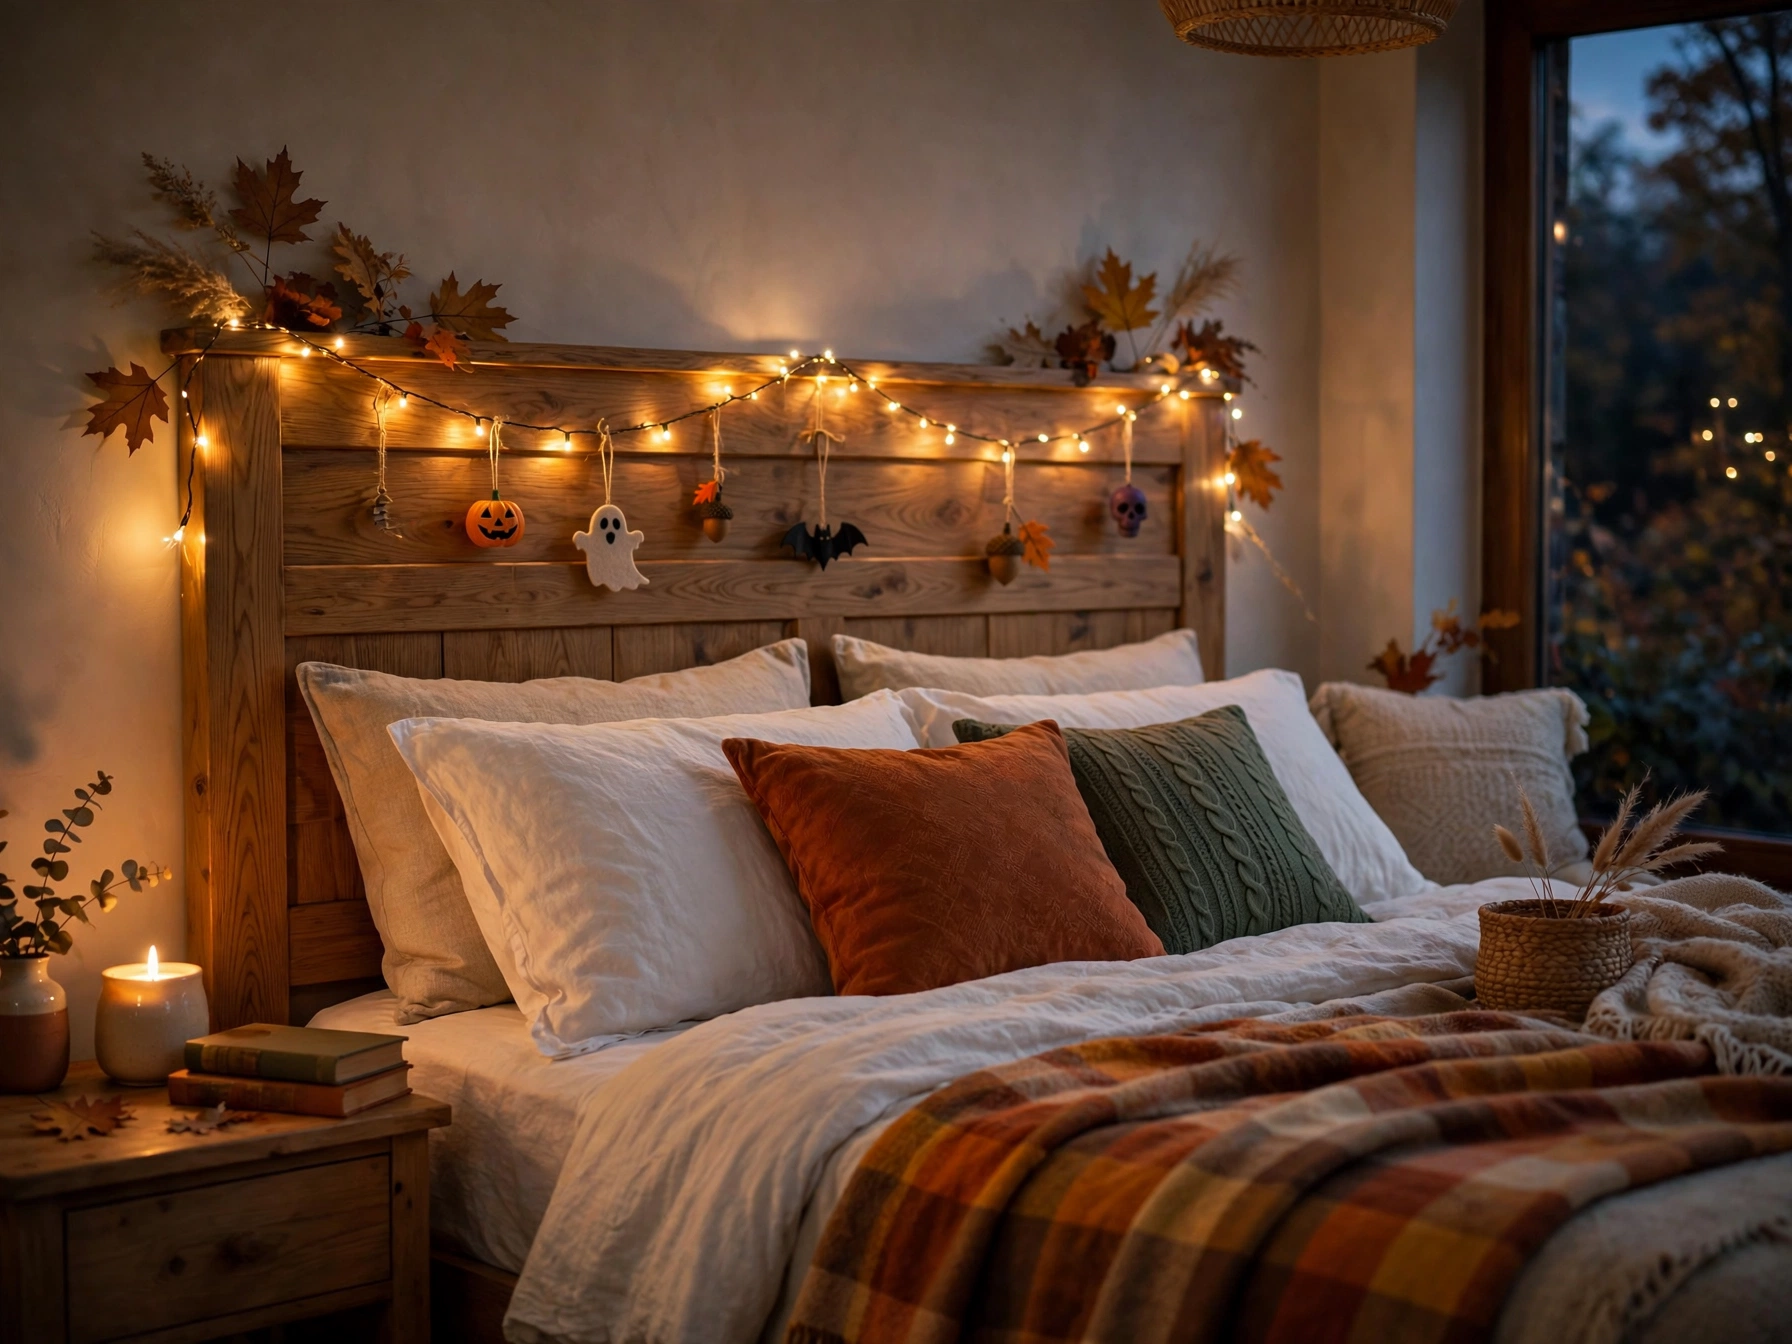
Draping warm LED fairy lights along a headboard turns a bedroom into a cozy Halloween retreat in about ten minutes. It's the highest comfort-to-effort ratio on this entire list.
Why it works visually: Soft points of light against a dark headboard create depth and warmth — the bedroom equivalent of candlelight, with none of the risk.
Materials: One 20–30 foot strand of warm-white LED fairy lights (battery powered), small removable clips.
Instructions:
- Starting at one end of the headboard, weave the light strand loosely along the top edge.
- Let some sections drape down a few inches for a casual look.
- Secure every 12 inches with a removable clip — no nails, no damage.
- Add a couple of small hanging Halloween ornaments (mini pumpkins, bats) to the strand.
- Switch on at bedtime; battery packs with timers are worth the extra dollar.
DIY time: 10–15 minutes.
Estimated cost: $6–$12.
Best placement: Headboard, or along a bedroom shelf if you have no headboard.
Styling tip: Warm white only — cool white reads as Christmas, multicolor reads as party. Warm white reads as autumn.
17. Mini Pumpkin Shelf Decorations
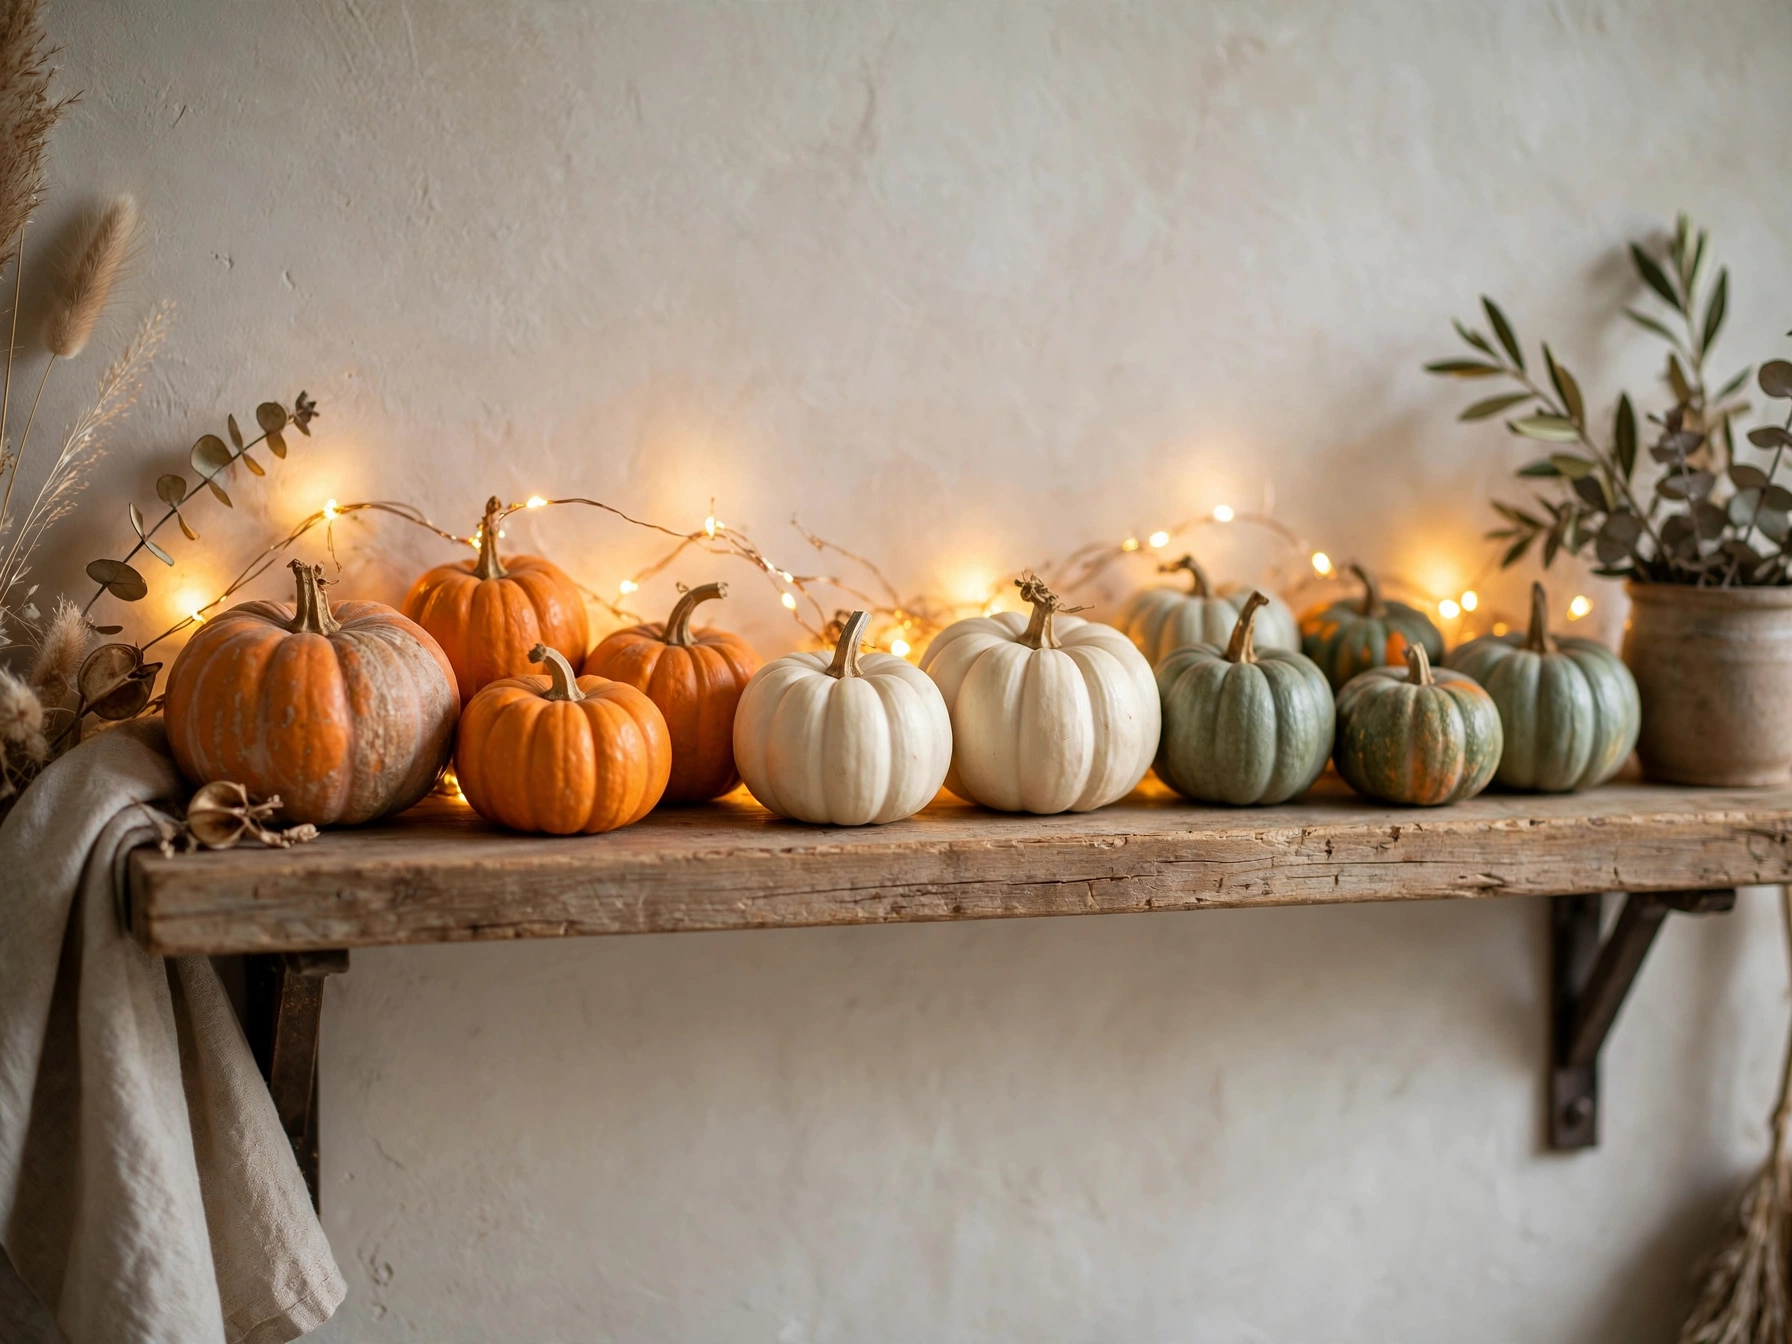
A shelf of miniature pumpkins is the small-space decorator's secret weapon: maximum seasonal impact in about six inches of depth. Real mini pumpkins, faux ones, or a mix — nobody can tell at shelf distance.
Why it works visually: Repetition of small identical-ish objects is deeply satisfying to the eye. The shelf becomes a little harvest display.
Materials: 8–15 mini pumpkins (real or faux), shelf space about 2 feet wide.
Instructions:
- Clear the shelf section completely — start from empty.
- Place the largest minis first, spacing them unevenly.
- Fill gaps with smaller ones, turning some on their sides.
- Tuck a short strand of LED fairy lights behind the back row.
- Stand back and remove two — less is more at small scale.
DIY time: 15 minutes.
Estimated cost: $5–$10.
Best placement: Bedroom shelf, bathroom shelf, kitchen open shelving, or a bookshelf.
Styling tip: Mix in one unexpected item — a small framed photo, a candle — so it looks styled rather than like a produce stand.
18. Cute Ghost Pillow Arrangement
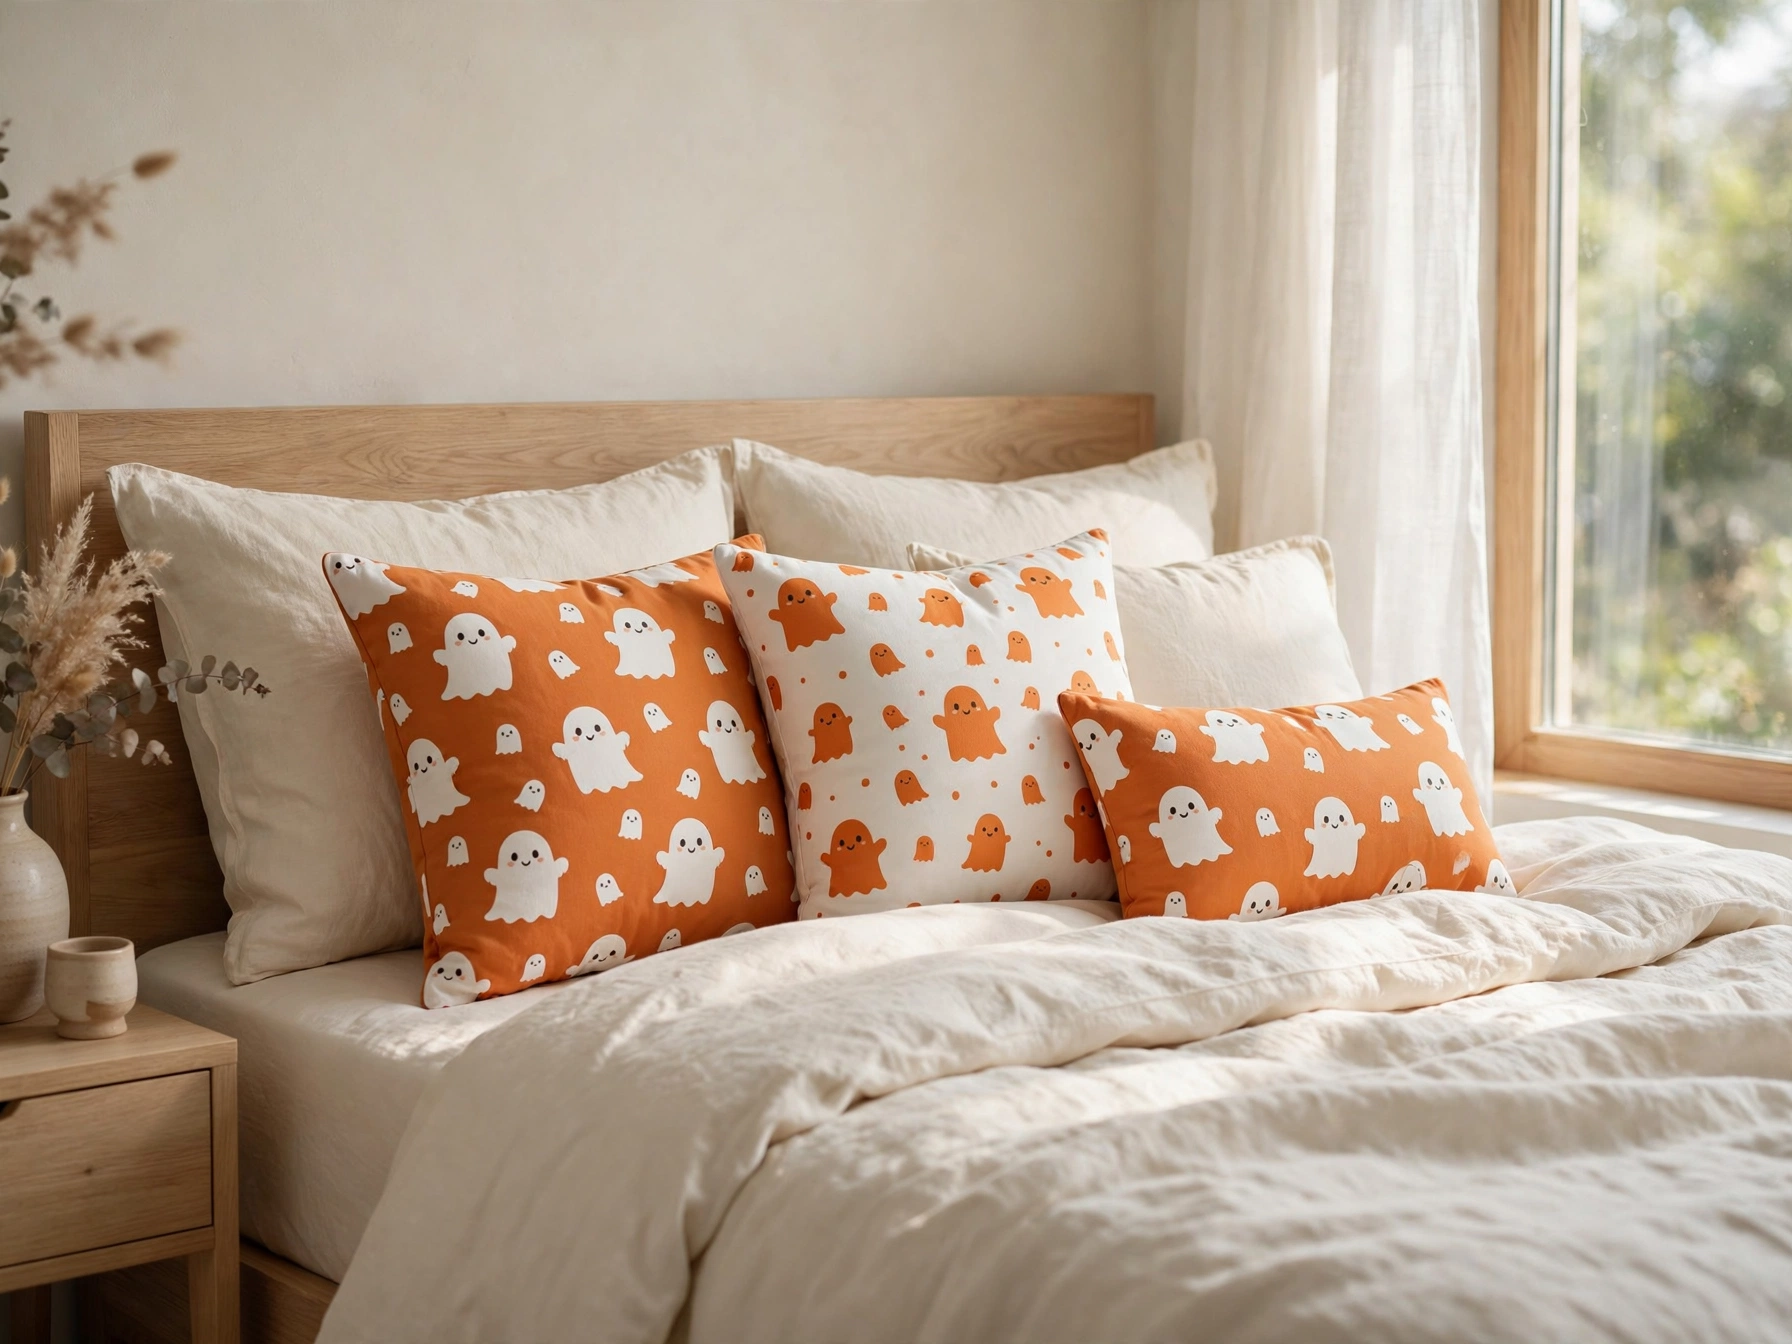
Swapping in two or three Halloween-themed cushions — ghosts, "boo" lettering, subtle spiderweb patterns — is the bedroom equivalent of the living-room sofa styling in idea #6, scaled down.
Why it works visually: Bedrooms are personal spaces, so cute beats scary here. Playful motifs keep the room feeling restful, not haunted.
Materials: 2–3 Halloween cushion covers (ghost, pumpkin, or text designs), existing pillows to put them on.
Instructions:
- Choose covers in your bedroom's existing color palette plus one Halloween accent.
- Put them on your sleeping pillows or a reading chair's cushions.
- Arrange casually — one flat, one propped — not in a rigid row.
- Store your everyday covers where you'll find them November 1st.
DIY time: 5 minutes.
Estimated cost: $10–$20 for covers.
Best placement: Bed, reading nook, or bedroom accent chair.
Styling tip: If your bedroom is neutral, this is where you can go bolder with the Halloween motifs — the calm base keeps it from overwhelming.
19. Halloween Window Silhouettes
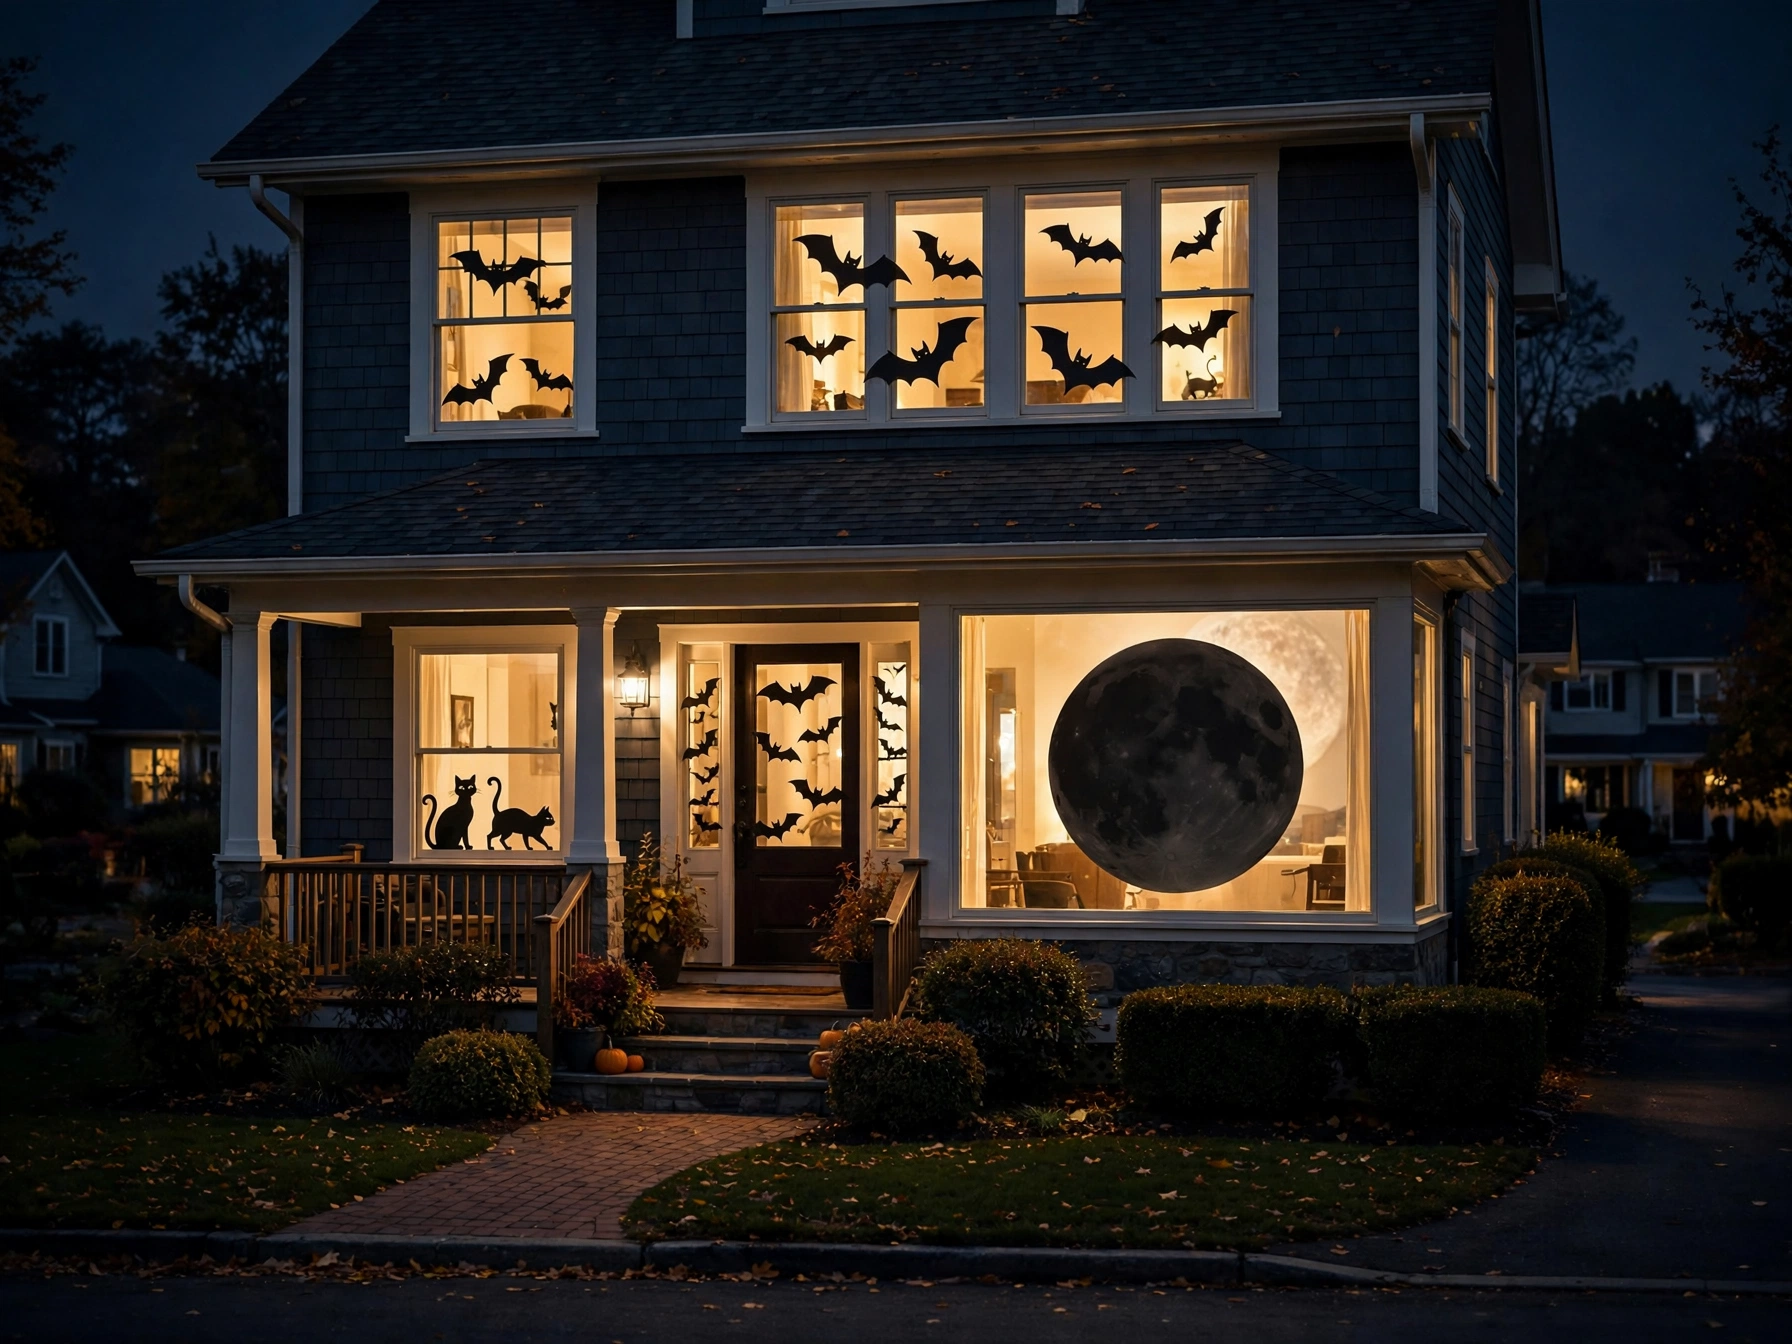
The indoor version of the porch classic: black paper shapes taped inside bedroom or living room windows, visible from outside at night and charming from inside during the day.
Why it works visually: Backlit silhouettes are pure graphic design — bold black shapes against glowing glass. From the street, your windows become the decoration.
Materials: Black construction paper or cardstock, scissors, painter's tape, printed templates (optional).
Instructions:
- Cut simple shapes: cats, bats, moons, haunted houses — silhouettes forgive wobbly cutting.
- Tape them to the inside of the window glass with small painter's tape loops.
- Arrange with space between shapes — crowding kills the effect.
- At night, leave a lamp on in the room to backlight them.
- Peel off in November; painter's tape leaves no residue on glass.
DIY time: 30 minutes.
Estimated cost: $3–$5.
Best placement: Street-facing windows, especially bedrooms and living rooms.
Styling tip: One large moon with a few small bats beats twenty small shapes — scale contrast is what makes silhouettes dramatic.
20. Small-Space Halloween Decorating Corner
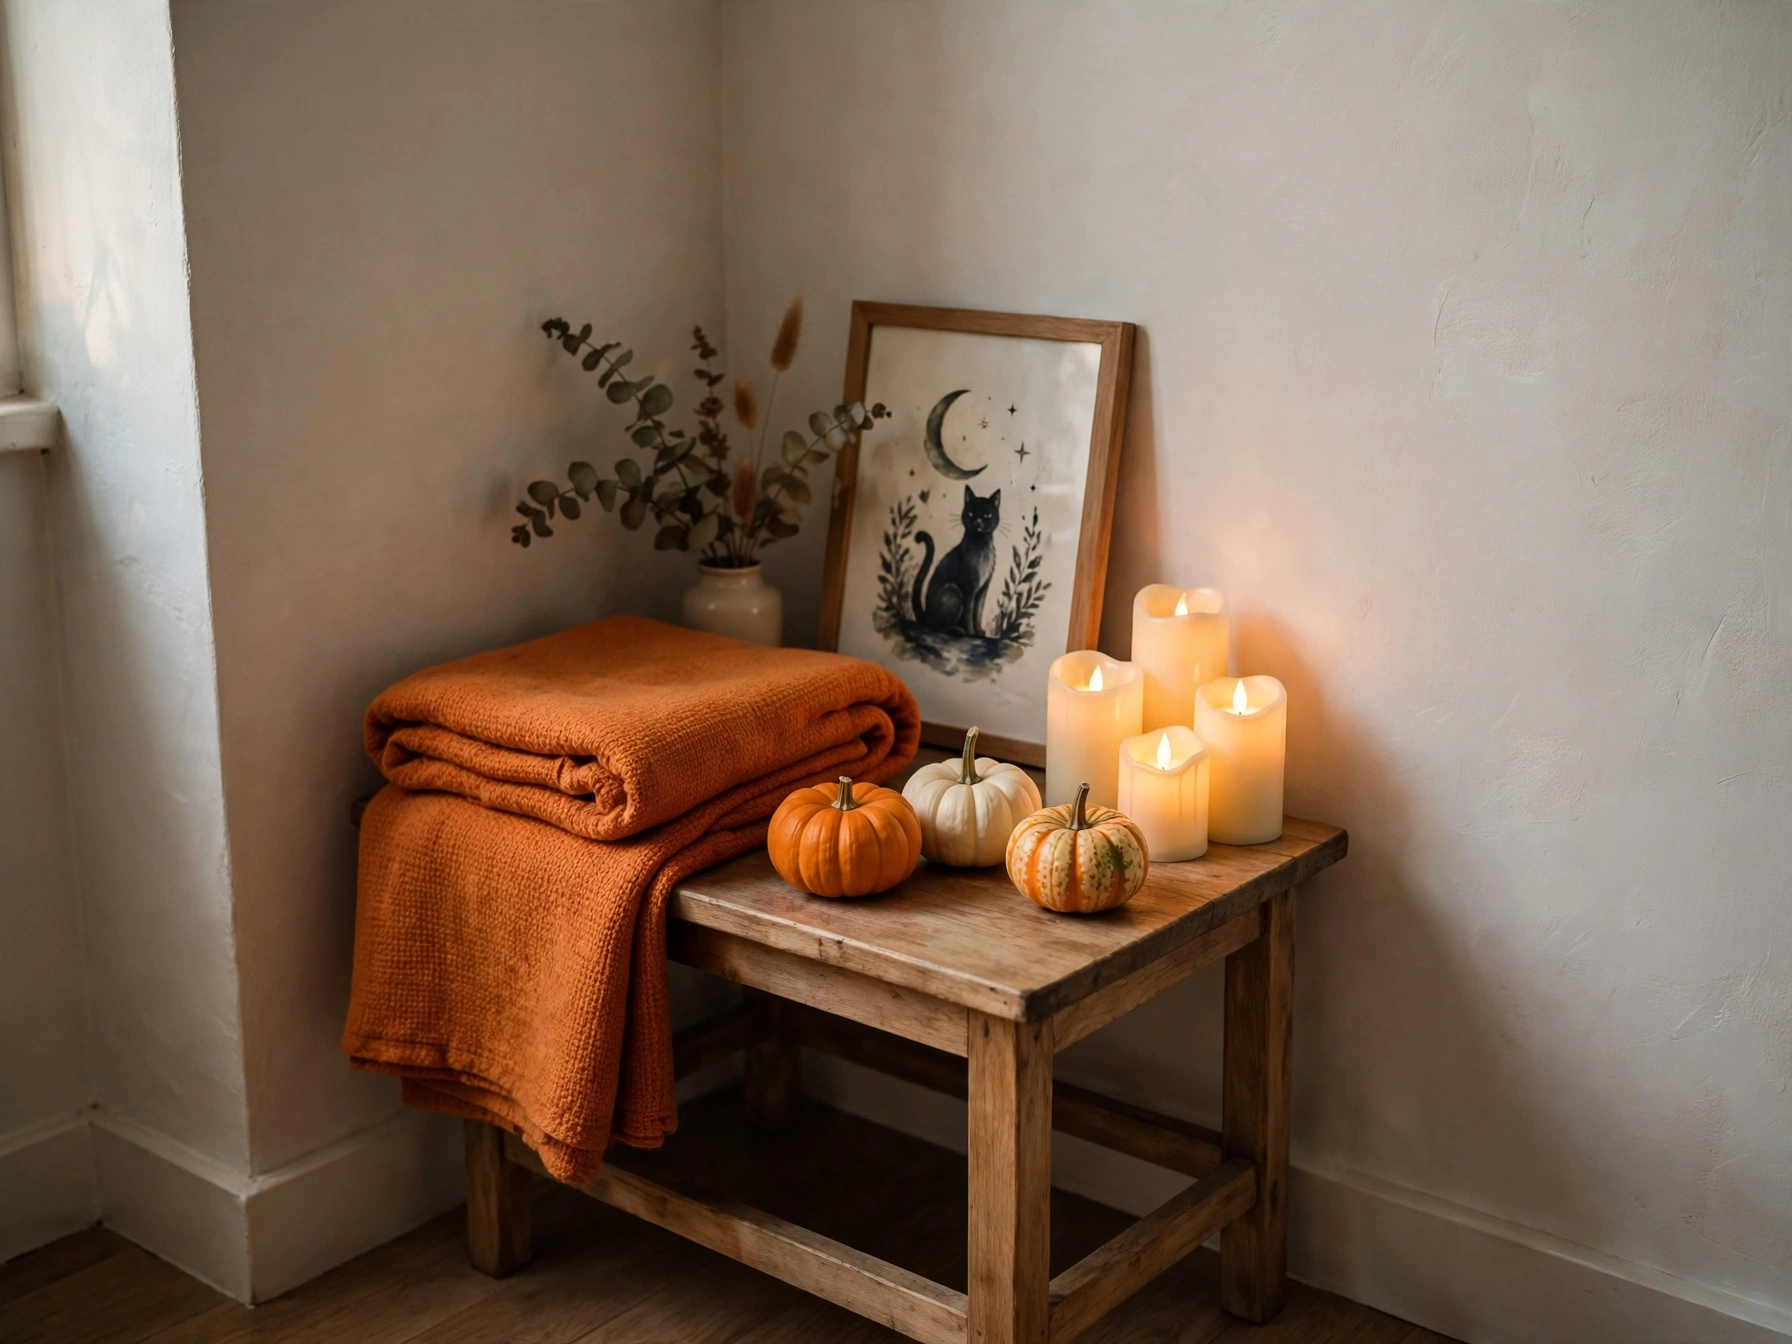
Renters and apartment dwellers: you don't need a whole haunted house. One well-styled corner — a side table, a chair, a shelf section — can carry your entire Halloween.
Why it works visually: A concentrated vignette reads as intentional design. One perfect corner beats thin decorations scattered across a whole apartment.
Materials: One small table or sturdy box as a base, 3–5 mini pumpkins, one LED candle cluster, a small Halloween sign or framed print, a folded throw.
Instructions:
- Choose your corner — near the entry works best for the "welcome" effect.
- Drape the throw over the table as a base cloth.
- Build upward: tallest item (sign or print) at back, pumpkins in front, candles lowest.
- Keep the footprint tight — everything should fit in about two square feet.
- Photograph it — if it looks good in a photo, it looks good in person.
DIY time: 20 minutes.
Estimated cost: $10–$20.
Best placement: Entryway corner, beside the TV, or a bedroom corner.
Styling tip: The "rule of three" — three heights, three textures, three colors max. Constraints make small displays look professional.
Budget-Friendly Halloween Decorations
21. Recycled Bottle Ghost Lanterns
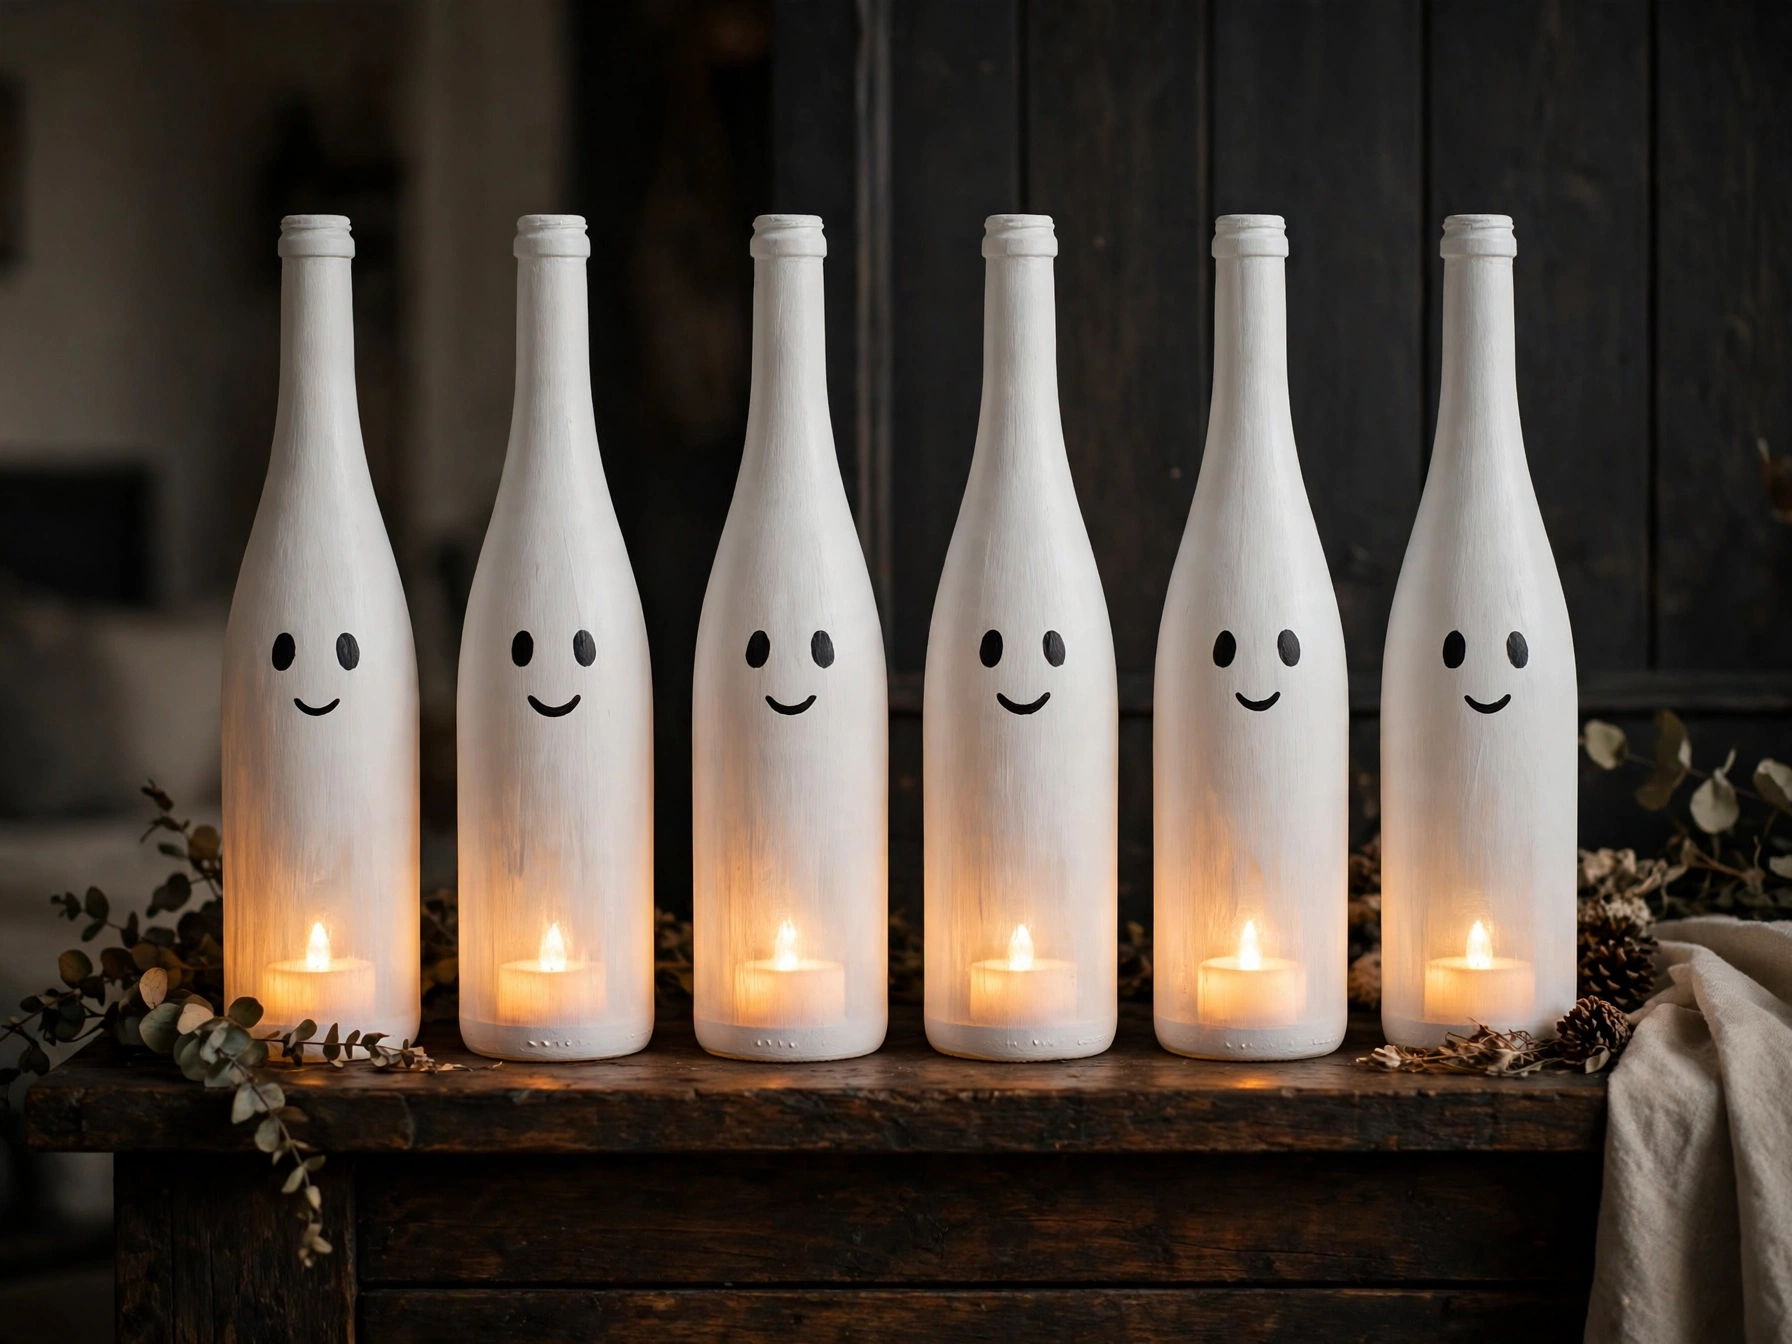
Empty glass bottles — wine, sparkling water, whatever — become ghost lanterns with white paint and an LED tea light dropped inside. It's recycling as decorating, and the tall bottle shape makes elegantly elongated ghosts.
Why it works visually: The unusual proportions (tall and narrow vs. the usual round pumpkin) add variety to a display. Frosted glass glows beautifully.
Materials: Clean empty glass bottles, white spray paint or acrylic paint, black paint pen, LED tea lights.
Instructions:
- Remove labels by soaking bottles in warm soapy water.
- Spray or brush two thin coats of white paint on the outside.
- Draw simple ghost faces with the paint pen once dry.
- Drop an LED tea light into each bottle.
- Line them along a mantel or windowsill.
DIY time: 45 minutes plus drying.
Estimated cost: $3–$6 (paint and lights only — bottles are free).
Best placement: Mantel, windowsill, or as a table runner down the dining table.
Styling tip: Vary bottle heights dramatically — a tall wine bottle next to a short stubby one looks like a ghost family.
22. Handmade Halloween Paper Garlands
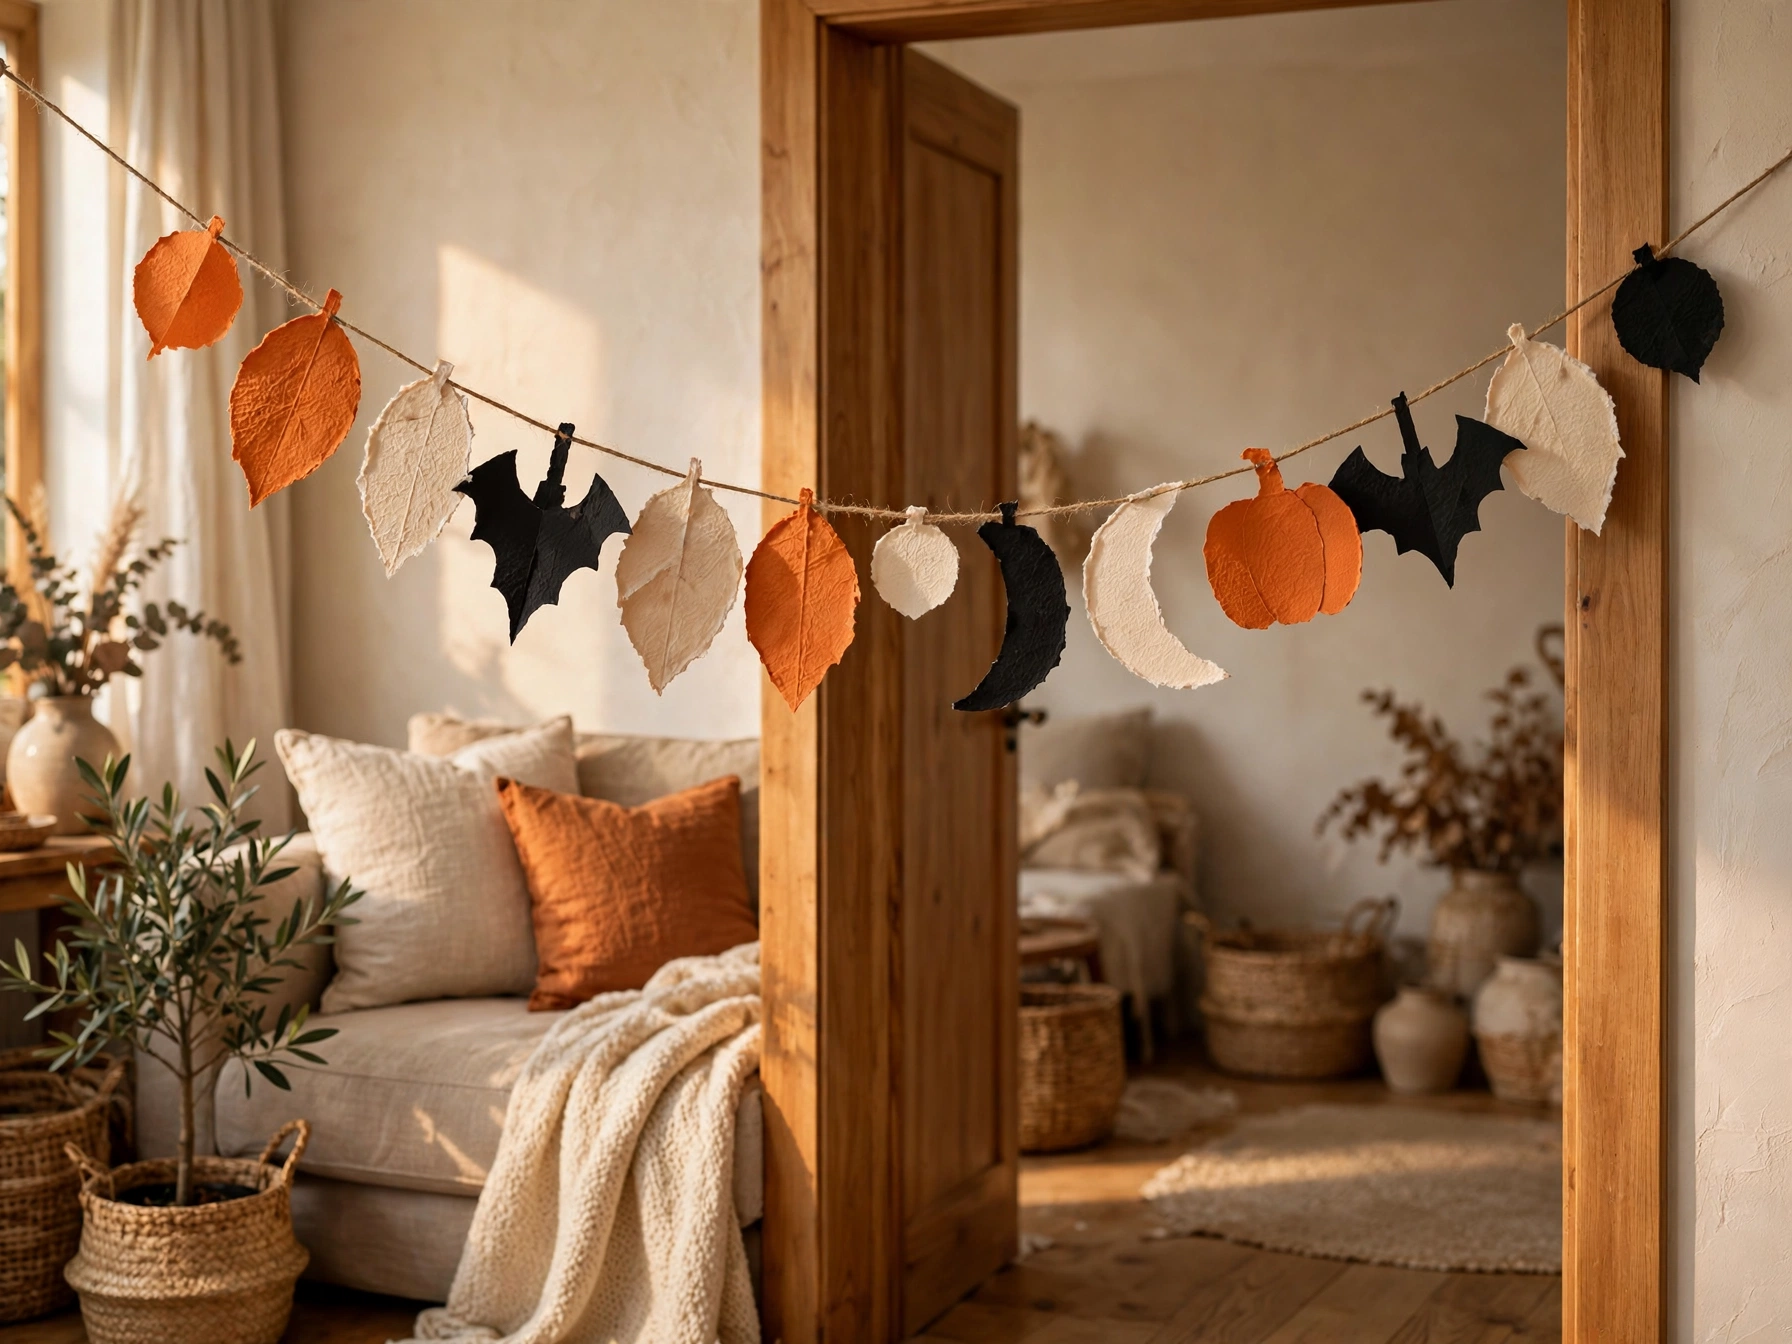
Paper garlands are the unsung heroes of budget decorating: pennies per foot, endlessly customizable, and they fill big empty spaces (doorways, mantels, stair rails) fast.
Why it works visually: A swag of repeating shapes creates a festive "finished" feeling that individual decorations can't — it's the difference between decorated and dressed-up.
Materials: Orange, black, and cream construction paper, string or yarn, scissors, hole punch or tape.
Instructions:
- Cut paper into simple shapes: triangles (candy corn), circles (pumpkins), or bat silhouettes.
- Punch a hole at the top of each shape, or tape the string across the back.
- Thread 12–20 shapes per 6-foot strand, alternating colors.
- Hang with removable hooks or painter's tape.
- Make two or three strands for a fuller look.
DIY time: 45 minutes per strand.
Estimated cost: $2–$4 per strand.
Best placement: Across doorways, along mantels, down stair rails, or over windows.
Styling tip: Slightly vary the spacing between shapes — machine-perfect spacing looks flat, organic spacing looks handmade in the best way.
23. Painted Pumpkin Alternatives
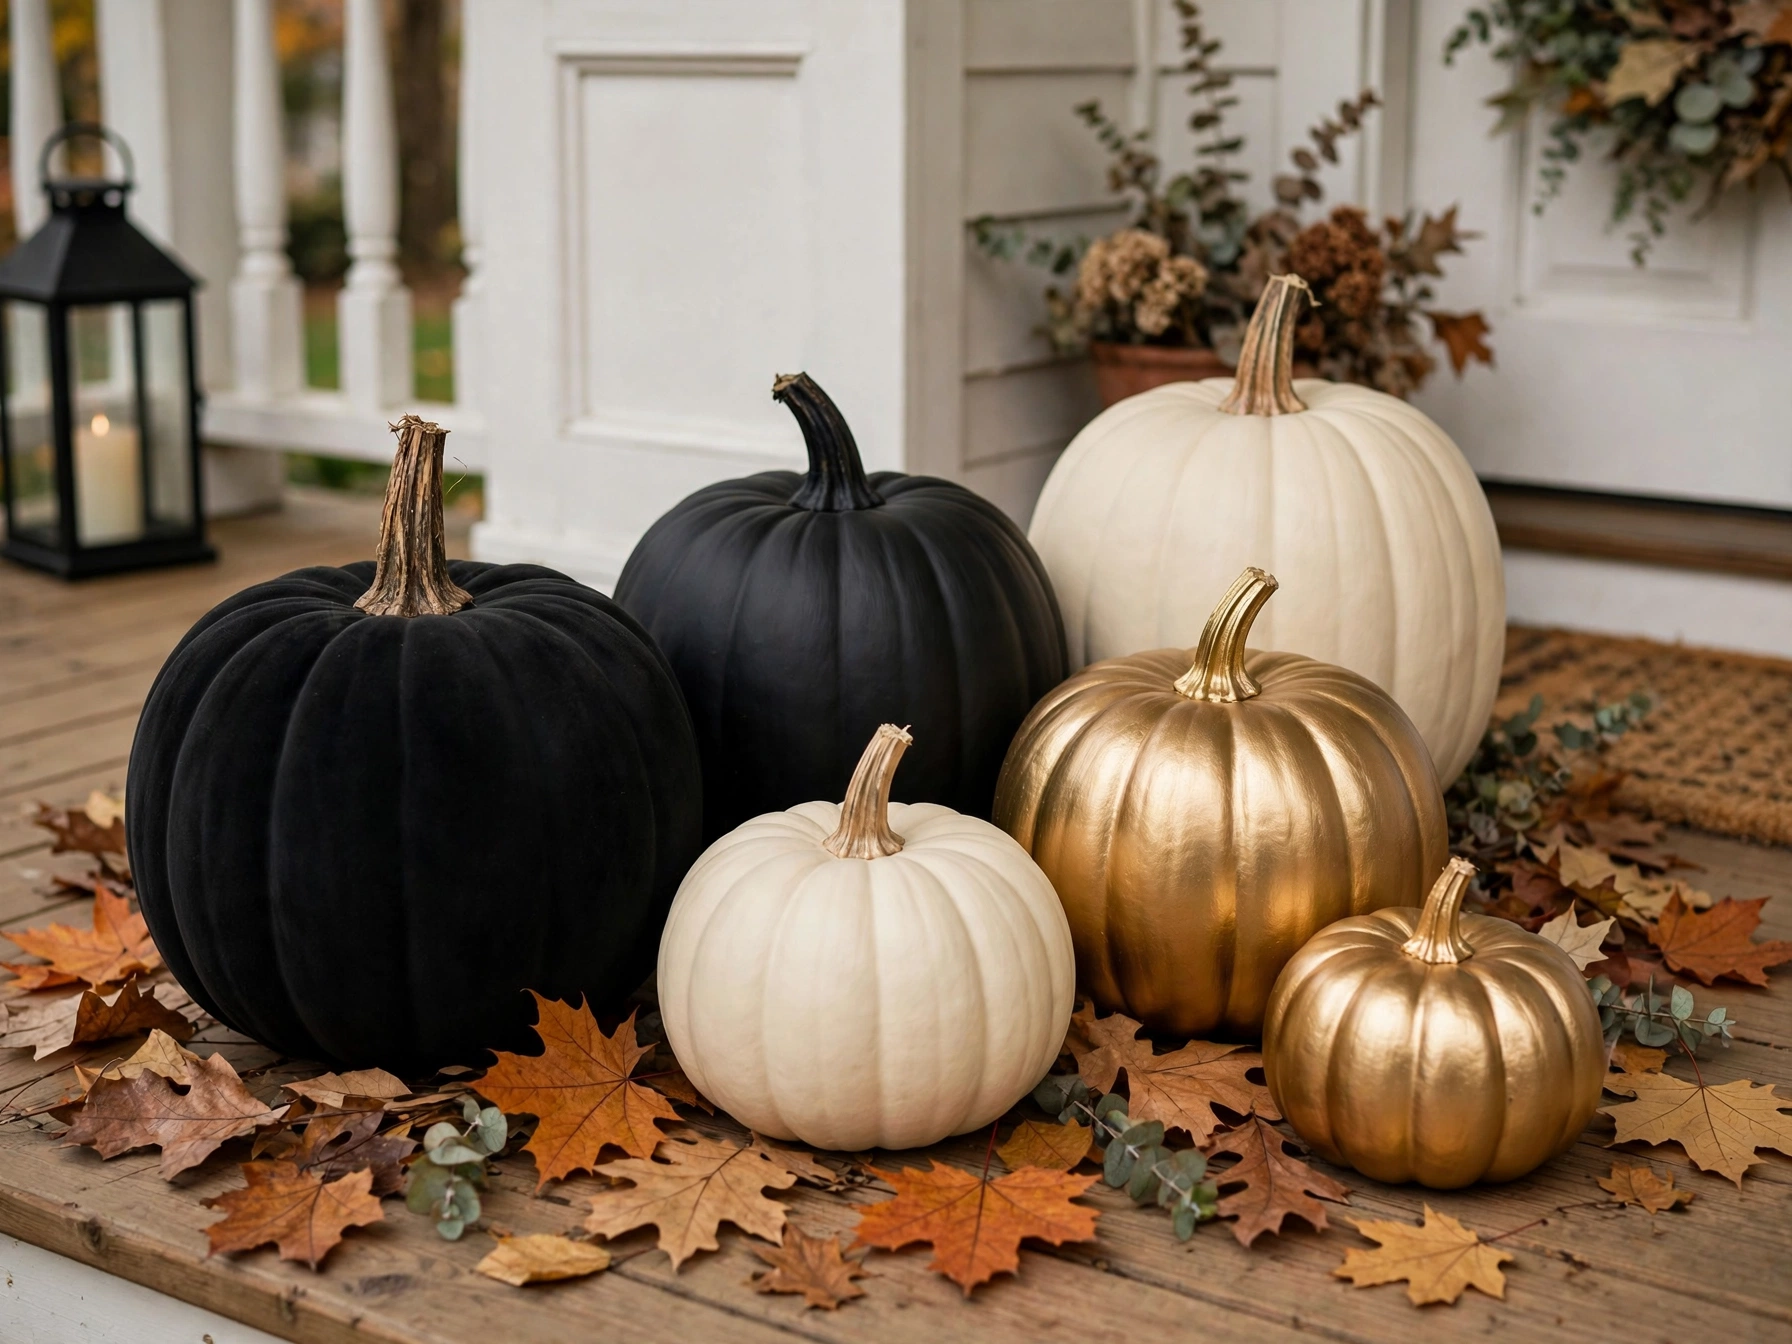
Not into carving, and fresh pumpkins rot on your porch? Painted faux pumpkins are the answer: buy once, decorate endlessly, store and reuse for years. Each October, repaint or restyle them for a fresh look.
Why it works visually: A flawless painted finish — matte black, cream, metallic gold — looks more sophisticated than any carved face, and the shapes stay perfect all season.
Materials: Faux pumpkins (foam or plastic), acrylic craft paint in your chosen colors, small brushes or sponge dabbers.
Instructions:
- Wipe pumpkins clean and let dry.
- Apply two thin coats of your base color, drying between coats.
- Add details: dots, stripes, a single word ("boo"), or metallic accents on the stem.
- Seal with a clear matte spray if they'll live outdoors.
- Store in a box with tissue paper after Halloween — they'll last years.
DIY time: 1 hour plus drying.
Estimated cost: $12–$25 for pumpkins and paint (amortized over many years).
Best placement: Anywhere — porch, mantel, table, shelves.
Styling tip: Commit to one palette per year (all cream one year, black-and-gold the next) and the collection always looks intentional.
24. Halloween Dining Table Centerpiece
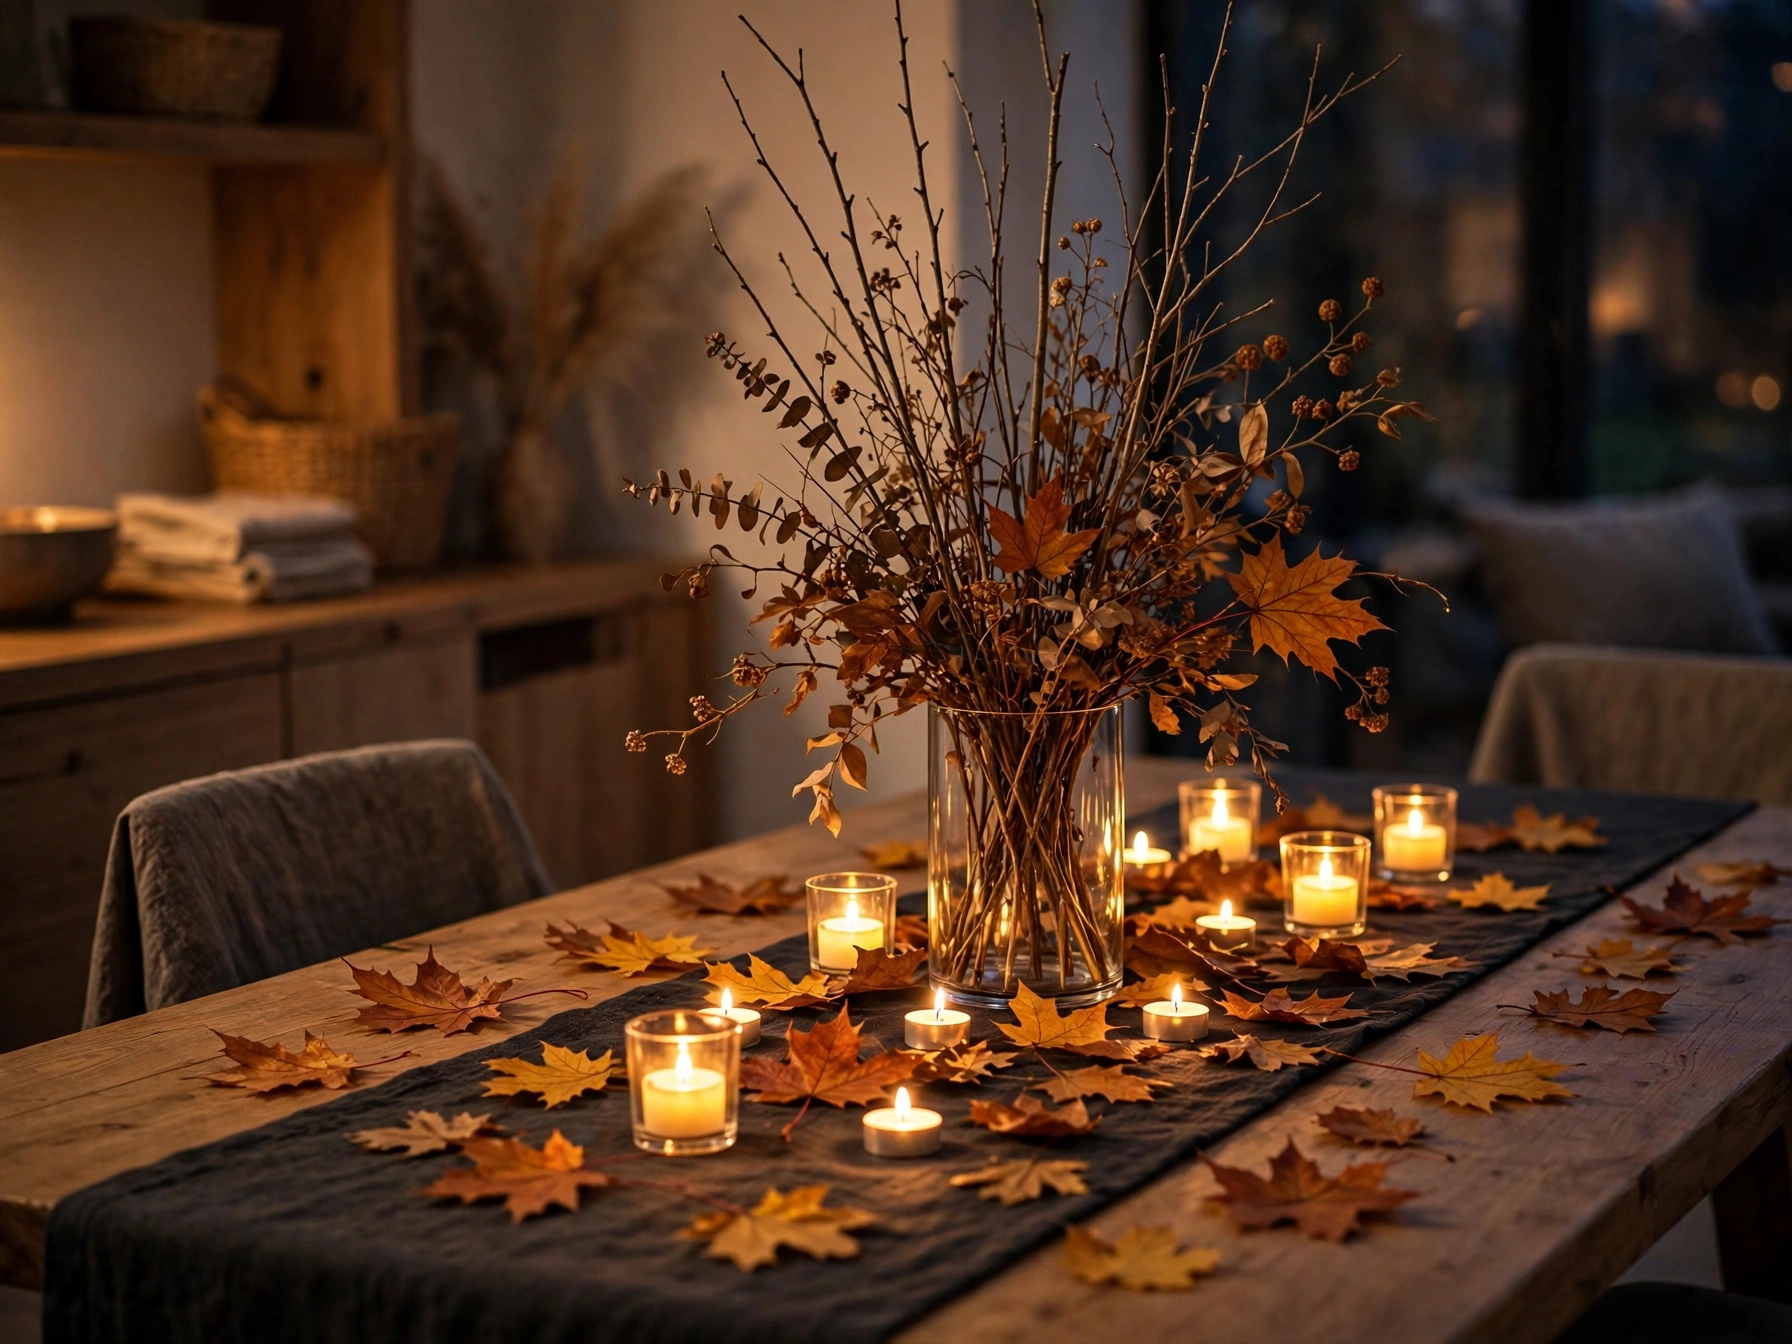
The dining table is where Halloween gatherings happen, so it deserves five minutes of attention. The formula: a runner or cloth, something tall in the middle, low glowing accents around it.
Why it works visually: Height in the center with light at the edges creates a "gather around" feeling — the table becomes a destination, not just furniture.
Materials: Dark table runner or cloth, one tall centerpiece (branch arrangement, tall pumpkin stack, or candelabra with LED candles), 4–6 LED tea lights, scattered faux leaves.
Instructions:
- Lay the runner down the table's center.
- Place your tall item dead center.
- Scatter tea lights on either side, interspersed with faux leaves.
- Check sightlines — diners should see each other over the centerpiece.
- Light everything 30 minutes before guests arrive.
DIY time: 15 minutes.
Estimated cost: $8–$15.
Best placement: Dining table, obviously — sized to the table, not the room.
Styling tip: Keep the centerpiece under 12 inches tall or put it on a tray you can lift off when the food arrives. Practicality is part of good design.
25. Reusable Halloween Decoration Storage Box
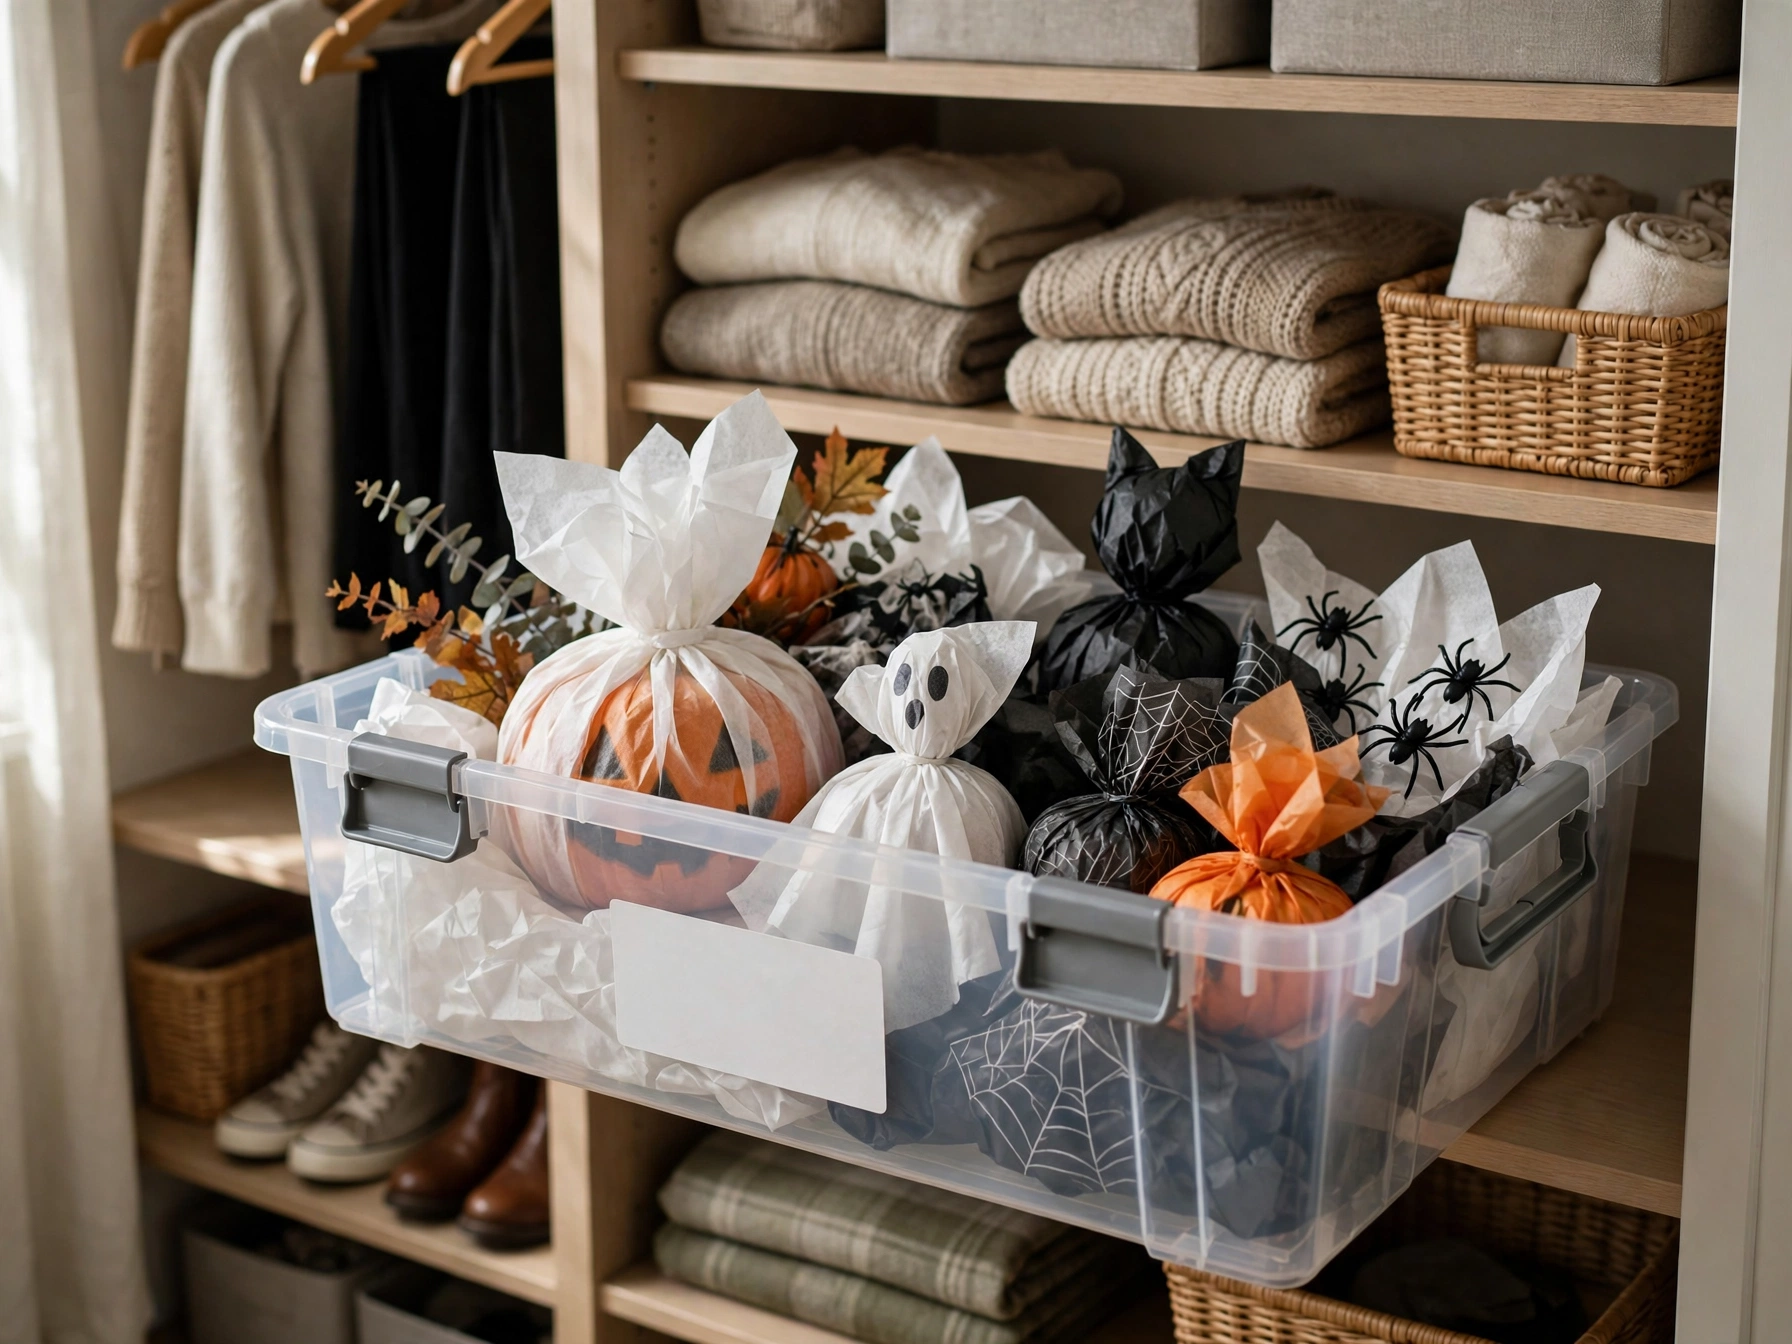
The most budget-friendly Halloween decoration is the one you already own. A dedicated storage box — one clear bin, labeled, with tissue paper — turns this year's purchases into next year's free decorations.
Why it works visually: This isn't about this Halloween; it's about every future Halloween looking better because you kept the good stuff organized instead of crushed in an attic corner.
Materials: One large clear plastic bin, tissue paper or bubble wrap, a label maker or marker.
Instructions:
- As you undecorate in November, sort into keep / toss / donate.
- Wrap fragile items (ceramic pumpkins, glass lanterns) in tissue.
- Place heavier items at the bottom, delicate on top.
- Label the bin clearly: "HALLOWEEN — open first week of October."
- Store somewhere climate-stable — attics cook paint, basements flood.
DIY time: 30 minutes once a year.
Estimated cost: $8–$12 for the bin.
Best placement: A closet shelf, under a bed, or a garage shelf — wherever you'll actually find it.
Styling tip: Tape a phone photo of this year's display inside the lid. Next October, you'll recreate the look in half the time.
Quick Comparison: 8 Ideas at a Glance
| Decoration Idea | Best Location | Difficulty | DIY Time | Est. Cost |
|---|---|---|---|---|
| Floating fabric ghosts | Living room ceiling | Easy | 30 min | $5–$10 |
| Glowing pumpkin lanterns | Porch steps / mantel | Easy | 20–40 min | $10–$20 |
| Paper bat wall | Large blank wall | Easy | 45 min | $3–$6 |
| Black-and-gold mantel | Fireplace / console | Medium | 30 min | $25–$40 |
| Front porch pumpkin display | Porch | Easy | 45–60 min | $20–$40 |
| Window silhouettes | Street-facing windows | Easy | 30 min | $3–$5 |
| Front door wreath | Front door | Medium | 30–45 min | $10–$18 |
| Mason jar luminaries | Windowsills / shelves | Easy | 1 hour | $8–$12 |
All costs are estimates for typical US craft-store and dollar-store pricing in 2026.
Beyond the List: Decorating Like an Editor
How to choose a Halloween color palette
Pick two main colors and one accent, then stick to them. Classic orange-and-black is cheerful; black-and-gold is elegant; cream-and-sage is modern-farmhouse; purple-and-black is moody. The palette matters more than any single decoration — it's what makes a home look "decorated" instead of "cluttered with Halloween stuff."
How to decorate a small apartment without drilling holes
Removable adhesive hooks, painter's tape, tension rods inside window frames, and over-the-door hangers cover 95% of hanging needs. Lean larger items (signs, framed prints) on shelves instead of mounting them. Command-style strips rated for the weight, applied to clean drywall, remove cleanly when used as directed.
How to combine cute and spooky
Assign zones: cute in bedrooms and kitchens (ghost pillows, smiling pumpkins), spooky in the living room and porch (bats, skeletons, dark mantels). The contrast keeps the house feeling balanced — nobody wants a genuinely frightening bedroom.
How to reuse Halloween decorations next year
Buy neutral bases (plain wreath forms, white pumpkins, black candlesticks) and swap only the accent pieces yearly. Store everything in one labeled bin with tissue paper. Faux pumpkins repainted in a new palette look completely different year to year.
How to avoid making small rooms look cluttered
One statement piece per room, not ten small ones. A single dramatic mantel beats scattered trinkets. Keep surfaces at least one-third clear — empty space is what makes decorations visible instead of lost in noise.
How to create an attractive Halloween entrance on a limited budget
Prioritize in this order: lighting (one $8 lantern with a timer), the door (a $12 wreath or a $4 paper bat swarm on it), the ground (pumpkins you already have, or $5 minis). That's under $25 for an entrance that looks complete from the street.
Common Halloween decorating mistakes
- Too many themes at once. Skeletons plus cute ghosts plus elegant black-and-gold plus horror-movie gore reads as a yard sale. Pick one lane per space.
- Blocking the walkway. Every decoration that narrows the path to your door is a liability on a dark night with excited kids.
- Real candles near fabric and paper. Just don't — LED technology is excellent now.
- Forgetting the lights. A great display with no lighting is invisible after 6pm, which is when Halloween actually happens.
Simple decorating checklist
- Choose your color palette (2 mains + 1 accent)
- Pick one statement piece per room
- Buy LED lights before anything else
- Check walkways stay clear
- Put lanterns on timers
- Photograph the result (for next year's reference)
- Label the storage bin before you forget what's in it
Safety First: The Short Version
- LED candles around fabric and paper: Flameless LEDs produce no heat, so they're safe near fabric ghosts, paper bats, and dried foliage — the three materials real flames would endanger. This is the single biggest safety upgrade in modern Halloween decorating.
- Outdoor lights: Use lights rated for outdoor/wet use outside. Indoor-only fairy lights will fail (or worse) in rain. Look for "outdoor" or an IP44 rating on the packaging.
- Entrances and walkways: Keep every path to your door fully clear and well-lit. On Halloween night, excited children in costumes with limited visibility are using your walkway — decoration is never worth a fall.
- Hanging decorations: Anything suspended overhead should be lightweight and secured with hardware rated for at least twice its weight. Keep hanging items at least 7 feet off the floor in walkways.
- Small children and pets: Avoid small detachable parts (googly eyes, small spiders) within reach of toddlers and pets. Battery compartments on LED lights should be screwed shut, not just clipped.
- Rental walls: Removable adhesive hooks and painter's tape, used as directed on clean surfaces, are the renter's best friends. Test in an inconspicuous spot first.
Add a handmade touch
Pair these decorating ideas with something you made yourself. Our free Fun Corner patterns include a mini Halloween pumpkin (no carving, no rotting) and Little Luna, the Halloween witch doll — both with printable PDFs and video walkthroughs.
Browse the Fun Corner →Frequently Asked Questions
How can I decorate my house for Halloween cheaply?
Start with paper and light — a $4 pack of black cardstock becomes a bat swarm, and a $6 strand of LED fairy lights transforms any corner. Dollar stores carry tea lights, stickers, faux leaves, and mini pumpkins. Reuse what you own: mason jars, white sheets, and branches from the yard are all free decorating material.
What are the easiest DIY Halloween decorations?
Paper bat wall arrangements, window silhouettes, no-carve sticker pumpkins, and draped fabric ghosts all take under an hour with no special skills. If you can cut paper and hang things with tape, you can do every one of them.
How can I make my living room look spooky?
Dim the overheads and rely on warm accent lighting — LED candles and fairy lights do the heavy lifting. Add one dramatic wall element (bat swarm or floating ghosts), dress the sofa in a dark palette, and build a small mantel or coffee-table vignette. Lighting plus one statement piece beats a dozen small trinkets.
How do I decorate a small apartment for Halloween?
Concentrate on one vignette — a styled corner or shelf — instead of spreading thin. Use vertical space (walls, windows, ceiling) since floor space is precious. Removable hooks and painter's tape protect your deposit.
What Halloween decorations can I reuse every year?
Faux pumpkins (repaint yearly for a fresh look), wreath bases, LED candles and fairy lights, black candlesticks, fabric ghosts, and quality garlands. Store them in one labeled bin with tissue paper and they'll last a decade.
When should I start decorating for Halloween?
The first or second weekend of October is the sweet spot — early enough to enjoy it for three weeks, late enough that real pumpkins stay fresh through the 31st. Indoor items can go up earlier; save anything perishable for mid-month.
How can I decorate my front porch for Halloween?
Layer pumpkins at multiple heights using crates or steps, add warm lantern light on a dusk timer, hang a wreath on the door, and keep the walkway clear and lit. That's the complete formula — everything else is bonus.
What colors look best for elegant Halloween decor?
Black with antique gold is the classic elegant pairing. Cream with matte black suits modern homes; deep plum with charcoal fits moody traditional rooms. The key is limiting yourself to two or three colors — restraint is what reads as elegant.
The Bottom Line
You don't need to do all 25 — that's the best part. Pick two or three ideas that fit your space, start with supplies you already own, and give yourself one relaxed afternoon. A bat swarm on the wall, glowing pumpkins on the steps, and a wreath on the door will make your home feel completely, unmistakably Halloween.
The decorations people remember aren't the most expensive ones. They're the ones with a little personality — the slightly crooked ghost, the pumpkin with the goofy face, the porch that glows warm on a dark street. Start simple, have fun with it, and save the fancy mantel for next year when you've caught the bug.