My Little Pumpkin — Free Crochet Pumpkin Keychain Pattern
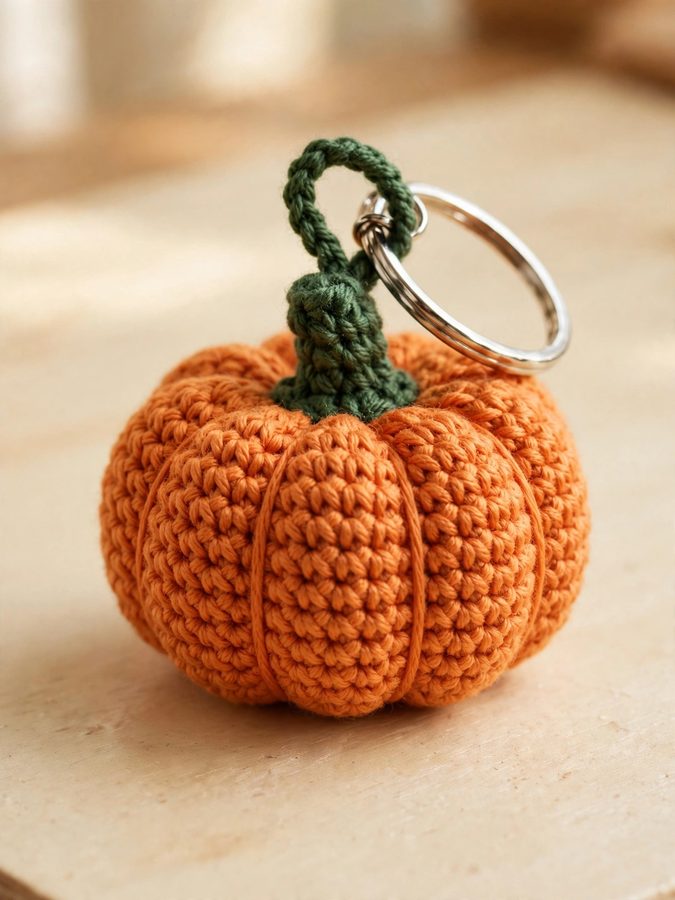
Learn how to crochet a mini pumpkin with this free Halloween pattern: a soft little amigurumi pumpkin about 2.5 inches tall, with real ridges, a green stem, and a sturdy keyring. Hang it on your bag, your keys, or your Halloween display — no carving required.
Absolute beginner · 45–90 minutes · 3.0 mm hook · US terms · free printable PDF
Read the full 29-page pattern with photos
Flip through every page right here — a photo for each step, from your first magic ring to the finished crochet pumpkin keychain. Tap the big buttons, use your keyboard arrows, or swipe. Works on phones, tablets, and computers.
Want it on paper? Download the free crochet pumpkin pattern PDF →
Materials for your crochet pumpkin
- Yarn: pumpkin-orange DK-weight (#3) cotton or acrylic — 15–25 g, plus a little forest green (3–5 g) for the stem
- Hook: 3.0 mm (keeps stitches dense so no stuffing peeks through)
- Stuffing: polyester fiberfill — one small handful
- Blunt yarn needle, small scissors, stitch marker
- Keyring: small silver split keyring
Finished size: about 5–7 cm (2–2.75 in) tall. Time: 45–90 minutes once you know the basic stitches — a perfect October afternoon project. Cost: under $8–12; most of us already own a hook and a keyring.
How this easy crochet pumpkin is built
This beginner crochet pumpkin pattern uses only one stitch — single crochet — plus its increase and decrease. Here's the journey:
- The body: crochet a sphere in spiral rounds, growing from 6 to 36 stitches and back down — 17 rounds total. If you can make a magic ring, you're already started.
- Stuffing: small tufts of fiberfill after round 15, until it's softly firm like a ripe peach.
- The ridges: the magic step — a long yarn tail pulled six times around the body creates gentle vertical grooves. This is what turns a ball into a pumpkin.
- The stem: a tiny green cylinder in 4 rounds, whipstitched twice around the top center for strength.
- Keyring: a reinforced green hanging loop anchored through several stitches, then the silver split ring. Tug-test it — your pumpkin should hang upright.
The PDF photographs every round with exact stitch counts, so you're never guessing what your work should look like.
Senior-friendly tips
- One stitch to learn: the whole pumpkin is single crochet. Master that one motion and the pattern practically crochets itself.
- Count out loud: each round ends with a bold stitch count — check yours against it before moving on.
- Don't pull the ridges too tight: think soft dents, not deep canyons. You can always tighten later.
- Take breaks: body one sitting, ridges and stem the next. No rush — Halloween isn't going anywhere.
- Make a patch: once you've made one, the rest fly by. A bowl of mini pumpkins is the cutest no-carve Halloween decoration there is.
Make it yours: Halloween variations
The pattern never changes — only the finishing touches do. Add a tiny embroidered smiling face in black thread for a kawaii jack-o'-lantern, try cream or white yarn for ghostly "boo" pumpkins, or make a whole pumpkin patch in different sizes by switching hook sizes. Tuck a jingle bell inside before closing for a pumpkin that rings when it swings.
How do you crochet a mini pumpkin for beginners?
Crochet a small sphere in spiral single-crochet rounds (increasing from 6 to 36 stitches, then decreasing back down), stuff it, close it, then pull six gentle grooves around the body with a long yarn tail to form the pumpkin ridges. Add a tiny green stem and a keyring. This free pattern photographs every round — no experience needed.
How long does it take to crochet a pumpkin keychain?
About 45–90 minutes once you know single crochet, increase, and decrease. Complete beginners learning each stitch fresh should allow a relaxed afternoon — perfect for a cozy October craft session.
What yarn is best for a crochet pumpkin?
DK-weight (#3) cotton or acrylic in pumpkin orange, plus a little forest green for the stem. Cotton shows crisp stitch definition; acrylic is softer and cheaper. A 3.0 mm hook keeps the stitches dense so no stuffing peeks through.
How do you make the ridges on a crochet pumpkin?
Leave a long yarn tail when you fasten off, thread it on a yarn needle, and pass it from the bottom center through to the top center, then down the outside — repeating six times around. Pull gently for soft grooves. The pattern includes close-up photos of the whole technique.
Can I sell the crochet pumpkins I make?
Yes! Anything you make from this pattern is yours to keep, gift, or sell — a bowl of mini pumpkins makes a wonderful Halloween craft-fair item. Please just don't sell or redistribute the pattern PDF itself.
Is this a good Halloween crochet project for seniors?
It's ideal: one simple stitch repeated, large easy-to-see stitches, short rounds, and a finished decoration in under two hours. No carving, no mess — just a soft little pumpkin for your bag, keys, or Halloween display.
Honest note: this pattern is AI-designed and has not been physically tested yet. If a stitch count ever looks off, trust your eyes and adjust — and tell us so we can fix it.